Here is the step by step process how to make the best chicken stock at home using chicken bones. I have a complete guide to teach you all about the difference between stock, broth and bone broth. I’ll also be covering why some stock is cloudy and how to avoid that. Plus just how long to simmer the bones and why.
I originally shared this recipe on November 14th, 2011. I have updated the photos and text to reshare it with you today.
OMG, friends, I am so excited to share this refreshed post with you. I love making stock so much and I am really excited to share all I know about Chicken Stock!
What is Stock?
Stock is slowly simmered bones and water with vegetables and aromatics added at the end. The slow simmering process dissolves the flavors and nutrients out of the bones and vegetables and results in a thick and rich flavorful liquid.
Stock is one of the most important building blocks of cooking. It is an ingredient used for the base of many recipes, from soups and stews, to the flavorful cooking liquid used in rice dishes, pasta dishes or casseroles.
There are all different kinds of stock. From fish and chicken to beef or veal. They are each a little different, but based on the same principle of slowly simmering ingredients with water.
Vegetable stock, is made with vegetables and water only instead of bones and water.
What is Broth?
While we know that stock is essentially bones simmered in water, you may be wondering, what is broth then?
For all intents and purposes the vast majority of people use the term broth and stock interchangeably. But on a technical culinary level they are actually a little different.
- Broth is made with the addition of meat. Think of it like stock that’s enriched with meat. This is the result of the cooking process, not a product made for the sake of use in another recipe. Shelly explains the difference here.
- Store Bought Broth: Commercially, most products on the shelf are called broth, and they can be used instead of stock, but the vast majority of them have added sodium, so you have to adjust your recipes accordingly.
- Store Bought Broth Doesn’t Have The Same Amount of Gelatin: Homemade chicken stock is rich with gelatin, which gives it a lovely mouthfeel, something you cannot get from packaged broth.
What Is Bone Broth?
Bone broth is actually stock that has been cooked longer. It also almost always includes the addition of acid (in the form of a couple tablespoons of vinegar per gallon) to help dissolve the nutrients out of the bones.
According to The Kitchen, Bone Broth is simmered for 12 to 48 hours. According the dietitians at Whole Health Nutrition, the added time helps to extract even more of the nutrients from the bones. Those include calcium and magnesium. Susie Polgreen, MS, RD, CD explained, “The concentration of calcium and magnesium is directly related to cooking time, and [longer than] 8 hours will yield statistically higher amounts than 4 hours. But you will have calcium in the broth even if cooked for 1/2 hour.”
I also asked Polgreen about heavy metals in broth, and she reassured me that “While toxic metals were found, it was in amounts associated with minimal health risks. Like any food, you wouldn’t want to overdo it, but a regular serving daily (1/2-1 cup) is likely fine.”
If you are interested in making Bone Broth instead of Stock, follow the below instructions adding in 3 tablespoons of lemon juice or white vinegar with the water and simmering the broth for 7 hours before adding the vegetables and aromatics.
Important Tips For Making Homemade Chicken Stock
I have to warn you, the process of making homemade stock is not for the kitchen-faint-of-heart. You have to deal with slippery chicken bones, giant pots of steaming hot liquid and a lot of schmaltz.
You could definitely scale this recipe down to just do one or two chicken carcasses, but I find it easier to just do it all at once in a big batch a couple times a year.
So, if you’re not into that, I highly recommend buying packaged broth. It is pretty great stuff and it works just fine. Seriously, I buy packaged broth all the time when I run out of homemade, and I think it is good.
Also, I want to warn you, the utter-food-science-dork comes out in me when I even think about making stock. So I will try to restrain myself from using too many French culinary terms… like “ecumer.” Oops.
Equipment You’ll Need:
- 2 Large rimmed sheet pans: I use heavy aluminum sheet pans.
- Tongs: You’ll need them to move the chicken bones into the pot. The bones stick to the sheet pans.
- Large Pot: the bigger the better!
- Ladle and a heavy measuring cup: or other container in which you’ll ladle the fat off the top. It has to be heavy enough so the ladle won’t knock it over.
- A very large bowl: to strain the stock into
- A large strainer: to strain the stock through.
- Containers To Decant the Stock into: I like four cup containers, because that seems to be the most useful size for thawing and using in a recipe.
Bitter, Cloudy or Thin Stock- The three problems with Stock and how to Avoid them
Avoiding Cloudy Stock
The three contributing factors to cloudy stock are:
- Not skimming the scum and fat from the top. I’ll explain more about when and how to do that in the section below titled “cooking chicken stock.”
- Boiling the chicken bones too fiercely causes cloudy stock. You just want to bubble the stock gently.
- Adding the vegetables too early. They only need one hour to impart their flavor. After that they break down too much.
How To Get Gelatin In Stock
If your chicken stock comes out with a thin texture, then your problem is lack of gelatin.
In my opinion, this is the single most important thing you need to know about homemade broth or stock. It takes four hours in a moist cooking environment for the collagen (or connective tissue) in chicken bones to break down into gelatin.
Gelatin is the most important part of stock because it is what gives the soups and sauces you make with the stock great body, and all that lovely mouthfeel and richness.
You’ll know you were successful in extracting the gelatin two ways:
- Once the stock has been simmering for four hours you’ll see that there is no longer any clearish connective tissue in the sternums of the chicken or along the ball and sockets of the leg joints. If there are necks in your mix of bones, they will pretty much disintegrate into shredded meat and tiny little bones.
- When your stock is strained and then refrigerated, it will be almost as thick as jello.
Avoiding Bitter Stock
When I was getting ready to write this post, I decided to go through my culinary school “Cooking Theory” notebook about how to make stock. I wanted to see if there was anything that would be helpful to include.
Among the ratios of mirepoix to bones and French terminology for descumming was a hastily scribbled note in the margin that said “Don’t treat your stock pot like a garbage can.”
My Cooking Theory chef instructor, Susan Reid, explained that if you use bitter carrot peels, bitter celery leaves and dirty roots to make your stock, your stock will taste bitter and dirty, and anything you cook with that stock will taste bitter and dirty.
To further illustrate the point, she had us make a side-by-side comparison of vegetable stocks.
- The first batch was made with peeled onions, peeled carrots and clean celery.
- The second was with celery leaves, carrots peels, onion peels and miscellaneous roots, potato peels and so on.
- The first was sweet and fragrant and the latter was well, disgusting. It was a far cry from what you’d want to use as the base for another recipe.
Purchasing Bones for Chicken Stock
Okay, so, if you’re still with me, let us begin with the bones. Yup. They’re gross.
- You can order chicken bones from a good butcher. Ask for carcasses.
- Or if there is a farm in your area that sells chicken, there is a good chance you can order directly from them. That’s what I did most recently from a farm near me.
- Over the years, I have had luck calling the meat department at any of the locally owned groceries in the area and special ordered them. They often come in frozen, so you’ll need to plan ahead about a week so that you can defrost the mass of them in your fridge.
- Or you can save up your own over time in your freezer, any time you debone a whole chicken.
- For this recipe you’ll need 12 to 15 pounds of raw chicken bones. Which is about 12 to 15 carcasses.
Using Roasted Chicken Bones for Stock
In culinary school we didn’t roast the chicken bones when we made chicken stock. (We only roasted the bones for veal stock.) However, I have come to prefer my stock better when the bones are roasted.
Why Roast The Chicken Bones
I like this step for three reasons:
- It brings the raw bones up out of the temperature danger zone (41 to 135 degrees F) quickly. (When you’re talking about such a large mass of bones and liquid I think this is an important safeguard.)
- It caramelizes the sugars in the meat and bone which intensifies its chickeny flavor.
- It also deepens the golden color of the final stock.
How To Roast The Bones
- Preheat your oven to 450 degrees F.
- Line bones up on two baking sheets and roast them in the oven.
- This takes up to an hour.
- I found that I needed to swap the pans from top to bottom to ensure that they are evenly roasted.
- It’s okay if the drippings start to form a crusty layer on the sheet pan. This will actually improve your stock. I’ll get to that in a minute!
Use The Fond From Baking Sheets
Do not wash the baking sheets! They should be covered in fond at this point. Fond is the tasty crusty bits of browned meat and fat stuck to a pan. It has amazing flavor and should not be wasted. The next step is for getting the fond into the stock. It is way better than Anthony Bourdain’s secret bullion cube from Kitchen Confidential.
- Pour some water in the baking pan, bake it for 20 minutes.
- Let it sit 10 minutes and then scrape up the fond.
- Pour that into the stock pot.
Cooking Chicken Stock
Starting The Stock
- Use a Big Pot: Then transfer the roasted bones to the greatest-biggest stock pot you can get your hands on. I often call for a heavy bottom pot, but in this case it’s okay to have a kinda cheap pot. I use my husband’s former beer brewing pot. It’s thin metal, but it does the trick.
- Use Cold Water: Cover the hot bones with COLD water. It is important that it is cold because it “facilitates flavor transfer.” [Yep, I just copied that straight out of the Theory notes.]
- Collagen: But even more importantly, starting with cold water helps to dissolve the collagen (aka connective tissue or cartilage.) When that collagen breaks down it will become gelatin, which is what gives home-made stock all that amazing body. You can’t get that from shelf-stable broth!
- Add acid: I also add a tablespoon of acid with the water (lemon juice or white wine vinegar works.) This also helps to break down the collagen as it simmers. I only add a tablespoon because I don’t want to flavor the stock too much. For Bone broth you’ll want to go up to three tablespoons.
- Bring To A Simmer: Get that on the stove to begin the long process of heating it up to a simmer.
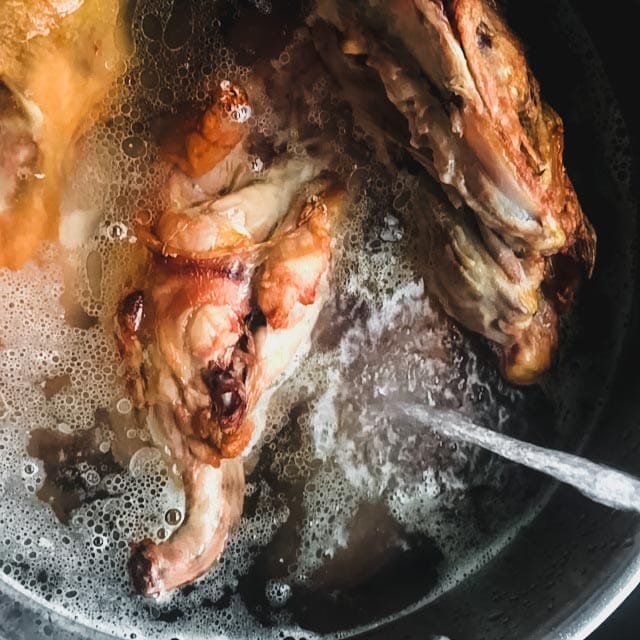
Skim Foam and Scum Off the Top of the Stock
As the stock comes up to a simmer the proteins will denature and foam and scum will rise to the top. Get rid of that by skimming it off with a ladle. This is called ecumer in French.
I keep a big glass measuring cup or bowl next to the stove for that.
Simmer Gently
Once it simmers, reduce the heat to maintain the simmer. You can also pull the pot to one side of the burner, to keep it simmering more gently and it will help collect the fat and scum on one side of the pot. [That has a French term too. This is called migotet.]
The reason you want to be gentle about it is that it keeps the fat from emulsifying into the stock and it keeps it from getting cloudy.
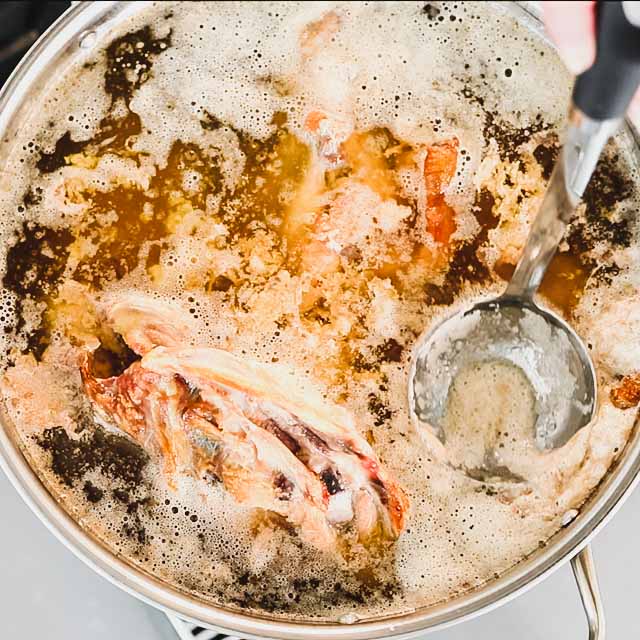
Skim Fat off the Top of the Stock
After about 20 minutes of simmering, you’ll have a thick layer of melted chicken fat on the surface of the stock. Get rid of that too with your trusty ladle.
Then it is a matter of time. It takes four hours for collagen to break down into gelatin.
Set your timer for three. That’s when you’ll add your vegetables and aromatics.
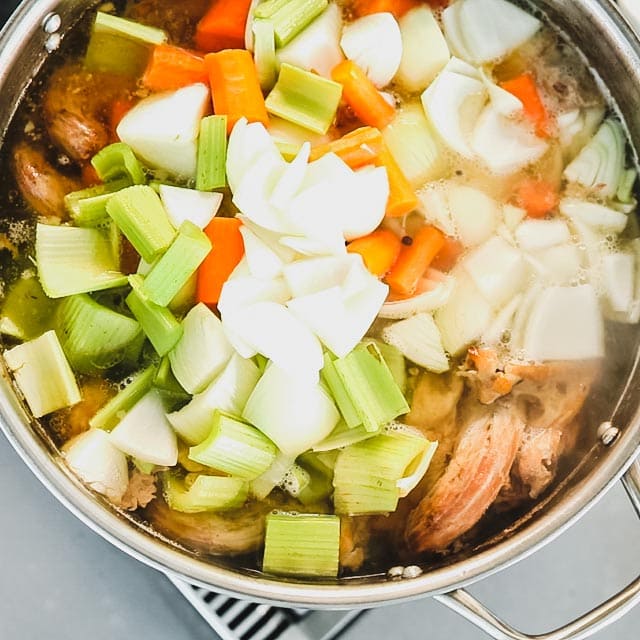
Adding Vegetables and Aromatics
- Peel The Vegetables: While your stock simmers, you can get your veggies ready to go. As I mentioned above, you’ll have to clean your celery and peel the carrots and onions. This will give the stock the best flavor!
- Mirepoix: Use two parts onions to one part each carrot and celery.
- Using Other Vegetables: I don’t usually add any other vegetables because they tend to flavor the stock in more strong directions. You can add some in small amounts, but make sure they are clean and peeled.
- Large Pieces: You’ll want to cut the vegetables into big pieces because they’ll need to hold up for an hour in the pot. If they are cut too small they will break down and you’ll have cloudy stock.
- Aromatics: I always add peppercorns and bay leaves to the stock. Today I didn’t have
Simmer Stock With The Mirepoix for One Hour
Don’t Overcook the Vegetables: Once the vegetables are added, you simmer the whole thing for an hour. If the vegetables are added too soon, they will also break down too much and you’ll have cloudy stock.
It’s Not A Waste: You’ll know that the vegetables have released all the flavor that they can when a piece of carrot no longer has the flavor of a carrot, and it just tastes like chicken stock.

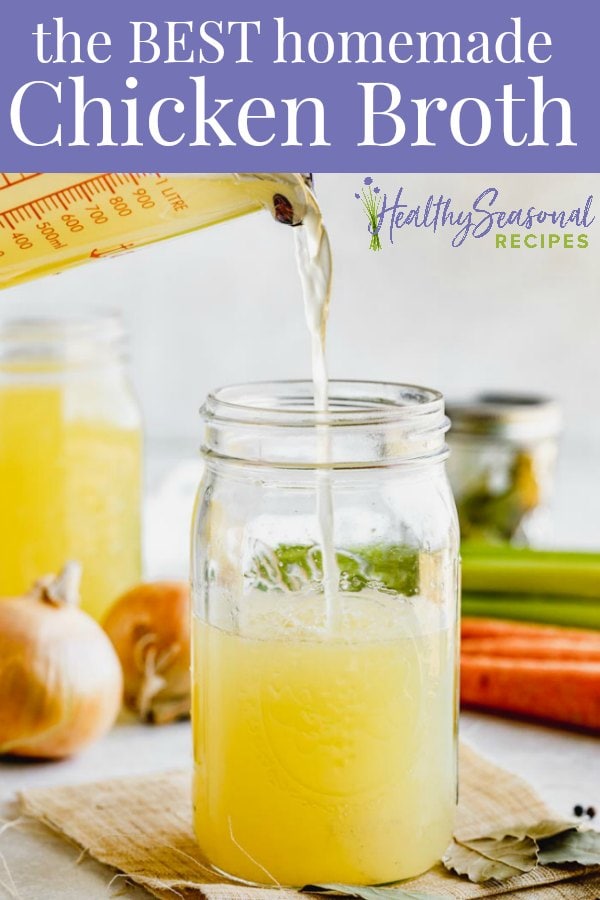
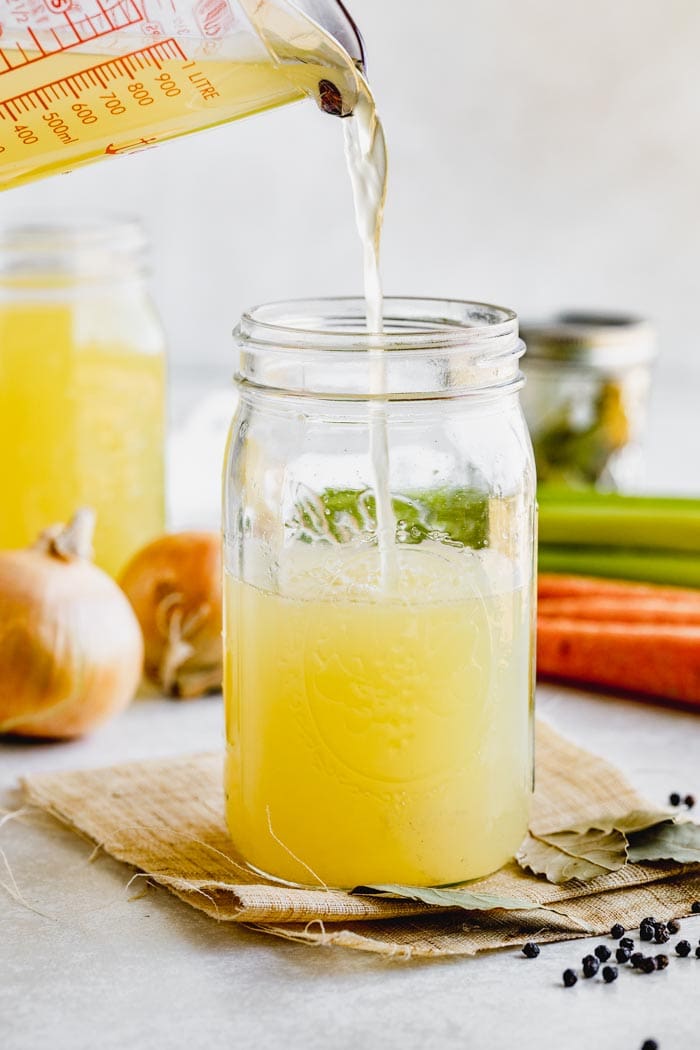
How To Strain, Cool and Store Chicken Stock
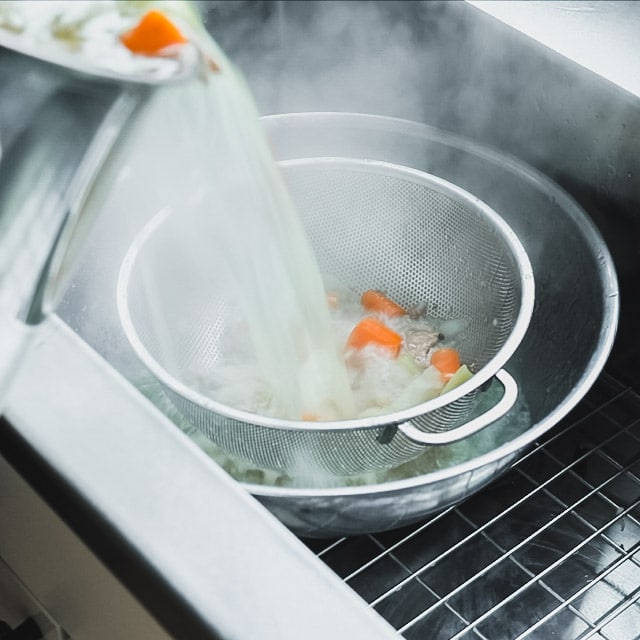
Strain
Finally, you have to strain the stock. Promise me to be careful here.
Note, if the stock pot when full is too heavy, you can rest a strainer in the pot and dip out enough stock to make the pot lighter. Then carefully strain the stock into another large pot, bucket or bowl.
Discard the bones and vegetables or you could always compost them if you put meat in your compost.
Cool Quickly For Food Safety:
If you’ve ready my instructions for thawing chicken then you know I am somewhat of a food safety nut. So I must mention the food safety of the stock once it is cooked.
Stock is high in protein. High protein foods are good breeding ground for harmful food born pathogens so it’s important that the hot stock goes through the temperature danger zone as quickly as possible. So I like to shock it down.
Once it is strained, I usually pour the strained stock back into the original pot, and then fill up my large bowl with ice and water to make an ice bath.
To speed the process, replace the ice as necessary and keep stirring often with a metal spoon (metal conducts heat better.)
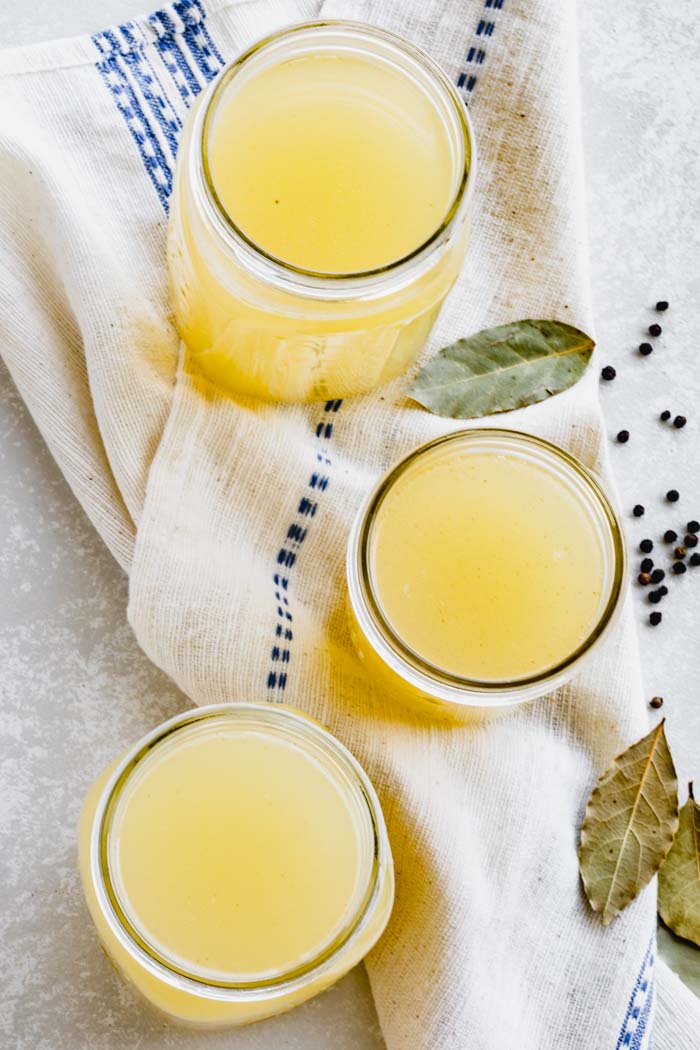
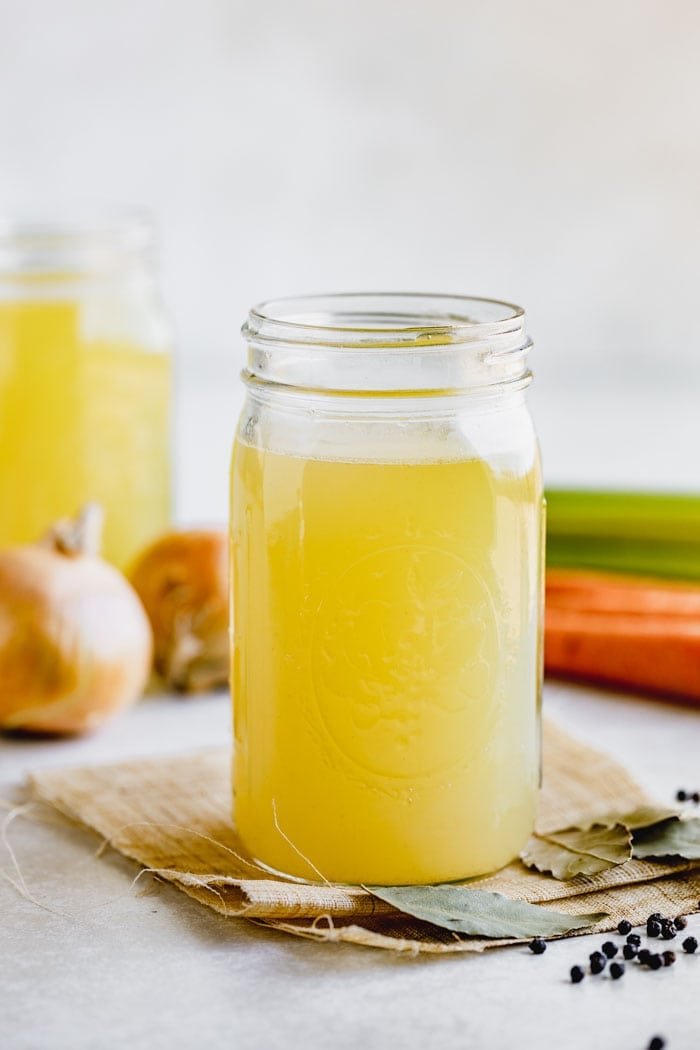
Store/Freeze the stock
- Ladle the stock into storage containers. I like to use quart containers.
- Leave a little headspace in the jar or container so that it can expand when it freezes.
- Then just label and freeze them.
- You can keep it in the fridge for five days.
Step to Make Homemade Chicken Stock


Recipes In Which To Use This Stock
To use this stock in place of broth in a recipe you’ll should add 1/4 teaspoon salt per cup.
Everyone loves this cheesy comforting Chicken and Rice Casserole.
I have always been a fan of this Chicken and Biscuit Casserole.
This Italian Wedding Soup has been our favorite soup lately.
Recipes like this Light Chicken Broccoli Alfredo and Chicken A La King often call for a cup or two of broth. Sub in this homemade stock to make it even better!
Thank you so much for reading. If you make this recipe, please come back and leave a star rating and review.
Happy Cooking!
~Katie

chicken stock
- Author: Katie Webster
- Prep Time: 1 hour
- Cook Time: 5 hours
- Total Time: 6 hours 30 minutes
- Yield: 7 Quarts
- Category: Stock
- Method: Oven and Stovetop
- Cuisine: French
Description
Here is the classic culinary way to make chicken stock (or broth as it is sometimes called) with chicken bones.
Ingredients
- 13.5 pounds raw chicken bones
- 2 gallons cold water plus about 2 cups, divided
- 1 tablespoon white wine vinegar or lemon juice
- 2 pounds Spanish onions, peeled and cut into quarters (5 medium)
- 1 pound carrots, peeled and cut into 2-inch pieces (4 large)
- 1 pound celery, cleaned, leaves removed and cut into 2-inch pieces (5 large stalks)
- 3 stems parsley
- 2 bay leaves (preferably fresh)
- 1 stem thyme
- ½ teaspoon whole black peppercorns
Instructions
- Arrange oven rack in upper and lower thirds of the oven. Preheat to 450 degrees F. Lay chicken bones out in even layers (not overlapping if possible) on two large baking sheets. Roast bones until the meat and bones are browned, 45 to 55 minutes.
- Transfer the bones to a stock pot with tongs. Cover the bones with 2 gallons cold water and vinegar or lemon juice. Place the pot over high heat to bring to a simmer.
- Meanwhile, pour any fat from the baking sheets (you may not have any, see below *note.) If there is any fond (baked-on browned crispy bits) on the baking sheet, pour the 2 cups water (or more) into the baking sheet(s) to cover. Transfer to the oven and let bake until the water is steaming hot, and the fond loosens, about 10 minutes. Carefully remove the baking sheet from the oven and let cool 10 minutes to allow the water to further loosen the fond. Then scrape up any fond from the pan with a spatula or bench scraper. Carefully pour the fond water into the stock pot. *note: If the pans never got any fond (just chicken juices) the juices and moist skin and meat can be added directly to the stock.
- When stock comes to a simmer, reduce heat to medium low or to maintain a gentle simmer, and cook, occasionally skimming any foam or scum until a thick layer of fat rises to the surface, about 20 minutes. Gently dip a large ladle just under the surface of the stock and allow the fat to flow into the ladle, without any broth from below the fat layer. Transfer the fat to a heat-proof bowl or metal can, to be discarded later. Continue simmering, occasionally skimming any fat from the top, until the chicken is starting to brake down and the collagen on the joints and sternum is braking down, about 3 hours.
- Add onion, carrot, celery, parsley, bay leaves, thyme and peppercorn and return to a simmer over high heat. Reduce heat again to maintain gentle simmer and cook until the vegetables are completely soft and taste like chicken stock, 1 hour more.
- Strain the stock into another large pot or bowl. Rest the large pot or bowl with stock in it in an ice bath, stirring often until cool. Transfer the stock to storage containers, leaving about 1/2 –inch of head-room if planning to freeze, and freeze or refrigerate. To use this stock in place of broth in a recipe you’ll should add 1/4 teaspoon salt per cup.
Notes
Roasted Garlic Chicken Stock Variation: Place one to two whole head(s) of garlic on a large sheet of aluminum foil. Drizzle with 1 teaspoon olive oil. Wrap up into a packet and place on the baking sheet with the bones in step 1. Unwrap, and add the whole head(s) to the stock with the chicken bones.
Porcini Mushroom Chicken Stock Variation: Soak one half ounce of dried porcini mushrooms in 1 cup hot water for 20 minutes. Lift the mushrooms from the water and add to the stock with the vegetables and aromatics in step 5. Strain the mushroom water through a coffee filter or cheese cloth. Add to the stock.
To Make Bone Broth:
If you are interested in making Bone Broth instead of Stock, follow the above instructions adding in 2 tablespoons additional lemon juice or white vinegar with the water and simmering the broth for 7 hours before adding the vegetables and aromatics.
Nutrition
- Serving Size: 1 cup
- Calories: 40
- Sugar: 0
- Fat: 3