https://cloverhousegifts.com/blogs/news.atomClover House Gifts - News2023-06-30T17:13:51-04:00Clover House Giftshttps://cloverhousegifts.com/blogs/news/4-bomb-grill-recipes-from-bay-area-chefs2023-06-30T17:13:51-04:002023-06-30T17:13:51-04:004 Bomb Grill Recipes from Bay Area Chefsadmin
Fourth of July tradition calls for lighting up the grill. But there's no rule that says you have to stick to hot dogs and hamburgers.
In a bid to up our game before hosting the annual backyard barbecue, we asked some of the Bay Area's best open flame experts to share their favorite recipes for grilling.
International Smoke's Korean-Style Barbecue Ribs
Love Korean-style barbecue and Ayesha Curry? These ribs are gonna be your jam.
"We dry-marinate the ribs for 12 hours, and this marinade produces a great sticky bark when the ribs are cooked," Curry says. To prepare this recipe successfully, she reminds readers to "...budget time to cook on two separate days in order to maximize flavor with the overnight marinating process."
½ tbsp toasted sesame seed, white, ground in blender
½ cup dark brown sugar
4 tbsp kosher salt
1 ½ tbsp garlic powder
1 ½ tbsp onion powder
Combine all ingredients in a mixing bowl and whisk to completely combine. Set aside.
Korean-style wet rib glaze:
3 tbsp garlic cloves, peeled and coarsely chopped
1 cup fresh scallions, peeled, coarsely chopped
1 1/16 cups ginger, peeled, coarsely chopped
½ cup gochujang chili paste
2 tbsp soy sauce
2 tbsp (packed) brown sugar
2 tbsp sugar, granulated white
3 tbsp apple cider vinegar
¼ cup toasted sesame seeds
2 tbsp peanut or grapeseed oil
Pulse scallions, garlic, and ginger in a food processor until finely chopped. Heat 2 tbsp oil in a medium saucepan over medium heat. Add scallions, garlic, and ginger and cook, stirring often, until softened, and starting to stick to bottom of pan, about 4 minutes. Add gochujang, white sugar, brown sugar, soy sauce, and sesame seeds and stir until smooth. Bring to a simmer and cook, stirring often to prevent scorching, until thick, 5 - 10 minutes. Remove sauce from heat; season with salt. Transfer mixture to a food processor (preferably a Vitamix blender) and blend until fully incorporated and smooth. Transfer to heat-safe storage container. Set aside.
Rub ribs with the wet glaze and dust with Korean dry rib rub spice mix.
Let stand on a cooling rack on sheet pans, uncovered, on the top shelf of the refrigerator until the next day.
The following day, to cook your ribs to tenderness, you'll need to use indirect heat on your grill. If you're using a charcoal grill, heat your chimney of coals and then empty them all onto one side; if you're using a gas grill, turn up the burner on only one side. Place the ribs on the opposite side, over indirect heat, so they can cook low and slow. The goal is for the closed grill to maintain a temperature of 250 degrees. Forget about them for 3 to 4 hours.
Remove from the smoker and baste with part of the Korean-style wet rib glaze. Rest for 10 to 12 minutes.
To serve, cut into portions and re-brush with more wet glaze.
To garnish, sprinkle red salt, sesame seeds, and scallions on the ribs prior to plating.
4505 Burgers and BBQ's Harissa Chicken Wings
You may have tasted these already—the harissa chicken wings make occasional appearances on the menu at 4505 Burgers and BBQ. And according to chef Ryan Farr, "These wings are perfect for a backyard barbecue!"
"The harissa dry rub adds a new dimension to the typical chicken wing," adds Farr, who serves them with a mayonnaise-based white barbecue sauce, also known as Alabama white sauce, which is popular throughout the Southeast. "While it's great on all kinds of BBQ, it especially shines with smoked chicken, and it's stellar on chicken wings," Farr says.
chicken wings, flats and drums divided, tips reserved for stock
lemons cut into wedges
½ bunch picked cilantro
2 cups house white BBQ (recipe below)
*Harissa is a North African spice that people often associate with a paste, but this recipe will let you make a dry seasoning powder to toss on your wings before popping them on the grill.
Harissa dry rub:
½ cup sea salt
½ cup ancho powder
⅓ cup granulated garlic
⅓ cup paprika
⅓ cup cayenne
1 tbsp sugar
1 tbsp coriander
1 tbsp cumin
1 tbsp pepper
1 tbsp chipotle
1 tbsp caraway
1 tbsp red pepper
1.5 tsp fennel
1.5 tsp dry spearmint
Mix together all ingredients and set aside.
House white BBQ sauce:
2 cups mayonnaise, preferably Helman's or Best Foods
2 tbsp pickled jalapeno liquid (from a jar or can)
½ tsp salt
½ tsp pepper
½ tsp ground coriander
Mix together all ingredients and set aside.
Method:
Preheat grill to medium heat.
Toss wings with extra virgin olive oil and Harissa spice in a large bowl, and place wings on the grill in a single layer.
Turn wings occasionally, and cook through until skin is crispy, 20 to 35 minutes.
Platter wings and top with cilantro.
Serve with lemon wedges and house white BBQ sauce on the side.
Bird Dog's Grilled Avocado with Ponzu
"This is the most California dish I've ever made in my life," admits chef Robbie Wilson of Bird Dog in Palo Alto. "We are so blessed with avocados in California, and we like to use them in unique ways while they are in season."
Putting them on the grill was only natural. "We light a fire every day at the restaurant because, let's face it, everything tastes better over wood. Why not avocados?"
When you cook an avocado, it becomes buttery—"like the most tender piece of meat you've ever had." Then, a half-salty, half-acidic Ponzu sauce provides the perfect balance.
A note about ripeness: When selecting avocados for the grill, Wilson suggests channeling Goldilocks. "Choose ones that are not too soft, and not too firm. The fruit should just give a little to the touch. If it feels soft like guacamole, run away. You are better off erring on the side of too firm than too soft."
// Bird Dog, 420 Ramona St. (Palo Alto), birddogpa.com
You will need:
4 Haas avocados
4 tbsp extra virgin olive oil
1 tbsp freshly grated wasabi or horseradish
1 batch ponzu sauce (recipe below) or good-quality store bought
salt and pepper to taste
Ponzu sauce:
1 piece kombu seaweed (3 x 2 inches)
1 to 1.5 cups bonito flakes (katsuobushi)
¾ cup plus 2 tbsp soy sauce
¾ cup lemon juice
⅓ cup plus 1 tbsp mirin
2 tsp sugar
2 tsp rice vinegar
Combine all ingredients in a bowl and refrigerate for one to two days to develop taste; strain well after one day. If you like more dashi flavor, keep it in refrigerator for two to three days and then strain. The ponzu sauce keeps in the refrigerator for six months. Mirin is often available in small bottles at Whole Foods and Safeway.
Method:
Preheat the grill as if you were cooking a steak.
Cut each avocado lengthwise in half and separate.
Carefully remove the pit.
With a large spoon, scoop the fruit out of its skin and brush each side with the olive oil.
Season with salt and pepper.
Place the avocado flat side down and grill to mark. (the idea is to mark each avocado, not actually cook)
Gently turn over and grill until barely warmed through.
Fill each cavity with the Ponzu sauce and serve with freshly grated wasabi.
DOSA's Grilled Peaches and Cream
Grilling peaches intensifies the flavor of the fruit, which makes chef Arun Gupta's sweet-and-smoky dessert more than the sum of its parts.
"The heat from the fire concentrates the sugar, and the bitterness of the slightly burnt edges accentuates the natural sugars of the peach," he says.
The fresh peaches in this dessert add acid as well as texture, while the cardamom, yogurt cream, and cashew chikki impart nutty flavors, creaminess, and complexity. If you have never tried a grilled peach, you are in for a special treat.
Note: While you could use substitutions for jaggery (light brown sugar) and ghee (clarified butter), Gupta recommends paying a visit to your local Indian grocery store for the real thing. Rose water is typically available in Safeway and Whole Foods.
// Sadly, Dosa has closed it restaurant locations, but you can still make this tasty dessert at home.
You will need:
1.5 pounds fresh peaches
yogurt cream (recipe below)
cashew chikki (recipe below)
Yogurt cream:
2 cups cream
⅓ cup sugar
1½ cups yogurt
½ tsp rose water (half cap full)
1 tsp ground black cardamom
Beat cream, sugar, rosewater, and cardamom in mixer until very soft peaks form - just enough to barely hold shape. Fold in yogurt. Makes about 1.5 quarts.
Cashew chikki:
1 cup cashews
¾ cups jaggery
1 tbsp ghee
Preheat oven to 325 degrees. Spread cashews onto a baking tray and toast in an oven until golden brown (8 to 10 minutes) at 325F. Once cool, lightly pulse cashews in a food processor until crushed. (Make sure to not pulse them fully into a powder.) Next, heat ghee in a sauté pan and add jaggery, cooking 3 to 4 minutes on medium high heat until jaggery is fully dissolved and starts to thicken slightly. Add crushed cashews and continue to cook until jaggery mix evenly coats all the nuts. Pour out onto a greased baking surface and let cool. Pulse in food processor and use to garnish as desired. Keep sealed in an airtight container in the freezer for up to a month.
Grilled peaches:
1 pound peaches cut into quarters
½ pound peaches diced
1 tsp sugar
1 tsp olive oil
½ tsp cinnamon powder
¼ tsp powdered cloves
1 tsp cardamom powder
Method:
Preheat grill to medium high.
Toss peaches with sugar, olive oil, cinnamon and cardamom and place cut sides on grill over medium high flame.
Once cut side is sufficiently charred (it can be a little black) flip peach onto other cut side and repeat the process.
Carefully remove grilled peaches and toss with fresh diced peaches.
Divide into serving bowls and garnish with a tablespoon of yogurt and and a teaspoon of cashew chikki.
This article was originally published in 2018.
]]>
https://cloverhousegifts.com/blogs/news/the-best-lunch-boxes-for-camping-and-commuting-in-20232023-06-30T13:13:52-04:002023-06-30T13:13:52-04:00The best lunch boxes for camping and commuting in 2023admin
On a day-to-day basis, having a reliable lunch box is vital if you often carry meals with you. Not only does it protect your food, but it’ll help you avoid single-use packaging like cling film, foil and sandwich bags. Plus, it’ll save you money in the long run.
We’ve tried out eight popular and smart choices to find the best lunch boxes out there for 2023.
What to look for
Finding a great lunch box can be easier said than done; while many might look the part, they’re not always leakproof, lightweight and practical to use.
First of all, think about how you’ll use your lunch box. Some are great for packed lunches with lots of separate components, while others are better suited to cooked meals. There are also lots of stylish and smart options for picnicking and commuting.
Next, consider the material. While metal designs are usually more durable, they’re heavier than other lunch boxes and aren’t microwavable. Plastic boxes tend to be lightweight, inexpensive and microwavable but they’re often flimsier and less sustainable than alternatives. Eco-friendly choices made from materials like bamboo and wheat straw are also worth considering; they’re often reasonably priced, but again will not be microwave-friendly.
Finally, think about the lunch box’s design. Is it too bulky to slip into your bag? Does it come with dividers to separate your food? Is cutlery included? If you like to take sauces or yoghurt with you, look for a lunch box with a leakproof pot too.
We reviewed these lunch boxes to find out how they performed on a day-to-day basis. We tested them to see whether they were heavy and bulky, convenient to use, leakproof and sustainably made. We also judged them on their style, durability and value for money.
Best lunch boxes for 2023 – tested by experts
Black+Blum Leakproof Original Lunch Box
Best for cooked meals
5.0 out of 5 star rating
Size: 1L
Weight: 510g
Includes: stainless-steel fork, inner compartment and sauce pot
Leakproof: Yes
Partially microwave, dishwasher and freezer safe
With its clever design, durable feel and smart aesthetics, Black+Blum’s lunch box is a real favourite among our test team. It’s clear a lot of thought has gone into the design, and as a result it’s easy and satisfying to use and clean on a day-to-day basis.
To separate your food, there’s a 150ml compartment and a 50ml sauce pot inside. They both lock into place when you snap the lid shut, thanks to the raised ridges on the underside of the lid. Store the metal fork in the lid of the larger tub, or go without it and clip the fork to the outside of the lunch box. Meanwhile, the leakproof sauce pot lid is ideal for holding garnishes or cheese.
Inevitably, the high-quality construction and extra compartments do add some weight, and this lunch box does feel fairly hefty at 510g, but it’s a reasonable trade-off for such a well-made item – especially if you’re commuting into the office. In fact, we think the sophisticated design makes it the best adult lunch box on our list; a great choice for office working.
Admittedly, care is a bit more complicated than usual due to construction; you can’t microwave the lid or microwave the rest of the box for longer than two minutes at a time without a one-minute break. Plus, it’s best to store the fork tines-down to avoid scratching the lid.
Overall, this lunch box offers style, pretty good convenience, and durability, and we love the different colour options, with pops of Olive green or Ocean blue.
Pros: durable, stylish, space to store and separate food, sauces, garnishes and fork
Cons: heavier than others, not completely microwave-, dishwasher- or freezer-safe
Black+Blum Stainless Steel Bento Box
Best bento lunch box
5.0 out of 5 star rating
Size: 1L
Weight: 510g
Includes: two 500ml stainless steel containers and fork
Leakproof: Yes
Partially dishwasher safe and fully freezer safe
This Black and Blum bento box is perfect for sushi, mezze, or any meal with many components. Crafted from stainless steel, each of the two boxes stack neatly atop one another, securely fastened with a wide elastic strap. The lids are made from food-safe polypropylene with silicone steam vents that double as suction fastenings, and there’s a stainless steel fork concealed underneath the portable antibacterial bamboo chopping board.
The stainless steel divider (not pictured) allows you to create three sections for different foods, although for the price of this box, we would appreciate the option to use a second divider. We decided to fill the bento box with vegetarian sushi, onigiri, and cucumber and avocado salad, but the box comes with a leaflet of five different vegan recipe ideas you can choose from.
The box is completely leak-proof, and feels durable enough to last a long while. The metal construction keeps food cool for longer, and is more sustainable than plastic. Overall, it’s a very trendy lunch box that strikes a good balance between substance and style.
Pros: durable, leakproof, stylish, includes fork, chopping board and recipes
Cons: heavier than others, could do with another divider
Sistema Bento Box To Go
Best for packed lunches
4.0 out of 5 star rating
Size: 1.1L (also available as 1.25L and 1.76L)
Weight: 304g
Includes: five compartments and yoghurt pot
Leakproof: leakproof sauce pot
Freezer safe, dishwasher safe on top rack and microwave safe without lid
Widely considered one of the best lunch box brands out there, Sistema has developed a customer base of millions across 110 countries. Its popularity is no surprise, given its huge range of lightweight, affordable food storage options.
This compartment lunch box is a great choice for meals with lots of different components or snacks. The largest top section is the perfect size for sandwiches, but you can remove it, alongside the smaller upper tray to store bigger portions or bulky items like apples and bananas. There’s also a leakproof sauce pot with a screw lid, which is great for individual helpings of yoghurt or smaller items like grapes and nuts. Alternatively, you can remove the pot to get another separate compartment.
Overall, the Bento Box is rather bulky, which means it takes up a lot of space in your bag, but while other options can only fit a sandwich or single portion inside, this is one of the best lunch boxes for storing your entire meal.
As a plastic design, it’s not a particularly sustainable choice and doesn’t feel as sturdy as some of the other lunch boxes on test, but it does offer great value for money.
Pros: inexpensive, lightweight, plenty of space and compartments, leakproof sauce pot
Cons: fairly bulky, unsustainable plastic construction
Sistema To Go Sandwich Box
Best for sandwiches
5.0 out of 5 star rating
Size: 450ml
Weight: 60g
Includes: one compartment
Leakproof: No
Freezer safe, dishwasher safe on top rack and microwave safe without lid
For anyone who favours the humble sandwich, this Sistema lunch box is one to consider. Shallow and relatively compact, it won’t be ideal for other items, but it’ll keep your sandwich together on long journeys – a big win for anyone who wants to avoid using cling film or foil. In short, this is a handy item to keep in the cupboard.
Again, the plastic construction makes this an extremely lightweight option, at just 60g, so it’s one of the best lunch boxes for hikes and picnics, especially given its slimline shape, which slots easily into bags. We also love the tasteful pops of colour and the stackable design – a great feature if you buy a few.
Pros: stops sandwiches falling apart, lightweight, easy to clean, stackable
Cons: not as durable or sustainable as others, doesn’t fit any extra snacks
Yumbox Presto
Best for snacky lunches and healthy eating
5.0 out of 5 star rating
Size: 828ml plus dip
Weight: 680g
Includes: five compartments
Leakproof: Yes
Not freezer, dishwasher or microwave safe
With a stainless steel tray and moulded silicone-lined lid, the Yumbox Presto is a smart alternative to the many plastic versions out there, and feels highly durable. It features four deep compartments for separating snacks, as well as a shallower section for sauce in the middle.
On testing, we discovered the compartmentalised tray is the perfect size for packing different lunch items and healthy snacks like grapes, fruit bars and dips. While other lunch boxes on test hold far more than a single portion when full, this one holds just enough to make up a satisfying meal.
What’s more, the tray is slimmer than other lunch boxes we tried, so it slips easily into bags. In fact, the neat design, including the sturdy metal tray, soft moulded silicone and slimline look means the Yumbox feels satisfying to use too.
The Yumbox would also be one of the best lunch boxes to buy for children in need of a packed meal, thanks to its simple design and single open-close latch.
As for the drawbacks, the metal and silicone construction inevitably makes the box heavier than others we tried, and you can’t put it in the microwave, dishwasher or freezer.
Although the box wasn’t fully leakproof when we tested it with water, we’d be comfortable filling it with wet food and sauces, especially when stored in the central section.
Overall, we’d say this lunch box offers good value for money; one to go for if you’re after a smart, eco-friendly option.
Pros: smart design, slimline, convenient size, high-quality construction, good for kids
Cons: heavy, not microwave, dishwasher or freezer safe
Includes: one main compartment plus tray with five compartments and cutlery
Leakproof: leakproof sauce pot
Dishwasher safe
At first glance, Bodum’s Bistro box is a compact, stylish lunch box. Unlike lots of the others on test, this one has a stretchy silicone band to secure the lid in place, as well as a full set of cutlery to take with you on the move.
In practice, we found this lunch box a little fiddly. Sliding the grippy band around the box is trickier and more time consuming than flipping a locking paddle into place, and the removable dividers feel rather flimsy. Both the lid and dividers can only be configured one way, to line up with the ridge for the silicone band, which limits the ways you can use the box.
While the knife, fork and two spoons certainly feel sturdy and ergonomic, they’re fairly bulky and there’s no set space to store them inside the box. Although they look as though they should click together, they all sit separately, taking up a lot of room. Combined with the removable dividers, sauce pot and silicone band, there seem to be a few too many loose pieces here; doomed to be lost or become unnecessary cupboard clutter.
All in all, we can’t say this lunch box offers great value for money, but it is a stylish option and there are loads of colours to choose from. The punchy yellow colour of our test box did attract plenty of compliments during testing.
Pros: stylish look, lots of colour choices
Cons: slightly fiddly design, feels a little flimsy
Traditional Hand Painted Indian Tiffin Box
Best for picnics
4.0 out of 5 star rating
Size: 16 x 16 x 11.5 cm
Includes: three compartments
Leakproof: No
Not freezer, dishwasher or microwave safe
As soon as you open up this tiffin tin, it’s clear this is no standard lunch box. Carefully hand painted, the beautiful exterior is instantly eye-catching, and attracted lots of attention during testing. In fact, this lunch box would look lovely on permanent display in your kitchen, so it’s one of the best lunch boxes to get if you’re after something a little more easy on the eye than your average food tub.
Aside from the painted exterior, which can become scratched and chipped with the wrong care, this is a highly durable design, made from gleaming stainless steel. The makers take inspiration from traditional Asian and Eastern European food carriers, and there’s more than enough room inside for a whole meal.
The three large bowls appear to be crafted from single pieces of metal, so there’s no room for food to hide, making them easy to wash in the sink.
As for functionality, this is certainly a sturdy lunch box, but it’s not completely leakproof so we’d recommend storing it upright or using the convenient carry handle at the top. It’s also relatively bulky, making it harder to slip into cramped bags.
Another minor drawback is its non-microwavable and non-dishwasher-safe construction. If you bring lunch into the office, you’ll need to decant it into a different container to heat it up, and then wash it by hand.
Ultimately, we’d give this lunch box big ticks for its style, sustainability and value for money, but it might not be the most practical day to day.
Pros: beautiful design, large capacity, sustainable
Cons: easily scratched, fairly bulky, not microwave or dishwasher safe
Eco Friendly Lunch Bento Box Set
Best sustainable choice
5.0 out of 5 star rating
Size: 900ml
Includes: three compartments, fork and spoon/chopsticks
Leakproof: No
Dishwasher and microwave safe
Another bento-style lunch box, this model has three layers for plenty of variety. There are two shallow top layers and a deeper bottom compartment with a separate lid. The clear top lid fastens securely onto the bento box, keeping all the compartments safe and preventing spills.
Made from sustainable wheatstraw, this lunch box is an eco-conscious choice as it’s biodegradable.
Also included is a single partition (although a second would be handy) and an ergonomic fork and spoon which double up as chopsticks. Although we particularly enjoy the shape and feel of this cutlery, there’s nowhere to store it in the lunchbox to avoid getting it dirty, which is a minor setback.
Pros: lightweight, eco-friendly and biodegradable, includes fork and spoon/chopsticks
Cons: could do with another divider and separate section for cutlery
Which lunch box should I buy?
Your ideal lunch box will depend on how you’ll use it. If you’re looking for a lightweight option to carry lots of different snacks, a plastic design with separate compartments should do the trick. For hot meals, you might want to choose a microwavable box with just one or two sections.
Make sure your chosen lunch box is leakproof or comes with a leakproof pot if you want to carry meals with sauces or yoghurts.
For more great product recommendations, see our reviews of the best travel mugs.
]]>
https://cloverhousegifts.com/blogs/news/vegan-peach-pie-with-crumble-topping2023-06-30T11:13:50-04:002023-06-30T11:13:50-04:00Vegan Peach Pie with Crumble Toppingadmin
This vegan peach pie is pure decadence! It's made with juicy summer peaches and topped off with buttery cinnamon crumble topping. A big slice with a scoop of vegan vanilla ice cream on top is absolutely heavenly!
Don't let summer pass without baking up this vegan peach pie. It's totally worth the effort and turning on the oven, even on super hot days.
While peaches are becoming more and more available year round, the best peaches are found during the peak of summer. Personally, I always buy more than I can eat (because I love 'em!), and they don't last long. So I put them to good use in baked goods!
This pie is filled with juicy spiced peach filling and topped off with a crumbly topping. I'm all about the crumbly topping because: (1) it goes so well with sweet, gooey peaches, and (2) it's easier than a top crust (although you can make this pie with a top crust if you wish).
This pie is also perfect for enjoying during the summer because: ice cream. A big scoop of dairy-free vanilla is the perfect complement for this decadent dessert.
[feast_advanced_jump_to]
Ingredients You'll Need
Vegan pie crust. You can use store-bought crust or make your own vegan pie crust. If using store-bought crust, check the ingredients for items like lard or butter that can be found in many commercial pie crusts. I like Wholly Wholesome and DuFour Pastry Kitchens. Both are vegan. Feel free to use either a premade pie shell or dough that you can roll and shape yourself.
Flour. You'll need all-purpose flour for the crumble topping. I haven't tried other varieties like whole wheat or gluten-free flour, but I think they'd work just fine.
Brown sugar. Make sure this is organic. Conventional granulated sugars may be processed using animal bone char.
Cinnamon.
Salt.
Vegan butter. This can be found near the regular butter in most supermarkets. Melt, Earth Balance, and Miyoko's are some popular brands to look out for.
Fresh peaches. Look for peaches that are just ripe, meaning they're just starting to get soft. If they're too soft they'll be difficult to peel.
Sugar. Again, make sure your sugar is organic in order to keep the recipe vegan.
Cornstarch.
Ground ginger.
Vanilla extract.
How It's Made
The following is a detailed photo tutorial on how to make this dish. Scroll all the way down if you'd like to skip right to the recipe!
Get your crust ready first. If you're using store-bought crust you'll need to make sure it's thawed and ready to go. If using homemade, make sure it's in your pie plate, trimmed and crimped. Stick it in the fridge to chill while you make the filling and topping.
You'll also need to peel and slice your peaches. The easiest way I've found to peel peaches is by blanching them in boiling water for about a minute, then placing them in an ice bath. The peel will rub right off.
To make the topping, stir flour, brown sugar, cinnamon and salt together. Add softened (but not melted) vegan butter. Stir it up, then place the bowl in the fridge while you make the filling.
To make the filling, stir your sliced peaches, sugar, brown sugar, cornstarch, vanilla, cinnamon, and ginger together in a large mixing bowl.
Transfer the filling to your crust. Spread it out nice and evenly, then sprinkle the crumble topping over it.
Pop the pie into the oven to bake. After about 20 minutes you'll want to cover the edges of the crust with foil or a pie shield to prevent them from burning.
Bake the pie until the filling is bubbly and the crumble topping is lightly browned.
Place the pie on a cooling rack when it comes out of the oven. It will need to sit for at least four hours before you can slice it. During this time it will cool and set.
Your vegan peach pie is ready to serve. I highly recommend topping each slice with some dairy-free vanilla ice cream!
Leftovers & Storage
This pie will keep in the fridge in an airtight container or tightly wrapped in plastic for about 4 days.
Like this recipe? If so, please stop back and leave me a review and rating below if you try it!Also be sure to follow me on Facebook, Pinterest or Instagram, or subscribe to my newsletter for more recipes like this one!
This vegan peach pie is pure decadence! It's made with juicy summer peaches and topped off with buttery cinnamon crumble topping. A big slice with a scoop of vegan vanilla ice cream on top is absolutely heavenly!
If you're making your own pie crust, prepare the dough according to the recipe. (Note 3)
Roll the dough out on a lightly floured surface and drape it into a 9 ½ inch pie plate. (Note 4) Press it down gently so it conforms to the inside of the plate.
Trim excess dough from the edges. Crimp the edges with a fork or your fingers. Poke a few holes in the bottom and sides of the crust with a fork.
Place the crust in the fridge to chill while you prepare the filling and topping.
To make the topping, stir the flour, brown sugar, cinnamon, and salt together in a medium bowl. Add the butter and stir until the mixture is well combined. Place the bowl into the fridge to chill while you make the filling.
Stir the filling ingredients together in a large mixing bowl.
Transfer the filling to the crust, then sprinkle it with the crumble topping.
Bake the pie for about 50 to 65 minutes (Note 5), until the filling is bubbly and the topping is browned. I recommend covering the edges of the crust with foil or a pie shield after the first 20 minutes, to prevent burning.
Remove the pie from the oven when it has finished baking. Place it on a cooling rack and let it cool completely, which can take about 4 hours.
Slice and serve.
Notes
Look for peaches that are just ripe. If they're underripe (very firm) they won't be sweet enough. If they're overripe (squishy), they will be difficult to peel.
Vegetable peelers don't work very well on peaches. The easiest way to peel peaches if by blanching them for about 1 minute in boiling water, then transferring them to an ice water bath. The peel will easily rub off after that. You can also skip the blanching and use a sharp knife, but it's difficult to get a close peel that way and you could end up with a lot of waste.
If using a store-bought pie shell, simply make sure it's thawed and ready to go. Keep it cold in the fridge while you prepare the filling and topping.
A smaller pie plate can be used, but you may have extra filling and/or topping.
The bake time can vary quite a bit due to slight temperature differences among ovens. 55 minutes is the sweet spot with my oven, but your pie may take anywhere from 45 minutes to 1 hour and 10 minutes.
Tender and juicy, sweet and smoky, this Baked BBQ Chicken will shake up your weeknight dinner routine with big, bold flavor. You won’t believe it came from your oven!
Why You’ll Love This Baked BBQ Chicken Breast Recipe
Double the BBQ Flavor. This isn’t your ordinary barbecue chicken! By marinating the chicken in my BBQ Chicken Marinade and then slathering it in Homemade Barbecue Sauce you get maximum BBQ flavor. The sweet and tangy marinade infuses every bite, while barbecue sauce locks in the moisture and adds an extra layer of lick-your-fingers deliciousness.
Tastes Like Grilling. The smoky flavors in the marinade and sauce are the next best thing to Grilled Chicken!
Ideal for Busy Evenings. When it comes to weeknight dinners, this baked BBQ chicken breast recipe is a dream meal. You can prep it the night before and then have it cooked and ready to eat in under 30 minutes.
Healthier Than Your Favorite BBQ Restaurant. Like my BBQ Chicken Salad and Crockpot BBQ Chicken, this baked BBQ chicken is much lighter than the barbecue chicken you find on restaurant menus. Using homemade BBQ marinade and sauce means there’s no high-fructose corn syrup and you can control the amount of sodium in the recipe, but still get that classic BBQ flavor.
Everyone Will Love It. Kid-friendly! Adult-approved! No one can resist juicy oven baked BBQ chicken breasts. The technique in this BBQ chicken recipe is based on my wildly popular Baked Chicken Breasts, so it’s guaranteed to be a winner winner chicken dinner.
How to Make Oven-Baked BBQ Chicken
The Ingredients
Boneless Skinless Chicken Breasts. You can use boneless or bone-in.
BBQ Chicken Marinade. My recipe has all the flavors of a good barbecue sauce, but in marinade form!
Barbecue Sauce. Or use your favorite store-bought or homemade BBQ sauce.
Substitution Tip
This recipe works for a variety of cuts of chicken, both bone-in and boneless. You can make barbecue chicken wings, chicken drumsticks, skin-on chicken thighs, dark meat—whatever! Just note that the cooking times will vary.
The Directions
Prepare the Chicken. Pat the chicken dry, then pound it and place it in a zip-top bag or dish.
Make the Marinade. Whisk all of the ingredients in a small bowl.
Marinate. Pour the marinade over the chicken, turn to coat, and refrigerate. Marinade BBQ chicken for 2 hours or up to 1 day.
Bake. Place the BBQ chicken breasts on a parchment-lined baking sheet and bake in the preheated oven until they reach 155 degrees F.
Rest and Serve. Transfer the chicken to a plate or cutting board. Let it rest, covered, for at least 5 minutes, then serve and ENJOY!
Storage Tips
To Store. Refrigerate baked BBQ chicken breasts in an airtight container for up to 3 days.
To Reheat. Leftover chicken can be reheated in a baking dish in the oven at 350 degrees F. Brush with fresh BBQ sauce before reheating and to serve.
To Freeze. Freeze leftovers in an airtight freezer-safe storage container for up to 3 months. Thaw overnight in the refrigerator, then reheat according to the directions above.
Meal Prep Tip
The chicken marinade and barbecue sauce can be made in advance and stored in the refrigerator for up to a week.
Pound the Chicken. This allows you to make sure your chicken is the same thickness throughout, which means that all of your chicken breasts will finish cooking at the same time and each breast will be juicy and tender throughout, instead of rubbery on the ends. (The meat will be more tender too!)
Marinate Overnight. If you have time, marinating the chicken overnight will help make it extra flavorful. That said, you don’t want to marinate it much longer than this—after 24 hours, the marinade will begin to break down the fibers in the chicken, making it mushy and unappetizing.
Use a Meat Thermometer. Don’t watch the clock! The best way to know when your chicken is done cooking is to use an instant-read thermometer. I remove the chicken from the oven when it reaches 155 degrees F, as the internal temperature will continue to rise during the resting time, eventually reaching the perfect (and safe!) 165 degrees F.
Let It Rest. If you cut into the chicken too soon, all the juices will run out, leaving your chicken dry. Loosely cover the BBQ chicken breast with foil and let it rest for 5 to 10 minutes, then serve and cut.
Pat the chicken dry, then place chicken breasts on a cutting board; if desired lay a sheet of plastic wrap over the top to keep things tidy. With a meat mallet or rolling pin, gently pound the breasts into an even thickness. Place in a sturdy ziptop bag or a small dish that will hold it snugly.
In a small bowl, stir together the marinade ingredients: ketchup, maple syrup, vinegar, Worcestershire, smoked paprika, cumin, salt, garlic powder, and black pepper.
Add the marinade to the chicken (either the bag or the dish). Seal the bag (if using), squeezing out as much air as possible. Turn to coat the chicken in the marinade. Marinade the chicken in the refrigerator for at least 2 hours or up to 1 day.
When ready to cook, remove the chicken from the refrigerator and let stand at room temperature while you preheat the oven. Place a rack in the center of the oven and preheat to 425°F. Line a rimmed baking sheet or baking dish large enough to hold the chicken without it touching with parchment paper.
Remove the chicken from the marinade and place on the parchment paper. Bake BBQ chicken for 14 to 16 minutes (for small/medium breasts that are about 6 to 7 ounces), 16 to 20 minutes (for medium/large breasts that are 8 to 10 ounces), or 20 to 25 minutes (for larger breasts). For best results, use an instant-read thermometer. When the breasts reach 165°F, they are done. Note that the chicken’s temperature will rise as it rests; I prefer to remove mine at 155°F. If desired, when the chicken has about 5 minutes left, brush it liberally with BBQ sauce.
Transfer the chicken to a plate or cutting board. Cover and let rest for a minimum of 5 minutes. Enjoy hot with a side of barbecue sauce as desired.
TO STORE: Refrigerate baked BBQ chicken breast in an airtight container for up to 3 days.
TO REHEAT: Leftover chicken can be reheated in a baking dish in the oven at 350°F.
TO FREEZE: Freeze leftovers in an airtight freezer-safe storage container for up to 3 months. Thaw overnight in the refrigerator, then reheat according to the directions above.
I’ve tested a whole range of temperatures for baking chicken and 425 degrees F consistently produces the best results, with tender, juicy chicken and a nicely browned exterior.
How Long Should Chicken Be in the Oven at 425 degrees F?
Small to medium chicken breasts take 14 to 16 minutes, medium to large take about 20 minutes, and extra large chicken breasts can take as much as 25 minutes. I recommend using an instant-read thermometer rather than setting a timer, which is much more accurate.
Do You Put Barbecue Sauce on Before or After Baking?
When I’m making BBQ chicken breasts in the oven, I apply the first coating of sauce when the chicken reaches 150 degrees F, then I slather more BBQ sauce on after serving. The marinade already infuses the chicken with BBQ flavor, so the sauce is just a bonus!
How Do You Make BBQ Sauce Stick to Chicken?
Applying the sauce after the chicken has been in the oven for a while is key to getting the sauce to stick. I apply it when the chicken reaches 150 degrees F, but if you don’t have a thermometer, brush it on about 10 minutes before the chicken is done baking.
Can I Shred BBQ Chicken?
The texture of baked chicken lends itself better to dicing than shredding. For a shredded version, check out my Crockpot BBQ Chicken.
Related Recipes
Everyone needs some back pocket chicken recipes! These are some of my favorites:
]]>
https://cloverhousegifts.com/blogs/news/7-little-known-secrets-to-organize-your-custom-closet-system2023-06-29T17:13:51-04:002023-06-29T17:13:52-04:007 Little-Known Secrets to Organize Your Custom Closet Systemadmin
Let's face it,
custom closet systems
may seem like a luxury, but they're a necessity for anyone who wants to keep their clothing and personal belongings in tip-top shape. A messy closet can lead to clutter and stress, which are two things no one needs more of in their life. While most people think they know the basics of closet organization, there are a few little-known hacks that can make a big impact.
Here are some handy secrets to help you maximize your closet space and keep everything organized and tidy:
Use the door for storage
Add a shelf-mounted or side-mounted ironing board
Roll rather than fold
Keep a stepladder handy
Invest in a pants rack
Add dividers to shelves and drawers
Use waterfall hooks
Read on to discover the best little-known organization secrets that can transform your closet space.
Use the Door for Storage
One of the most overlooked areas in a closet is the door. By using the back of your closet door, you can add a shoe organizer or some hooks to maximize your storage space. This is especially useful for small closets where every inch counts. You can use the shoe organizer to store shoes, or even smaller items like hats, gloves, and scarves. Hooks can be used for purses, belts, or other miscellaneous items.
Add a Shelf-Mounted or Side-Mounted Ironing Board
Ironing boards can take up a lot of space, and let's be honest, they're not the most attractive item in a closet. A shelf-mounted or side-mounted ironing board is a great alternative to a traditional ironing board. These boards can be easily mounted to the side or underside of a shelf, and they fold down when not in use, freeing up valuable closet space.
Roll, Rather Than Fold
Are you still folding your clothes as you put them away? There are other options, and while some of those involve complicated and possibly intimidating folding techniques, at least one is fairly simple. According to
House Beautiful
, you should roll your clothes instead of folding them. Not only does this save space, but it also makes it easier to find the item you need without having to dig through a pile of clothing.
Keep a Stepladder Handy
If you’re making the most of your custom closet storage space, you’re likely storing some items up high and out of reach. Keeping a stepladder handy can help you quickly and easily store sweaters, boxes, or blankets away, rather than leaving them in a heap on the floor. Put a small step ladder in a corner of the closet or on a hook on the wall so you can easily reach the highest shelves without straining your arms or neck.
Invest in a Pants Rack
Folded pants take up some valuable real estate in your custom closet system—and the process of folding is time-consuming, too. A pant rack is a great alternative that allows you to hang your pants vertically, maximizing closet space and making it easy to find the pair you need. Plus, your pants stay wrinkle-free and tidy.
Add Dividers to Shelves and Drawers
Dividers are an often-overlooked addition to shelves and drawers that can make a world of difference in how much storage space you’re able to use effectively. By using dividers, you’re able to keep each individual stack in its own space, eliminating the problem of disturbing one stack as you reach for something in another. Not only does this keep things neater, but it also limits how much your items are able to move around, keeping them safe and secure.
Use Waterfall Hooks
Waterfall hooks are handy hooks that attach to the top of your closet rod and cascade down, creating multiple levels of hanging space for your clothes and accessories. Not only do they maximize your storage space, but they also make it easier to see and access all of your items—and they couldn’t be easier to install. As a bonus, waterfall hooks are also a great solution for organizing those hard-to-store items like scarves, belts, and purses.
Conclusion
A custom closet system is a great investment, especially if you take the time to maximize the space and keep everything organized. By following the secret tips above, you can make the most of your closet space. With a little effort and creativity, you can turn your closet into a beautiful and functional space that makes your life easier and less stressful.
]]>
https://cloverhousegifts.com/blogs/news/virgin-voyages-cruise-cabins-and-suites-everything-you-want-to-know2023-06-29T11:13:51-04:002023-06-29T11:13:51-04:00Virgin Voyages cruise cabins and suites: Everything you want to knowadmin
True to its brand, Virgin Voyages does things a little differently than other cruise lines, and this ethos extends to its accommodations. Virgin Voyages’ cabins sport a minimalist look with futuristic touches, and its suites exude a rock-n-roll vibe with in-room turntables and peekaboo showers.
While these cruise rooms may be unique in the cruise industry, you won’t have trouble choosing your cabin or suite. Virgin offers a reasonable three styles of standard cabin and eight categories of suites, so your choice will be guided by your requirements around space, price and light.
Virgin also does not use standard cruise industry lingo to refer to its rooms. Inside cabins are Insider rooms, ocean views are Sea Views, and balconies are Sea Terrace cabins. Suites are RockStar Quarters. Many rooms can accommodate one to four guests, often in slightly unusual bed layouts, so pay attention if you’re traveling in a pack and looking to save a few bucks on your cruise fare.
For cruise news, reviews and tips, sign up for TPG’s cruise newsletter.
Whether this is your first cruise ever or your first with this cruise line, you’ll want to familiarize yourself with Virgin Voyages’ cabins and suites before you make that booking. Here’s everything you need to know.
A Virgin Voyages cabin primer
Sea Terrace on Scarlet Lady. ERICA SILVERSTEIN/THE POINTS GUY
Virgin Voyages sails three identical ships, with one more on the way by the end of 2023. Cabin categories and design are standard across the fleet, so if you’re familiar with one ship, you’re familiar with them all.
Here is a breakdown of the cabin types on Scarlet Lady, which should be the same across all the sister ships:
Insider inside cabins: 105 (8%)
Sea view outside cabins: 96 (7%)
Sea Terrace balcony cabins: 1,051 (79%)
RockStar Quarters suites: 78 (6%)
The cruise line caters to adults only; all passengers must be 18 years old. That means you won’t find any family-focused accommodations. However, you will find Insider and Sea View cabins designed for solo passengers, with a 3/4 size bed (larger than a twin but smaller than a full.)
Solo Sea View cabin. VIRGIN VOYAGES
Other cabins and suites in all categories can sleep three or four guests. Groups who don’t want to squeeze four into a room (and we wouldn’t recommend it, given Virgin’s tiny bathrooms and limited storage) can take advantage of connecting rooms.
Balcony cabins are designated either regular, extra-large, centrally located or limited-view, and your cruise fare will change depending on which you choose. Cheeky Corner and Suite Aft Suites are also divided into Pretty Big Terrace, Even Bigger Terrace and Biggest Terrace classes.
Accessible cabins are available in Insider, Sea View, Central Sea Terrace, Extra-Large Sea Terrace and Seriously Suite categories.
All Virgin Voyages cabins mix a hip yet minimalist design (think IKEA or micro hotel) with tech-forward accessories (such as an iPad that controls the A/C, curtains and mood lighting). The look is more spare than you’ll find on other cruise lines that feature thick mattresses, fluffy duvets and faux-wood cabinetry in their cabins.
Seabed in couch setup. MELANIE ACEVEDO/VIRGIN VOYAGES
In standard cabins, the bed is modular – not only transforming from a queen bed to twins but also turning from a bed into an L-shaped lounging couch. In some quad layouts, a queen bed and an extra twin share the same headboard with a bunk overhead. The mattresses are rearranged on a long platform to form various arrangements; any uncovered portion of the platform serves as a nightstand or low table.
A triangular-with-rounded-edges odd-shaped white table serves as a desk and vanity in most standard cabins, with a round vegan leather stool beneath. It partially overlaps the shelving unit beneath that houses a mini-fridge and small shelves. Above is a round mirror and a shelf holding the room-controlling tablet.
Sea View and Sea Terrace cabins trade out the typical cruise ship cabin couch or love seat for a spare director’s style chair with a faux leather partial back and a padded seat.
Virgin also skips a full wardrobe for a more minimalist closet area where a hanging rod and a two-shelf luggage rack with storage baskets are hidden behind a curtain. A narrow floor-to-ceiling wardrobe contains four slim drawers, shelves housing the safe, life jackets and extra linens and a full-length mirror.
Sea Terrace on Scarlet Lady. ERICA SILVERSTEIN/THE POINTS GUY
It’s not a lot of storage space — perfect for one, manageable for two and likely impossible for three or four.
Standard bathrooms are also tiny and lacking in storage space. The shower has one measly shelf and pump bottles of Red Flower shampoo, conditioner and body wash. It offers both a rain shower head and a wand. The rest of the tiny bathroom features a bowl sink and a small vanity where you can store toiletries if you move the hand towels somewhere else (possibly the shelf below with the garbage can).
The entire space is tight, even for average-sized people. If you need spacious loos, you will need to book a suite.
Virgin Voyages ships have eight types of suites, ranging from 352-square-foot Seriously Suites (which are essentially extra-spacious regular cabins with slightly nicer furnishings and a much larger bathroom) to the 2,147-square-foot Massive Suite with separate living and sleeping areas, a music room, and a gigantic terrace with a dining table (with steps up in case you want to pull a Richard Branson and dance on it) and hot tub.
Suites are split into two categories — RockStar Quarters and Mega RockStar Quarters — which determine which additional perks come with your booking.
Virgin claims that 86% of its cabins feature private balconies, and if you can, you want to book one of these. Why? Because each Sea Terrace comes with a sustainably sourced hammock that is extremely comfortable and unusual in the cruise industry — and for us, was the best part of the entire Virgin accommodation experience.
Inside cabins on Virgin Voyages cruise ships
Social Insider cabin. VIRGIN VOYAGES
Insider cabins are Virgin’s name for windowless interior rooms. They measure 105 to 177 square feet and can sleep one (Solo Insiders) to four people (Social Insiders). As we mentioned above, the Solo Insiders have a 3/4-sized bed. The four-person arrangement is two twin beds arranged in an L shape head to head, with two bunkbeds also in L shape right above. The intent is for the lower beds to be made up as couches during the day and transformed into beds at night.
The room is laid out like a standard Scarlet Lady cabin, but on the far wall, where a window would be, there’s a red, round art piece evocative of a porthole.
Ocean-view cabins on Virgin Voyages cruise ships
Sea View cabin on Scarlet Lady. ERICA SILVERSTEIN/THE POINTS GUY
Sea View cabins are slightly bigger at 130 to 190 square feet and can sleep one to three people, with one pull-down bunk and beds that convert from a queen to two twins. They are arranged identically to the Insider cabins, except they have a large round porthole window with a window seat on the exterior wall.
Some Sea View cabins come in slightly different configurations, especially the rooms located where the ship’s superstructure juts out at an angle. We toured one of these practically V-shaped rooms, which had one rectangular window rather than a full porthole. The window was on the same wall as the bed and chair, and the opposite wall had the desk, mini-fridge and mirror. The converging angle of the two walls made it a tight squeeze between the bed and the desk.
The bottom of the V, if you will, had a tall wardrobe and full-length mirror. The top of the V was the wall with the entry door, the bathroom and the closet hidden away in a tight corner by the window.
Balcony cabins on Virgin Voyages cruise ships
Sea Terrace on Scarlet Lady. ERICA SILVERSTEIN/THE POINTS GUY
Virgin calls its balcony cabins Sea Terraces. They measure 185 to 225 square feet, including the 45-square-foot terrace. They can sleep two to four people, but there’s only one bunkbed. To sleep four, two people will need to share a bed, the third bed will be perpendicular in an L shape (so three heads in close proximity) and the fourth is a bunk flush with the cabin wall above.
Sea Terraces share the layout of the other standard cabins. Note that cabins numbers on the port or A side of the ship have the beds by the bathroom and the desk by the balcony, and cabin numbers on the starboard or Z side of the ship have the reverse layout, with beds by the balcony and desks by the bathroom.
Balconies are outfitted with two upright not-that-comfortable metal chairs and a circular drinks table just big enough for two glasses. The real attraction here is the full-size red hammock hung from the ceiling. A grown adult can easily lay out or simply sit and swing in the hammock. Be prepared to come to blows with your cabinmate over who gets the hammock first and for how long.
If you love your hammock so much you can’t live without it, you can buy one on board. The custom-designed hammocks are handwoven by women in rural Thailand and sold by Yellow Leaf, an organization focused on community transformation and female empowerment.
Suites on Virgin Voyages cruise ships
Suite with peekaboo shower. VIRGIN VOYAGES
Virgin Voyages’ 78 RockStar Quarters are broken down as follows (based on Scarlet Lady’s deck plans):
Two Massive Suites
Two Fab Suites
Two Posh Suites
nine Gorgeous Suites
18 Brilliant Suites
14 Cheeky Corner Suites (six Biggest Terrace, four Even Bigger Terrace and four Pretty Big Terrace suites)
24 Seriously Suites
Seven Sweet Aft Suites (three Biggest Terrace, two Even Bigger Terrace and two Pretty Big Terrace suites)
Massive Suite. VIRGIN VOYAGES
The Sweet Aft, Seriously, Cheeky Corner and Brilliant suites are considered RockStar Quarters. They come with the following perks:
Access to Richard’s Rooftop sun deck with hot tubs and a bar
Complimentary in-room bar setup (no refills)
Priority access to dinner and event reservations, plus shore excursion signups
RockStar agents (i.e. concierges) who can help you 24/7
Priority embarkation
Gorgeous, Posh, Fab and Massive Suites are considered Mega RockStar Quarters. They come with all the RockStar perks plus additional benefits:
A daily bar tab for complimentary drinks and bottles of wine throughout the ship
Complimentary Thermal Suite access at the Redemption Spa
Private transfers to the ship or free parking (depending on the departure port)
A personal RockStar Agent
Limitless in-room bar
Premium Wi-Fi on Caribbean cruises, allowing streaming on up to two devices
The suite that’s right for you will depend on your budget, the perks you value and where on the ship you wish to stay.
Among the RockStar Quarters, the Seriously Suite is the most common suite type on board. It measures 352 square feet, including the balcony. It features a European king bed facing the floor-to-ceiling glass balcony doors, tall closet wardrobes, a brass vanity, a shelving unit with a turntable and bar setup and a window behind the bed looking into the extra-large shower. The bathroom is spacious with a marble tile look, and the terrace is only slightly larger than a standard one, with the same furnishings.
The Sweet Aft Suite ranges in size from 416 to 661 square feet, depending on the deck and the size of the balcony. The higher the deck, the bigger the suite and terrace. There’s one Sweet Aft Suite on each deck between decks 8 and 14, and each is located smack in the center of the back of each deck.
These suites also have a bed facing the windows, but the bathroom is to the side with a shower porthole looking onto the oversized balcony. In addition to the standard hammock, the terrace features two padded lounge chairs, a couch and a round metal table (meant for Champagne) and chairs.
The Brilliant Suite measures 482 square feet and looks like an expanded version of the Seriously Suite. The extra space allows for a modular couch that can double as a bed; this suite can sleep up to four. Its balcony is slightly longer than the Seriously Suite’s, meaning it can offer the larger Champagne table of the Brilliant Suite.
The Cheeky Corner Suite also comes in a range of sizes, 615 to 857 square feet, based on deck and balcony size. The 14 suites are at the back corners of the ship on decks 8 – 14, on either side of the Sweet Aft Suites.
Balconies wrap around the back and sides of the ships, and offer the same furnishings as the Sweet Afts but with the hammock tucked away in the side corner. Inside, the room has a corner sofa area and a large wardrobe.
All of the Mega RockStar Quarters are on Deck 15, directly beneath Richard’s Rooftop, for easy access.
Massive Suite terrace. VIRGIN VOYAGES
The Gorgeous Suite is the smallest at 570 square feet, and can sleep up to four. Its interior is similar to the Brilliant Suite, but the difference is in the balcony. The suite has a double-depth balcony with an outdoor shower and lounge chairs.
The Posh Suite measures 833 square feet, with living and sleeping areas divided by a wall. It can sleep four (the living room sofa can convert to a bed) and has a bath and a half (the master with a peekaboo shower looking into the bedroom and out the balcony doors beyond). The balcony is similar to the other suite terraces with lounge chairs, a hammock, Champagne table and chairs and a small couch.
The Fab Suite, at 950 square feet, is essentially an oversized version of the Posh Suite. The extra space allows for additional seating areas in both the living room and bedroom. It can also sleep four.
All the way forward on Deck 15, each of the two Massive Suites lives up to its name, coming in at a whopping 2,147 square feet. You enter the main living area with a circular couch seating area and a full bar. To one side is the music room, which can double as an extra bedroom; the suite sleeps up to four — that is if you don’t stay up rocking out on the provided guitars all night. An adjacent guest bathroom is ideal for hosting parties.
On the other side, the master bedroom has privacy behind sliding doors and floor-to-ceiling windows. Just behind, the marble-tiled dressing area features two closets and a soaking tub; turn the corner to find the rest of the bathroom, complete with the signature windowed shower.
The also-massive terrace is your own private backyard with a hot tub, outdoor shower, dining table for six, two hammocks, circular couch seating and padded lounge chairs.
Bottom line
Virgin Voyages’ cabins get the job done. However, its standard rooms won’t keep you inside when the real fun is found in the ships’ public areas. Their best feature is the hammock on every balcony.
For more spacious bathrooms, tricked-out terraces, lounge and seating spaces, and extra perks, upgrade to the RockStar Quarters. While you might want to bring the after-party back to your social living quarters, you miss out if you hide out in your upper-deck digs rather than immerse yourself in the entertainment and cozy hangouts found around Virgin Voyages’ ships.
]]>
https://cloverhousegifts.com/blogs/news/chocolate-frosted-donuts2023-06-29T09:13:51-04:002023-06-29T09:13:51-04:00Chocolate Frosted DonutsadminChocolate Frosted Donuts are homemade with lots of love and even more chocolate! Fluffy chocolate donuts are baked to perfection in just about 15 minutes, then they’re topped with the best sweet chocolate frosting. You’ll love how EASY this homemade donut recipe is!
I’m such a sucker for a good chocolate frosted donut. Maybe it’s the chocolate lover within me, but I just can’t say no to a chocolate donut topped with chocolate frosting – it’s the best bite of double chocolatey goodness every time! Whether it’s for breakfast or a late night treat, these chocolate donuts always hit the spot.
And as much as I do enjoy a classic fried donut, I don’t always feel like measuring the temperature of oil and dealing with all that jazz. Baked donuts are so much easier to make and just as tasty! The batter takes just a few minutes to whip up, then it’s as simple as piping it into a donut tin and baking for 15 minutes. The frosting is even easier to make and is so good you’ll definitely be licking the bowl when it’s all said and done!
Why You’ll Love This
So much better than the boxed stuff. You know those boxes of baked donut mix right next to the cake mix boxes? We can do so much better than that. Those donuts never taste half as rich, moist, or fluffy as these homemade baked donuts!
The frosting! I mean, it’s kind of a given that chocolate frosting is going to be the best part, right? This silky smooth frosting is made with just 4 simple ingredients in no time at all and always satisfies my sweet tooth.
Great for parties. If you’re hosting a brunch or need something sweet and special for a holiday morning, this is the recipe for you! Chocolate frosted donuts are always a hit and this recipe is incredibly easy to double as needed.
Ingredients You’ll Need
Here is a list of ingredients you will need to make this chocolate frosted donut recipe. Make sure to scroll down to view the full recipe for exact measurements!
Flour
Unsweetened cocoa powder
Brown sugar
Baking soda
Baking powder
Salt
Eggs
Buttermilk
Salted butter
Vanilla
For the frosting, you’ll need:
Powdered sugar
Unsweetened cocoa powder
Milk
Vanilla
How To Make Chocolate Frosted Donuts
Here is a general overview of the steps involved to make chocolate donuts with frosting. Be sure to scroll to the bottom of this post for the full recipe.
Prepare. Preheat the oven to 350 °F and spray your donut tins with non-stick spray.
Whisk the dry ingredients. Whisk together the flour, cocoa, brown sugar, baking soda, baking powder, and salt.
Finish making the batter. Whisk the 2 eggs together, then whisk in the buttermilk, melted butter, and vanilla. When this is smooth, stir together the wet and dry ingredients until just combined.
Bake the donuts. Pipe the batter into the prepared donut tins. Each one should be filled about 2/3 of the way with batter. Bake for 12-15 minutes.
Cool and make the frosting. Let the donuts cool on a wire rack. While they’re cooling, make the glaze. Simply stir together the powdered sugar and cocoa until combined, then whisk in the milk and vanilla until smooth.
Frost the donuts. Dip each donut into the frosting, then place back onto the cooling rack so the frosting can settle.
Recipe Tips, Substitutions, and Variations
Get the best frosted donuts every time with these easy tips and tricks!
Don’t over-mix the batter. Mix together the wet and dry ingredients until just combined. If you over-mix the batter, your donuts won’t rise to the right height and won’t be as fluffy as they should be.
Spray the pan. This is the kiss of death for so many baked donuts! You MUST spray your donut tins, otherwise the donuts will more than likely stick to the pan and break apart when you try to get them out. Even if you have a nonstick pan, it’s worth the extra insurance.
Don’t fill the tins all the way. The batter should only fill the tins about 2/3 of the way. If you fill the tins to the top, the donuts will bake way over the sides and won’t end up being the right shape.
Let the donuts cool. If you try to frost the donuts while they’re still warm from the oven, the frosting will melt into the donuts instead of sitting on top.
Storage and Reheating Instructions
You can store your chocolate frosted baked donuts in an airtight container at room temperature for about 3-4 days. Make sure the donuts are fully cooled to room temperature prior to storing! If they’re even a little bit warm, condensation will build up in the container and the donuts will get soggy.
More Sweet Breakfast Recipes We Love
Start your day off sweetly with more easy breakfast recipes:
Preheat the oven to 350 °F. Prepare your donut pans by spraying generously with non-stick spray.
In a large bowl, whisk together the flour, cocoa, brown sugar, baking soda, baking powder, and salt. Set this aside.
In a medium bowl, whisk the 2 eggs. Whisk in the buttermilk, melted butter, and vanilla. When this is fully combined, add these wet ingredients to the bowl with the dry ingredients (flour mixture).
Stir just enough to combine.
Place the batter into a piping bag. Pipe it into the prepared donut pans, filling each one ⅔ of the way full.
Bake for 12-15 minutes. (They should spring back when pressed gently.)
Remove them from the pan and place them on a cooling rack.
While they are cooling you could make the glaze. Just whisk together the confectioners’ sugar and cocoa. Then whisk in the milk and vanilla until smooth.
Dip the top of each donut into the glaze and place back onto the cooling rack.
]]>
https://cloverhousegifts.com/blogs/news/29-passive-income-ideas-that-will-build-you-real-wealth2023-06-28T19:13:52-04:002023-06-28T19:13:52-04:0029 Passive Income Ideas That Will Build You Real Wealthadmin
Earning money while working just a few hours per week or even sleeping does sound like a dream come true.
I want to help you achieve complete financial freedom in your life, and developing streams of passive income is the key to building your wealth.
Investment funds: Put your money to work instead of yourself by investing it in online platforms like Robinhood (hands-on) or Acorns (hand-off, Robo-advisor)
Selling Printables: You can create lists or artwork and sell prints online for easy passive income, learn how with this free eBook
Online Courses: Demonstrate your skills and knowledge while creating income by making online courses- you can learn how from this course!
What is Passive Income?
Passive income is where the money is continually coming in despite you not working hours to earn money.
According to Investopedia, passive income is “income that requires little to no effort to earn and maintain”- meaning we make money without constant effort!
To create a passive income stream, you first need to understand that there is generally some work required upfront before it gets to the ‘passive’ stage.
One passive income strategy is creating printables to sell– you need to create them, but you can sell them passively and earn money easily.
Active income is what we are used to in the more traditional sense of exchanging time for money. When you go to a job from 9-5 you are paid for the time that you are there.-
Active income means that once you stop working, you stop earning money. You have to actively put in more hours to keep earning more money, compared to a passive income stream that comes in regardless of more work.
Best Passive Income: Investments
Not all passive income ideas require an initial monetary investment, but don’t let an upfront investment put you off!
you can find ideas and create a passive income strategy to work little and spend less.
If you have some spare cash then you may be happy to put some money upfront into a passive income stream.
There are so many options for investment opportunities that will help you earn money without a huge upfront investment.
We will look at how to create passive income with some extra cash below:
1. Investing In Dividend Stocks
Investing your money in dividend stocks is one of the best passive incomes out there, and we should all be doing it to earn extra money for our futures.
Investing $1,000 in dividend stocks, mutual funds, or even in your own professional development can give you a hefty return on investment.
Then there are investment platforms like Robinhood, which is a hands-on way to invest in the stock market.
If you are feeling a bit nervous about finding the right dividend stocks to invest in, Robo-investing could be for you.
Robo investing is where you will invest your money and the Robo-advisor will allocate the funds for you. Bettermentis our go-to Robo investing platform.
2. Passive Real Estate Investing (Real Estate Investment Trusts)
Want to get into real estate without all of the hassles? Real estate investing could be a viable option for you to get an easy passive income stream.
REITs are Real Estate Investment Trusts where you can invest in real estate – they are investment vehicles that hold property in them.
This can be the perfect option for you if you are a bit apprehensive or nervous about getting into real estate but still want to get a taste of it.
A platform that you can use to get started investing in real estate and bring in some cash flow is Fundrise. It’s the best place to get a real estate investment trust we’ve used and you can invest $100 to generate income today.
Rental properties are great sources of passive rental income because you should have rent payments coming in from your tenants each month.
Rental income is another way to dabble in real estate, but be more hands-on than a real estate investment trust.
You’ll need to get an upfront investment to make a downpayment on rental properties, then see what house you can afford and how much rent you can charge.
Once you’ve got the finances worked out, it’s time to find the right rental property that can bring in rental income.
You’ll want to do your research, maybe have a real estate agent along for feedback, and don’t forget to be very critical when viewing properties.
Now that you have the house and it’s all ready, you can get tenants in soon after to start generating passive income every month.
To be even more hands-off, you could hire a management company to deal with the tenants. If you wanted to do it yourself, this could still be a fun work-from-home job.
4. Open a High Yield Savings Account Or Money-Market Account
A HYSA or a money-market account can be the best short-term investments for you and is a no-brainer in terms of earning money on the money that you already have.
Both a high-yield savings account and a money-market account generate passive income with interest rates- you put your money in and earn extra cents on your dollars.
It’s not somewhere that we would recommend putting all of your money as there are places that offer you more interest over time (e.g. through investing) but it’s still a good passive income stream to have.
The interest rates for each bank change all of the time so it’s worth doing your research and finding the best one for you.
You can open up a high-yield savings account with Chime or CIT Bankto get 1 – 2% of your money back.
5. Invest Your Spare Change
When you join the stock market and invest in the best stocks, you can actually find a more passive way to invest in dividend stocks.
Acorns is great because they automatically invest your money in dividend stocks and mutual funds, using a round-up feature whenever you buy stuff.
So your morning coffee will go from $3.48 to $4, and the extra cents will go towards a new stock an generate income on the side!
You may not be familiar with mutual funds, but it’s actually very simple and doesn’t take any effort on your part.
Mutual funds are simply like a bulk buy of stocks, bonds, and more, where you and multiple investors chip in money on multiple companies, and everyone receives payouts when the fund is sold.
It’s a great way to get your investing fingers into a few pies and diversify your portfolio.
6. Invest in CD Ladders
There are plenty of safe options to invest in if you want passive income to grow every day.
CDs are certificates of deposits from banks whereby you can be paid in certain increments which will allow you to earn a better rate of return on your investment.
Something to note with CD Ladders is that you will not be able to withdraw the money until the account has reached maturity.
When you set up your account, you will choose its maturity. It’s up to you to decide how long you wish to have the CD and earn passive income, ranging from a few months to years.
7. Peer-to-Peer Lending
Peer-to-peer lending is a great way to get some passive income if you have some money that you don’t need immediately.
You’ll be acting as the lender for the individuals or businesses that require a loan. The benefit of doing peer-to-peer lending is that you receive your money back plus interest.
However, this can be riskier than other investments, like a money-market account, because people can default on these loans.
One of the most popular peer-to-peer lending sites is Lending Club.
The minimum deposit is $25 for peer-to-peer lending, and the average return is 4% – 7% on the loans you give.
8. Rent Your Stuff
Another unique way to earn passive income isn’t to just sell your stuff- you can rent it out to people.
You can rent your yard equipment like a lawnmower or leaf blower, or even kitchen gadgets like a blender and air fryer.
It has some risks since people will be using it and may cause damage, but you can be wise and make a “you break it, you buy it” rule to cover buying a new one.
It’s a great option because many of us have things around the house we don’t use every day (or even every month!), so you may as well see if someone would pay to borrow it.
You can post in Facebook groups or in the Marketplace section but there are sites like Sparetoolz, where you can list your tools for rent.
Every sale makes a difference, but investing can make a big change!
Mainvestgives you opportunities to invest in delicious breweries, relaxing salons, your favorite little restaurant, your go-to gym, and more!
Minimum investments start at just $100, and even though small businesses are high-risk, you could potentially make 1.5X or more of your money back.
Best Passive Income: Online Jobs & Businesses
As we said before, some passive income ideas require some money to start, but others require some time put into them from the start.
And that’s ok! Because earning passive income investments can mean you earn money more in the long run.
Hopefully, you will agree with us that it’s still a good idea to put the work in upfront if it means that you will be able to work less in the future.
10. Affiliate Marketing via Blogging
Blogging is our favorite passive income business to start with just a little of your own money and time.
I said that we’d talk about making money from blogging, and here we are! Affiliate links are how we bring home the bacon.
A way to make money onlinefrom a blog is to use affiliate marketing- it’s one of the ways we’ve been generating passive income for years!
Affiliate marketing is where you recommend a product/company/service to a customer, and when they click through to purchase, you receive a commission for pointing them there.
I’m sure that you realize how much work goes into running a Youtube channel – there’s not just the filming of the videos but the editing, marketing, research, etc. It’s a lot!
There are a few ways to make money via Youtube with the most common ways being through ads, sponsored content, and affiliate links.
You can create a video that will circulate on Youtube and bring you in some money when people watch your video and click on your links.
Not sure how to monetize your YouTube channel? Take the Mastering YouTube course from Erika Kullberg, a lawyer who went from a newbie recorder to a pro YouTuber making over $100,000 in her first year!
You can learn how to record and edit videos, grow a following, and get more views on your videos.
If you start to look around at the small businesses in your local area you may find that some of them don’t have an online presence.
Not everyone has the time to update their social media accounts, and that can be the downfall of a business!
This is where you can come in. You can become a social media manager to keep businesses connected to their customers and help them find more.
Reach out to businesses that are lacking in social media presence. You can offer a variety of social media services, such as getting a website set up for them and social media accounts.
Facebook Ads are one of the best ways to generate passive income as a social media manager- once you create the ad, you just see how it’s going and see if they need updates.
eCommerce is what is known as an online store or internet commerce. It is the act of selling items online, which you can do using platforms like Etsy or Shopify.
There are physical items that you could sell online and then get shipped out. If you want to make this passive then you could use a drop shipper to send out the products for you.
There are a million different things that you could sell on an eCommerce site, and the fun part will be all of the brainstormings!
14. Sell Books
Books are a great way to generate passive income for decades. Writing a book will always require time investment upfront as you will need to actually write the book!
After that, though, you can put it up for sale and sit back to let the sales roll in.
It’s easier now than ever to publish a book because you don’t need to go down the traditional publishing route. You can use streams such asAmazon Direct Kindle Publishing.
15. Create an Online Course
There’s a lot of work that you have to put into creating an online course, but it can continue to bring in a lot of passive income opportunities over time.
There is likely one subject that you know a lot about, which you can turn into an online course!
Lots of people like to learn about a subject online, and you will be surprised at the popular subjects – don’t dismiss any of your ideas.
The most popular sites to create and host courses are Teachableand Udemy.
16. Sell Stock Photos
You don’t need to be a professional photographer to sell stock photos and earn passive income- if you like doing photography then you can get paid for photos.
A lot of websites – such as this one for example – need photos to use, and will typically head on over to stock photo sites to purchase them.
You can submit photos for pretty much anything, although it will be in your best interest to upload photos that will be popular.
Some other small business ideas have the potential to earn passive income even though they can be ways to make active income in some places.
What we mean by this is that they are more like business ideas that will need money and time investment. But they can be passive and not require you to be there to exchange time for money.
17. List Your House or Room on Airbnb
Airbnbis hugely popular which is good news if you are thinking about renting out a room or even your entire house!
Short-term rental property becoming more popular and this can bring you in more money in monthly payments than renting it out traditionally.
Airbnb charges 3% for the bookings on there for homeowners, but you can set any price that you want for renting out your accommodation.
Have a look at what other people are charging in your area and then price the property accordingly.
If you are renting out a room in your house this will be less passive as you will be there at the same time as them.
18. Rent Out Your Car
It’s not just property that you can rent out – you can even rent out your car!
If you don’t use your car that often (perhaps you work from home or are going away) you can put your car to use instead of leaving it sat on the driveway.
The most popular site for renting out your car is Turo, although it’s always a good idea to look around and do some research as to which will be the best for you.
19. Vending Machine
Vending machines are a really cool income stream idea and one that we have seen parents gifting mini ones for gumballs and candies to their children!
But buying a full-sized vending machine and stocking it with drinks and snacks can create some amazing cash flow for you.
You will have to ask around to find local businesses that will allow you to put vending machines on their site – you will want to go to businesses that are popular and have a lot of foot traffic.
They are not completely passive because you will have to maintain and restock them consistently- but restocking means you’ve got plenty of money in the machine!
Even if you have to stock machines, it’s not exactly a way to make active income. iI’s still a way to earn passive income without selling food and drinks in person.
20. Storage Rentals
Storage rentals are spaces that people rent out to store their things in.
This could be because they don’t have enough space, they’ve had to downsize, they’re renting before buying, they’ve gone traveling, and a whole host of other possible reasons.
That means if you spend 2 hours recording and editing an episode, that’s $250 – $450 per hour!
You can talk about anything you like on a podcast, or even make multiple channels if you have a lot of topics to discuss. The more topics you have, the more people you draw in.
Depending on your interests, you could make a podcast about true crime, the news with your own opinions/views, life in whatever country or tone you live in, or just comedic stories.
Again, this takes time to start, but long term you can earn enough to create a team to help you record and edit- they’ll handle the business while you’re the pretty voice drawing in the masses!
23. Sell Printables
It can take time to create a printable to sell, but once you have one page created, you can sell it over and over and over! It’s the product that keeps on earning!
So if it took you one hour to make a to-do list that you sell on Etsy, and you sell it 100 times in the first week at $5 a pop, your one hour has earned you $500 in passive income.
You can create to-do lists, questionnaires for bachelorette parties, budget templates, and more.
The startup time will be where your hours stack up, but once things are created and posted online for sale, your passive earnings will roll in without additional effort on your part.
24. Rent Out Your RV
Do you have an RV sitting in storage collecting dust most of the year? Well, get in on RVShare or Airbnb and rack in some extra cash!
When you aren’t using your RV, you can let other people rent it for trips and vacations as well. Rather than paying for storage, you can be earning money by letting someone else take it for a spin.
You might want to consider other things, like cleaning the RV, making sure you have good insurance or adding on roadside assistance, but you can make $10,000 – $40,000 in extra income depending on your RV.
Easy Passive Income Apps
We have covered a lot of passive income ideas which require quite a bit of time, money and effort put into them upfront, but now we can look at some easier ideas.
25. Cash Back Sites
Cashback sites are a super-easy way to make some money passively because you are making money from doing things that you would usually be doing anyway.
The way that cash-back sites work is that you are paid a small commission for clicking through to a site and purchasing something from them.
The reason that this is good for passive income is that you can go through the cash-back sites to buy the things that you were going to be getting anyway.
Say you knew that you wanted to buy a camera, and you knew which store you wanted to get it from.
You would head on over to the cashback site, type in the company name that you wanted to buy from, and then click through onto their site and complete your purchase.
The cashback site will track your visit and purchase and pay you some cash back for this.
It can take a while to come through because it will have to get past the returns period that the store offers.
Another great passive way to earn passive income is by using cash-back reward cards.
The way that this works is that you use your credit card as normal but you will get paid cash back on it.
You can typically earn 1% – 5% cash back on your purchases depending on what credit card you use. It’s worth researching the best option for you, say if you want more cash back on groceries or gas versus dining or traveling.
This isn’t exactly an opportunity to make money, but it is a way to keep you from spending more of your hard-earned income!
Sign up with Trim and save money on your monthly utilities. Trim isn’t an app but is an AI assistant which will look at your finances and see where you can make some savings.
It is passive because they will look into your spending and direct debits and analyze where you can save money.
They can also negotiate your bills for you and cancel any unwanted or unused subscriptions. This saves a lot of time and hassle!
Yes, you can generate passive income by plopping down in front of the computer and going hard at your favorite game.
This isn’t work in the typical sense, and you may “work” a lot of hours to gain followers- but hey, it’s a sacrifice I’d be willing to make!
You can stream your games on Twitch, gain sponsors and fans, and even sell your own merch to get some cash flow started.
29. Arcade Games
On that same note, why not earn passive income with some other games?
If you have some money to put down on an investment, why not buy an arcade machine or two and use it to make passive income?
You don’t have to start a whole arcade business, as even just one popular arcade game can draw in a crowd. It’s like the claw machines that people flock to at the mall or grocery store!
FAQs
Why Build Passive Income Streams?
Having more than one income really helps the bank account, but each passive income stream means extra cash with no extra work.
You probably don’t want to have to work more hours to earn more money, and it’s nice to have some time off too!
If you have money from multiple sources coming in at all times during the day, this means that you have the freedom to do other things.
You can use this money to fund your retirement (either the money you save, or as an income when you are retired), or as an income whilst you’re going around doing whatever you want to do!
The best thing would be for us all to have several passive income streams because this means that we are covered in case anything happens with one of the income streams e.g. with a job loss.
This also means that we could scale back a bit and work less. If you have passive income streams this means that you can take a break if you need to such as on maternity leave or if you are poorly.
The dream that is sold to a lot of people is sitting on a beach with a cocktail in your hand whilst the money rolls in – but it tends to require a lot of effort before you get near that point.
The truth is, we don’t know what the future holds and we need to prepare for things as well as we are able.
This means making sure that if we have a dip or something goes wrong, we will still have the money needed to live our lives.
They can be great side hustle ideas as well and you can scale up as needed.
How Much Money Can I Make?
The amount of money that you can make is dependent on a lot of factors.
It will depend on how much time, money, and effort you can put into it, and other things such as your location and target demographic.
There is no reason why you couldn’t make a lot of money from passive income sources and use that money to live off.
The most popular passive income ideas are generally the more traditional ones – investing, using high-yield savings accounts, and property rentals.
That doesn’t mean that you should just pick the most popular one and go for it as it’s important to think about what you would personally enjoy.
Does passive income really require “no work”?
When it comes to passive income, this doesn’t mean that money just floats into your savings account every month for no reason.
You will have to put in the work beforehand and set up systems to ensure the money will come in regardless of how much time you put into it, following on from there.
Some income streams will be more passive than others, though.
We have gone over a lot of examples in this article so if you’ve skipped to the end, we recommend going back through and taking some time to read through them.
A passive income source that a lot of people aspire to is having a rental property. This can bring in an income stream for a really long time.
Is passive income taxed?
Yes, passive income is still taxed because you’re earning money. All these ideas are still making money!
Even high-yield savings accounts since it’s considered taxable income.
If you want to find out more about taxable incomes, check out Investopedia’s article to clear things up.
Our Thoughts
The type of passive income stream that you choose will be ultimately up to you and how you want to grow your wealth.
The best thing to do is have a read-through of our list and write down which ideas appeal to you. Though I think you should definitely set up a savings account with Chime today to get started on the right foot!
You may also be drawn to certain income ideas over others e.g. if you’re creative, then you might want to choose a more creative idea such as a Youtube channel or selling your own products.
Or you may be a more traditional person who finds the idea of being a property owner that rents out rooms more exciting.
Pick one idea for an easy passive income stream, or even try out multiple income streams to see how much money you can make passively!
]]>
https://cloverhousegifts.com/blogs/news/how-to-declutter-a-house-to-sell-10-key-rooms-and-spaces2023-06-28T17:13:51-04:002023-06-28T17:13:51-04:00How to Declutter a House to Sell: 10 Key Rooms and Spacesadmin
After years of living in the same house, things might have become a bit…cluttered. The baby swing your eight-year-old won’t use again, the broken table you meant to fix, or closets overstuffed with clothes you haven’t worn in years. All of that is perfectly fine — why have a home if not to live in it? — until it comes time to sell. Now you may be asking, do I need to declutter to sell my house?
Decluttering your house can pay off — in both a higher sales price and fewer days on the market. Top real estate agent Michael Russo, who sells homes 57% faster than the average agent in Warwick, Rhode Island, says a home “will definitely sell quicker and for a higher price if the house is decluttered and looking good.”
But where to start? We’ll guide you through how to declutter a house to sell.
Connect with a Top Agent
If you’re starting to prepare your home for sale, hiring a great real estate agent is an important step to take. HomeLight data shows that top-performing agents sell homes faster and for more money than average agents.
Does decluttering and cleaning a house before selling really make a difference? Warwick says yes!
“When potential buyers are touring the house, they can better envision themselves and their possessions living there — their furniture, their belongings — which will enhance their interest and their offer amount,” he says.
One survey by Consumer Reports suggests that, as a home seller, you could see 3%-5% higher proceeds simply by decluttering and depersonalizing the space inside your home.
Here’s a list of decluttering benefits for home sellers:
You’ll receive higher offers
Your house feels larger and more open
Helps buyers imagine it’s their home
Your move will be easier
It highlights your home’s best features
Helps you emotionally separate from the house
You can redirect buyers’ eyes away from flaws
Helps with marketing and photography
Makes the home easier to stage
Room-by-room decluttering checklist to sell a house
If you’re overwhelmed and unsure where to start, take it room by room and try the “timer trick.” This method, favored by productivity and organization bloggers, gives you a structured chunk of time to focus solely on cleaning. Set a timer for 15 minutes, and devote the time to one step of the cleaning process. After all, anyone can do anything for 15 minutes, right? Repeat until your house is clutter-free.
Follow this 10-space checklist, and your home will be ready to sell in no time.
1. Entryway: Remove coats, shoes, hats, pet items
First impressions matter, so start at the front door. Remove and pack away out-of-season coats still hanging on the coat rack, multiple pairs of shoes, hats and gloves, and your dog’s leash. Get rid of the pile of mail and old cards sitting by the front door.
Professional organizer Andrew Mellen says that “Greeting cards with nothing more than a scribble in them have done their job — someone was thinking of you at a particular time and let you know it,” he says. “If they haven’t written anything significant, the moment has passed, and you can let go.” Sorting through some messes can take a considerable amount of time, and you might still need the dog’s leash within easy reach, so if you’re stuck here, place items in attractive storage boxes or baskets and hide them away.
If you’re pressed for time, Russo picked the kitchen and bath as the two most important rooms to declutter. “Remove all items from countertops, from on top of fridges, magnets on the front — make it look like nobody lives there,” he advises.
Toss out old, expired food, starting with the fridge and freezer and moving onto the cabinets and pantry. Throw away anything gross or mysterious. Budget 15 minutes per shelf, including time wiping down cabinet fronts and cleaning old spills.
While you’re throwing out expired foodstuffs, take a hard look at your pots and pans collection. Consider tossing any infrequently-used cooking tool, pot, pan, dish, or glass into a donation box. Tuck appliances into newly freed-up space in your cabinets, and consider bringing the toaster out for the five minutes a day that you use it.
3. Living room: Take away excess furniture, family photos
Old magazines in the rack beside the couch, books you haven’t read in years piled haphazardly on shelves, and that old armchair with the stuffing bursting from the arms — take a hard look at your living room when it’s time to get a house ready to sell. All of these will distract from the room’s appeal.
Start by clearing out everything that belongs in the trash or recycling bin — including old magazines or a broken lamp. If items from around the house have landed in the living room, sort them into bins color-coded by family members. Then, move them to their respective rooms.
And pack away personal photos and mementos — buyers have a hard time envisioning themselves living in a home if it’s your kid’s pictures hanging on the walls. You really need only one sofa and an accent table to indicate how to use the space. “A lot of times, we see that people just have too much furniture in the room for the size that it is,” Jeremy Kahler, a top real estate agent serving Rapid City, South Dakota, says. “Emptying that out helps it feel like a bigger area.”
4. Bedrooms: Open space in closets, drawers, under beds
In your bedroom, you want buyers to see that their bed, nightstands, and dressers will fit in the space. Making your own furniture visible can help. Clear off the bed so you’ll have somewhere to set laundry baskets, etc., while you clean. Tidy up books, tissues, and old glasses from the nightstand. Move under-bed storage out to the garage.
Sort through your clothes and donate items you haven’t worn in years. Create space in your closet, and make sure closet doors can open and shut easily. Buyers will be poking their noses behind closed doors!
Be picky about sentimental items — like your prom dress or a concert t-shirt. Mellen recommends paying close attention to these moments — namely, “the story you tell yourself” when you’re assessing whether or not to keep an item. “The story you may be telling yourself about how exciting the hunt to find it was, or how much fun you had when you were drinking cocktails with your friends are all good stories,” he says. “They just might not need to be stories you’re still telling yourself.”
In other words, if you’re holding onto an item for fear of losing a memory, let it go and trust yourself to remember the good.
5. Bathrooms: Organize towels, storage, bath and sink areas
According to Russo, “kitchens and baths sell houses.”
If you’re short on time, prioritize these rooms. In the bathroom, “remove all personal effects from showers, bathtubs, and vanity tops,” he says. Throw out half-empty bottles of shampoo and fold and hang up towels.
6. Home office: Remove paperwork, open up work surfaces
Russo says that before the pandemic, home offices weren’t as popular and could be smaller. But post-pandemic, people are still working remotely and prioritize them higher on their list. Clear away scraps of paper and books, but don’t think you have to get rid of everything.
“When it comes to decluttering, it’s okay to have your computer, your bookshelf, that shows that it’s functional and usable,” Russo says. “But you really want to keep it minimal, organized, and looking good.”
7. Child or playrooms: Thin down toys, furniture, kid’s art
It can be hard for kids to let go of beloved toys, but now is the time to weed out broken cars and playsets, stuffed animals that are less “stuffed” than split open, and toys they’ve outgrown. Take kids’ art down from the walls and consider repainting the dark black walls your teenager begged for. Homelight’s Top Agent Insights for Fall 2022 surveyed over 1,000 top agents nationwide, and 78% of them recommended that sellers paint tired rooms.
8. Hallways and windows: Clear sills, open walkways, add light
It’s easy for the windowsills to become a catch-all storage place for keys, paperwork, discarded gloves, and more. But cleaning them off allows your windows to shine (particularly if you’ve got a great view), lets in more light, and opens up the space. If shoes are piled in the hallways or on the stairs, clear them off. It should be easy for buyers to walk through your home.
9. Garage: Open up and organize space, throw out junk
If you’ve got the time, expand your decluttering beyond the house itself. Don’t worry if you’ve been using your garage as a place to store decluttered items. “You can put items in the garage if necessary, but organize them in a way where buyers can still see that, yes, you can actually put a car in here,” Russo says. The key is to organize tools, boxes, and the lawn mower so that buyers can see that the garage is usable.
10. Yard and garden: Mow, trim, plant, hide and toss
Adding a firepit, lighting, or seating can spruce up a starter home — 14% of agents in the Homelight survey recommended it. And these fixes are often cheap and add a lot to curb appeal. A new layer of mulch, some fresh flowers, and buyers may overlook some of the yard’s flaws.
While you’re at it, put in some sweat equity. Trim dead branches off trees and bushes, plant new bushes to hide unsightly fixtures like an air conditioning unit, and rake up any dead leaves.
Other benefits of decluttering
In a seller’s market, it’s easier to sell a house full of stuff. But, as many markets across the country have shifted, it’s more important to give your home every advantage. Removing clutter helps other professionals — all of whom are helping sell your house — do their job.
It’s easier for a photographer to navigate around the house and take the best pictures to highlight its features if they’re not tripping over or moving boxes of stuff. Stagers can come in and use an empty space.
And, as Kahler reminds us, “Neutralizing your space is important because buyers need to picture themselves and their family in the home.”
Conclusion: Declutter to sell — it’s only temporary
Maximalists may struggle to live in a minimal home, and it can be tough to stay on top of kids who want to haul all toys to play. So remember, “It’s for a short period of time,” Kahler says. “If you get the house ready and do it well, it’ll sell in a shorter amount of time so that you can basically make the move and get back to living and decorating it the way you want.”
Still not sure where to start decluttering? A top agent can walk through your home and give you a fresh perspective. They’ll point out where small tweaks can yield big rewards, and they’ll know what buyers in your market value. HomeLight can connect you with a top-performing, trusted agent in your market who can help you declutter and sell fast. We analyze over 27 million transactions and thousands of reviews to determine which agent is best for you based on your needs.
]]>
https://cloverhousegifts.com/blogs/news/how-to-make-moist-banana-muffins-your-family-will-love-dairy-free-too2023-06-28T13:13:51-04:002023-06-28T13:13:51-04:00How to Make Moist Banana Muffins Your Family Will Love (Dairy-Free Too!)adminWhole wheat flour, old-fashioned oats, natural maple syrup, sweet organic bananas, and a splash of vanilla are the makings of the best banana muffins you’ve ever tasted. Mix all the ingredients in the same bowl for less clean up, too! Then you simply pour the batter into your muffin tin, bake, and you’re all set to go. These fluffy, light, and moist muffins are easy, quick, and affordable. Go give ‘em a try!
Banana muffins are such an easy breakfast item to use up ripe bananas, even if you don’t consider yourself a baker.
Be sure not to overmix your muffin batter, and your muffins will come out great every time. It’s so easy, you can even get your kids to help you. Or better yet, they make it themselves depending on their age.
We made these muffins with almond milk to keep them dairy free. With bananas and maple syrup, you don’t need any extra sugar. (Although, we did top them with a little sprinkle of coarse turbinado sugar).
It’s almost impossible to mess these up, and you only need one bowl. What’s stopping you from giving them a try?
Let’s get to it!
Banana Muffins vs. Banana Bread
Banana muffins and banana bread are very similar. But have you ever gotten a slice of banana bread in the Starbucks drive-thru and tried to eat it in your car on the way to work? It’s messy, to say the least. Crumbs everywhere.
Banana muffins have all of the classic banana bread flavors like sweet organic bananas, vanilla extract, and that classic spicy cinnamon. Muffins are easier for little hands to eat on the go and quick for you to grab as a snack or throw on a plate for breakfast in the morning. We’ve added and swapped a few ingredients to make your life a little easier and make you feel like the superhero parent that you are.
And it doesn’t hurt that your kids will love them too.
Why You’ll Love Our Banana Muffins
If you love traditional banana bread, you’ll love this dairy-free, organic banana muffin recipe.
Here’s why:
You only need one bowl.
It’s made with whole grains.
Naturally sweetened.
Classic and comforting flavors.
They freeze well.
Easy enough for your kids to help you make them.
Balanced in flavor and nutrition.
Dairy-free.
This recipe is so quick and simple that your kids could make it themselves (and maybe they will one day). With all of the whole grains, maple syrup, bananas, and oats, your kids will be just as in love with this muffin recipe as you are.
We guarantee it!
Ingredients
You probably have most of the ingredients for banana muffins in your kitchen already. Below is the full list of ingredients so you can double-check that you have everything you need.
1/3 cup melted coconut oil
1/2 cup maple syrup
2 eggs
3 Organics Unlimited Bananas, mashed
1/4 cup almond milk
1 teaspoon baking soda
1 teaspoon vanilla extract
1/2 teaspoon salt
1/2 teaspoon cinnamon
1 and 3/4 cups whole wheat flour
1/3 cup old-fashioned oats, plus more for sprinkling on top
1 teaspoon turbinado (raw) sugar or other granulated sugar, for sprinkling on top
All of these ingredients can easily be found at most grocery stores. They’re affordable and accessible, so everyone can make them at home, even you. If you’re a beginner baker, this is a great recipe to start with because it’s pretty hard to mess up banana muffins.
They’ll turn out great.
Why Choose Organic Unlimited Bananas?
The debate has been alive and well between organic and non-organic produce. The short answer for us is that all produce is good for you. We believe in organic bananas because we believe in Organics Unlimited.
Organics Unlimited values organic growing practices because they believe in sustainability. They have been able to reuse the same land to raise wholesome, high-quality fruits for over 20 years without harming the balance in nature. It takes years to be considered an organic grower, and Organics Unlimited is happy to take extra care in giving you bananas that are grown sustainably and organically.
Did you know that there are so many other ways you can use bananas? We have a Banana Hair Mask that helps boost the health of your hair and scalp. Banana peels are also great for polishing shoes. Potassium and other natural oils found in bananas make for a powerful, natural shoe polish. Rubbing a banana peel on dusty, scuffed-up boots and shoes will have them looking new again in no time.
And, bananas are a great way to make homemade ice cream (also known as nice cream when you use bananas). Everyone will love our Strawberry Banana Ice Cream or Banana Nice Cream Sundae recipes. Plus, even your pup can enjoy the taste and nutrition of bananas. Make them a special treat that will make their tails wag, Peanut Butter Banana Pupcakes.
How to Make Banana Muffins
Step 1
Grease your muffin tin.
Whisk coconut oil and maple syrup in a large bowl.
Add eggs and continue to whisk.
Step 2
Slowly add mashed bananas and mix until combined. Add almond milk, vanilla, salt, and cinnamon and whisk again.
Step 3
Add flour and oats and mix with a large spoon.
Evenly divide your batter into your muffin tin and top with oats and sugar.
Step 4
Bake for 22-25 minutes at 325℉. Let cool and serve warm.
What Does A Banana Do in Baking?
Bananas are the not-so-secret weapon when it comes to our take on banana muffins. Bananas are naturally sweet, so you can automatically cut back on the sweetener you add to the batter. Along with adding extra vitamins and minerals, bananas naturally replace some of the fat like butter or oil typically used to thicken the batter.
Be careful not to use more bananas than the recipe calls for because your muffins may become heavy and look uncooked in the center.
How to Properly Store Muffins
Banana muffins will keep at room temperature for up to two days. Store them in a plastic bag or an airtight container in a single layer lined with a paper towel. The paper towel soaks up the moisture so your muffins don’t become soggy. Room temperature storage keeps your muffins fresh.
If you really want, you can store banana muffins in the fridge for up to four days. Just make a note that storing any muffins in the fridge can change the texture and taste. They don’t stay as soft and fluffy, and the sweet banana flavor may not be as strong.
How to Freeze Muffins
Again, we don’t want to end up with soggy muffins from the frozen crystals that form in the freezer. Wrap each individual muffin with aluminum foil and place them in a freezer bag, in a single layer. This makes it easy to take out the exact amount of muffins you need when you’re ready to eat them and helps keep them tasting fresh by preventing freezer burn. When stored properly, banana muffins keep in the freezer for up to three months.
To thaw your muffins, unwrap them and let them thaw on your counter. If you’re like us, we love our muffins warm, like they just came out of the oven. You can pop your muffins in the microwave for 30-45 seconds or reheat them in the oven at 400℉ for 10-15 minutes.
Why We Love Organics Unlimited
This is a company that believes in sustainability. Organics Unlimited works toward a better future in the way they organically grow their bananas to the way they treat their community and employees. They efficiently use and manage water, use the whole banana plant from stalk to stem with composting programs at their farm, and use organic fertilizers. But that’s not all.
Organics Unlimited is deeply committed to its surrounding communities in Mexico. Their Giving Resources and Opportunities to Workers (GROW) program has provided over three million dollars in services to those who need it most. They’ve helped their community get access to higher education, dental and vision care, clean drinking water, and even small business loans, no matter their employment status.
Organics Unlimited cares about the quality of the produce they grow, and they work hard to help those around them.
More Banana Recipes to Try
Air Fryer Banana Split – gluten-free, vegan, and made in just a few minutes in the air fryer
Easy Banana Smoothie – only four ingredients and you’ve got a silky smoothie loaded with banana flavor
1/3cupold-fashioned oatsplus more for sprinkling on top
1teaspoonturbinado (raw) sugar or other granulated sugarfor sprinkling on top
Instructions
Preheat your oven to 325℉. Grease your muffin tin with non-stick cooking spray or rub a stick of butter all around the bottom and sides. Be sure to get in the corners as much as possible.
Whisk the coconut oil and maple syrup together in a large bowl. Add the eggs and whisk until they're mixed well with the oil and syrup. Slowly add the mashed bananas (maybe half at a time) and whisk until combined.
Use a tablespoon to fill your muffin cups about two-thirds full. You will probably be able to fit about two heaping tablespoons of batter into each muffin tin.
Sprinkle oats and sugar on top of your muffins and bake for 22-25 minutes.
Place your muffin tin on a cooling rack to cool and enjoy your banana muffins.
Video
Notes
You can use paper or silicone liners to easily get your muffins out of the tin.
Use a butter knife to separate your muffins from the tin if you aren’t using liners.
Don’t overmix your batter to avoid a rubbery texture.
]]>
https://cloverhousegifts.com/blogs/news/seeutek-2-pcs-6-tier-tall-metal-indoor-plant-stands-with-hanging-loop-half-moon-shaped-ladder-plant-shelf-holder-multiple-plant-stand-flower-pot-rack-for-home-decor-patio-lawn-garden-balcony-round-brown-with-wheels-143-992023-06-28T11:13:51-04:002023-06-28T11:13:51-04:00Seeutek 2 pcs 6 Tier Tall Metal Indoor Plant Stands with Hanging Loop,Half Moon Shaped Ladder Plant Shelf Holder,Multiple Plant Stand Flower Pot Rack for Home Decor Patio Lawn Garden Balcony.(Round-Brown with Wheels) $143.99admin
【Multi-Tiered Plant Stand】:Our UPGRADE tiered metal plant stand has 6-tier, capacity is about 20 pots and 6 hooks on the top of the stand allows for the placement of hanging plants,that are designed to allow for maximum sunlight for each plant and providing you with plenty of storage and display positions, making your space look tidier.
【Unique Creative Curved Design】:This indoor plant shelf have elegant geometric shapes and aesthetic design. The ladder shelves with curved design add to the visual appeal of this piece,it is a perfect way to make the most of your space.The plant shelf equip with Include planting tool set and 2 screwdriver drill bit.
【Sold and Durable Construction】:The metal and wooden garden ladder plant stand is constructed of MDF Board.The sturdy metal construction with electroplating paint, protects the frame from rust,moisture-proof, easy to care and wipe. Weight Capacity of every tier shelf is up to 15 lbs.
【Easy to Assemble】:This half moon plant stand coming with complete accessories and detailed instruction, All installation tools, hardware, and detailed instruction are in the package.We provide a step by step instructions,convenient for you to assemble this flower stand easily and quickly withoaut complex tools.
【VERSATILE USAGE】This plant stand also can be used as a multiple storage and display rack for a variety of venues, such as corridors, halls, bedrooms, balconies, courtyards, companies etc. Excellent for displaying and organizing flowers, potted plants, books, photos, collectibles, or even small appliances.
Remember, Amazon prices can change at any time.
This post contains affiliate links.
]]>
https://cloverhousegifts.com/blogs/news/ikea-lack-side-table-26-surprising-ways-to-hack-it2023-06-28T09:13:51-04:002023-06-28T09:13:51-04:00IKEA LACK Side Table: 26 surprising ways to hack itadmin
The IKEA LACK side table is as “IKEA” as it gets. Minimal. Particleboard exterior. “Honeycomb” interior. Easy to assemble.
The IKEA LACK side table (21 5/8″ x 21 5/8″ x 17 3/4″) sells for $16.99. Not too long ago, IKEA started producing a smaller side table (13 3/4″ x 13 3/4″) which goes for $9.99. You can slide the small side table under the larger LACK side table as a set of nesting tables, and save space. The cheap price means a lot of possibilities for IKEA hacks, as we will see later in this article.
IKEA makes this simple side table in various colors, the most common being black, white, and in a wood veneer. Occasionally, IKEA may release limited edition versions in bolder colors and finishes. The side table is part of the LACK range which includes coffee tables, a TV stand, and wall shelves.
The IKEA LACK side table can be used in a multitude of creative ways, some as simple as peel-and-stick contact paper and others needing a little more DIY skills. We’ll explore 26 unique and creative ways to hack and use the IKEA LACK side table in your home. Some, perhaps, in ways you’ve never thought of before.
DIYer Teadelena gives the side table a new look. She dropped the LACK legs and replaced them with another IKEA product — an EKET cube. Assemble the EKET cube and use an adhesive such as Liquid nails to glue the edge of the EKET cube to the underside of the LACK side table. You can also finish the sides of the EKET cube with wood slats or trim if you want to further embellish it.
Inspired by coffee tables she saw, Kate decided to transform the table set to feature elegantly arched legs. She cut out arch shapes from 6mm MDF with a jigsaw. Then, stuck them onto the bottom of the table and the sides of the legs. For the finishing touch, she primed the set with every IKEA hacker’s favorite primer and painted them with Rust-Oleum Furniture Paint. She let the paint dry completely and was done!
If you love this IKEA LACK side table hack but don’t have the woodworking tools for it, here’s an easier table hack using corbels.
Briana’s extensive makeover elevates the square end table into a high-end sculptural side table that looks and feels luxe. To make the round base, she used these round 8″ tubes, cut into 18″ sections. The legs are glued to each other and to the base of the tabletop. Once the glue has cured, she covered the entire table with plaster of Paris. After the plastic has fully set, she sanded it down and sealed it with a few sprays of clear topcoat. The last step is to place it next to the sofa and move on to styling.
4. Make them into accent tables
Youtuber Jorge shows us 2 different bases for the LACK table, turning them into a home decor piece. One has the slatted base recessed below the tabletop. The second has the base going along the top of the table, creating a more robust square coffee table.
We love Mark’s surprising take on the LACK. It goes Art Deco, bordering on maximalism. Mark made the decorative pieces from plywood, cut with a jigsaw. Each piece is then painted in glossy black paint and edged with a metallic paint pen. To match, Mark painted the entire side table with the same black gloss paint. He then used the E-6000 adhesive to glue the decorative panels to the corners of the table.
Get ready to disco with this throwback furniture hack. This IKEA hack is as easy as busting a move on the dance floor. All you need to do is add some mirror mosaic tiles, and voilà! You’ll have a groovy and glamorous mirrored side table fit for a cameo on Saturday Night Fever.
JP Strate figured out an alternative way to assemble two LACK side tables together. The table top from the second LACK goes under the legs. The legs from the second table are shortened and glued together to form a square base for the LACK to sit on. Almost like a floating side table.
Another way to reconfigure the assembly is to shorten the legs, so it looks less cube-like. Add furniture legs of your choice under the table and it will make a lovely modern side table.
8. The TikTok Tile table
TikTok made her do it. The viral tile table caught April’s eye and she just had to try it out for herself. She used 2×2″ tiles, which were just right for the LACK table’s dimensions.
9. Use the side table for extra seating
If you’re in need of extra seating in your living room, try this ottoman hack. Wrap the tabletop in foam and the fabric of your choice. Embellish with nailhead pins if you want to up the glam factor. They also work as a cocktail ottoman, snack table, or display your latest magazines.
10. A rustic coffee table that no one will believe it’s IKEA
What a difference the slab of extra thick stained pine wood makes. When cutting the tabletop, Ad recommends a 1″ overhang on all sides. Center it on the LACK, making sure that the overhang is balanced on all sides. Attach the wood top to the original table via screws from the bottom. And voilà, a rustic IKEA coffee table.
IKEA LACK side table as pet furniture
11. A cat hammock side table
@productdesign.cavc
A student project but it does work. You’ll need to assemble two LACK tables together and add some cute feet if necessary. Then, within the space, hang a cat hammock from the four corners of the table. Cut MDF boards into the shape you want. Then use screws to install them and cover up all 4 sides of the table for kitty privacy. A cozy hideout for your cat.
12. Side table turned indoor dog house
Rather than discarding an old red LACK table, Rafaela turned it into a cute dog house for her pup. She turned the LACK side table upside down and used peel and stick shelf liner to cover up the striking red color. For the covering, she used a roll-on beach mat and a few nails to keep it in place. Pup loves it!
A quick reminder of to-dos before you leave the house. All you need is the top of the IKEA LACK side table, Chalkboard Paint, and picture hangers for this easy DIY chalkboard.
14. As wall art
The LACK’s square dimensions are also great for displaying art. Think of the tabletop as a square piece of canvas, then create as you wish. You can wrap the tops in masking tape like how Mike did. Or use fabric. You can try decals too.
IKEA LACK side table in the Kitchen
15. As a mobile kitchen island
No space for a kitchen island? Stack two of the LACK side tables and secure them to each other. Then, add wheels. There you have it: a mobile compact kitchen island cart.
16. Kitchen island on a budget
Would you believe that this kitchen island is made from 6 IKEA LACK side tables? While the striped plaster boards may look dated, the concept is still as good as new. If you need an affordable renter-friendly kitchen island with lots of storage cubes, this is the DIY project for you.
Not your regular IKEA LACK table hack. Here’s a classy-looking light using the IKEA LACK side tables as a frame for the LED spotlights.
IKEA LACK side table in the bedroom
18. Hack it into a bedside table
Just one LACK may be too low as a nightstand, two LACKs a tad too tall. So here’s how to cut them down to size and have a two-tiered LACK bedside table, with an additional shelf for your knick-knacks.
19. As a headboard
Using a mix of IKEA LACK coffee tables, Kennet made a headboard to span the width of the bed, integrating bedside tables at the end. An all-in-one headboard solution.
IKEA LACK side table in the kids room
20. As a mobile play kitchen
I love this mobile play kitchen by Kristin. It’s compact, can be easily transported from one room to another, yet has everything including the kitchen sink.
21. As a train table
Making a train table is not as hard as it seems. You only need 2 LACK side tables, an activity rug, tracks, and lots of trains!
A classic LACK Rack Hack. If you have lots of audio equipment, you’ll love this sturdy rack with modern style and clean lines.
Try it in the Patio
26. As a lounger
This is not an easy hack. Charles made this from multiple LACK side tables, cut into half and filled with expanding insulation foam, and covered with latex paint (for waterproofing). Then, assembled it into an outdoor lounger. Add a few plush cushions and done.
You may have an IKEA LACK side table or two stashed somewhere, all wobbly or scratched up, don’t throw them out yet. There are always ways to make them into something useful again. And if you do, do share them with all of us.
]]>
https://cloverhousegifts.com/blogs/news/buffalo-wings2023-06-27T19:13:52-04:002023-06-27T19:13:52-04:00Buffalo WingsadminBuffalo Wings are a must for tailgating! These crispy baked wings are covered in our homemade buffalo sauce for the perfect hot and spicy flavor. Buffalo chicken wings are a real crowd-pleaser and perfect for game day parties. You’re going to love these wings!
What’s in this Buffalo Wings Recipe?
There’s nothing like a crispy baked chicken wing covered in spicy homemade Buffalo sauce! These crispy wings wouldn’t be complete without it. Hot, spicy, and just a little bit sweet– just the way I like them!
Chicken Wings: Separate the drumettes and wingettes.
Kosher Salt: Enhances the natural flavor of the chicken.
Buffalo Sauce: Tangy, buttery, and spicy– the perfect complement to tender wings.
Pro Tip: If you use frozen wings, make sure to thaw them overnight in the refrigerator before baking.
Variations on Buffalo Chicken Wings
I love classic Buffalo sauce with these delicious baked chicken wings. But you can change up the flavor slightly by adding some Parmesan cheese and minced garlic, chipotle peppers in adobo sauce, lemon juice and cracked pepper, BBQ sauce, or honey to the Buffalo sauce.
Where did Buffalo wings originate?
These wings were invented at the Anchor Bar in Buffalo, New York when one of the owners cooked leftover wings in hot sauce as a late-night snack for her son.
Why are they called Buffalo wings?
Wings of a buffalo? Definitely not! These hot chicken wings are called Buffalo wings because they were first served in Buffalo, New York. The sauce is key!
What’s the difference between Buffalo and original wings?
What sets these wings apart is the sauce! It’s made from a mixture of vinegar, cayenne pepper, and butter. Chicken wings can be tossed in just about any sauce (sweet, spicy, or anything in between), but Buffalo wings are always tossed in Buffalo sauce.
Are Buffalo wings fried or baked?
Traditionally, Buffalo wings are fried. But we take the stress and mess out of them by baking them to crisp perfection in the oven!
Do you cover baked chicken wings in the oven?
I did not cover these wings while baking them. They still stayed plenty moist, while the skin managed to get really crispy.
How to Store and Reheat
Store leftover Buffalo wings in an airtight container in the refrigerator for up to 3 days. Reheat in a 350°F oven for about 15 minutes, or until 165°F internally.
How to Freeze
Freeze chicken wings in a single layer on a baking sheet until solid, then transfer to a Ziplock bag for up to 3 months. Allow wings to thaw overnight in the refrigerator before reheating.
Serving Suggestions
The classic way to serve Buffalo chicken wings is with a side of ranch or blue cheese and some celery sticks. That’s how you’ll often find them at restaurants, and it’s a simple way to serve them at home or parties too. Both help to balance out the heat of the Buffalo sauce.
Preheat oven to 250°F and spray a wire baking rack with nonstick spray. Set the rack over a baking sheet covered with aluminum foil. Set aside.
In a large bowl, combine the chicken with the baking powder and salt. Transfer the wings to the rack, in a single layer, with a little space between each one.
2 pounds chicken drumettes and wingettes, 1½ tablespoons baking powder, 1 teaspoon kosher salt
Bake the wings in the preheated oven for 30 minutes.
After 30 minutes, increase the temperature to 425°F and bake for an additional 45-50 minutes or until the chicken is crispy and golden brown.
Remove wings from oven and allow to rest 5 minutes.
Toss in the Homemade Buffalo Sauce and serve immediately garnished with sliced green onions, if desired.
1 cup Buffalo Sauce, Sliced green onion
Video
Notes
If you use frozen wings, make sure to thaw them overnight in the refrigerator before baking.
Pat the wings dry with a paper towel before coating. This will help the oil and rub stick well.
For the evenest cooking, line a baking sheet with aluminum foil then set a wire rack on the baking sheet. Lightly spray the whole thing with nonstick cooking spray.
Remember not to overcrowd the wings on the baking sheet. The more airflow they have, the more evenly they will cook and the crispier they will be.
Storage: Store Buffalo wings in an airtight container in the refrigerator for up to 3 days or in the freezer for up to 3 months.
]]>
https://cloverhousegifts.com/blogs/news/how-to-make-enriched-breads-examples-and-recipes2023-06-27T09:13:52-04:002023-06-27T09:13:52-04:00How To Make Enriched Breads | Examples and Recipesadmin
Blabby Gabby
When I started baking 10 years ago, I never considered the vast amount of baked goods that could be created in my kitchen with only a few ingredients. Through experimentation and several failures, I learned that baking bread products is not as complex or mysterious as it may seem to a non-baker. There are slight differences between bread products and the variation in texture and taste depends on the amount used for each staple ingredient. These ingredients include flour, sugar, fat (ex. Butter, oil, margarine, etc.), yeast, water, and milk or cream.
The use of each ingredient can determine how long a bread product needs to set before baking and the bread’s flavor, texture, and shelf-life. How ingredients are used in the batter or dough determines if the bread is a traditional product (i.e., yeast bread), quick bread, or enriched bread. Today I will discuss enriched breads and how this sweet and creamy bread can be used to prepare recipes like challah, brioche, beignets, or even French toast.
Learning how to prepare 5 minute bread has been a great help to my kitchen. Life as a busy mom, there isn’t much time to prepare fresh dough every day to bake sweets or traditional bread products. Because of my busy schedule, my go to methods is the following:
Prepare the 5 minute dough recipe for traditional breads like baguettes, loaf bread, and artisan bread
Prepare a second batch for enriched dough that can be frozen for several weeks.
This method allows me to take only what I need to prep fresh breads or sweets for the week.
Differences between Traditional Bread vs Quick Bread vs Enriched Bread
Although most bread products use the same ingredients, there are some notable differences between traditional breads, quick breads, and enriched breads.
TRADITIONAL BREAD (i.e., yeast bread) is prepared without dairy products, like eggs or milk. Adding yeast allows the dough to sit at room temperature for several hours. If the dough is prepared using the 5 Minute Bread recipe, then it can be stored in the refrigerator for 2 weeks. Also, the remaining dough can be used later to prepare sourdough bread.
QUICK BREAD are prepared using dairy products, like eggs or milk and sometimes sugar or honey for added sweetness. Unlike traditional bread, these quick breads exchange yeast for chemical leavening agents, like sodium bicarbonate to raise the dough. The use of sodium bicarbonate instead of yeast allow one to prepare the batter within 10-15 minutes followed by baking right away. These breads are considered “quick” because the chemical leavening agents significantly decrease the preparation time since the dough or batter isn’t required to ferment over long periods of time to raise and expand the bread product. Some examples of quick breads are biscuits, muffins, cornbread, and creamed loafs.
ENRICHED BREAD are the midpoint between quick breads and traditional bread. Like quick breads, enriched dough uses eggs, milk, and sugar or honey in the dough. This bread also uses yeast in the dough mixture. I say this because enriched dough yields a sweetened creamy bread product that can be stored for weeks. Like yeast bread, a large batch of challah or brioche dough can be prepared and used to make desserts such as beignets, cinnamon rolls, sticky pecan caramel rolls and more.
To summarize the differences between the 3 types of bread products, see the table below.
Table 1. Yeast Bread vs. Quick Bread vs. Enriched Bread
Challah, Brioche, Rolls (cinnamon or pecan), Beignets, Bread Pudding
How to Prepare Enriched Dough
Simply prepare the enriched dough the day before baking, which takes no more than 5 minutes if you follow my method in outlined below. Let the enriched dough sit at room temperature for no more than 2 hours since it has eggs, then store the dough in the refrigerator if you plan to use it within 3 to 5 days. After 5 days, place the dough in the freezer for longer storage.
If you freeze the enriched dough, remember to take it out of the freezer the day before and allow it to thaw in the refrigerator overnight.
Difference between Challah and Brioche
Two of the most common enriched breads are Challah and Brioche. Challah bread is “traditionally served in Jewish households at the start of Sabbath on Friday nights.” (Hertzberg, et al., 2013). The bread is prepared with eggs, Kosher salt, and butter. Oil or margarine can be used as a substitute for butter in this recipe. (Note: The use of butter gives the enriched bread its distinct flavor and aroma).
Brioche is a variation of Challah and commonly found in French and Italian cuisines. Like Challah bread, Brioche is prepared using the same ingredients. However, Kosher ingredients are not a requirement for this recipe. Also, Brioche uses twice as many eggs in its recipe compared to Challah. The advantage for both bread types is that several recipes can be prepared from their dough mixtures. This means recipes such as rolls, French toast, bread pudding, beignets and more can be prepared using the baked Challah or Brioche bread or its dough mixture.
Let’s learn how to make these two breads using the 5 Minute Bread method.
Table 2. Challah Master Dough Recipe
INGREDIENT
WEIGHT (IMPERIAL)
WEIGHT (METRIC)
Lukewarm Water (100 °C (212 °F) or below)
1 ¾ Cups
400 g
Granulated Yeast
1 Tbs
10 g
Kosher Salt
1 to 1½ Tbs
17 to 25 g
Large Eggs, Slightly Beaten
4
225 g
Honey
½ Cups
170 g
Unsalted Butter, melted
½ Cups
115 g
All Purpose Flour
7 Cups
990 g
Egg wash (Combine 1 egg (slightly beaten) with 1 tablespoon or 10 grams of water)
Poppy or sesame seeds, for sprinkling top crust
Oil, unsalted butter, or parchment paper, for the baking sheet
(Hertzberg et al, 2013)
Directions for Mixing Challah Dough:
In a mixing bowl, combine lukewarm water, yeast, salt, eggs, honey, melted butter, margarine, or oil in a 6-quart (6 Liter) bowl or a lidded food container.
Use a mixing spoon or stand mixer, mix in the flour without kneading until a consistent and uniform dough forms.
If prepared in a heavy duty stand mixer, transfer the dough mixture into a plastic container using a dough scrapper.
Cover the container (not airtight) and place on the countertop until the dough rises and collapses. This process should take 2 hours.
The dough can be stored in the refrigerator over 5 days. Beyond 5 days, freeze the dough in 1-pound (454 g) portions in an airtight container up to 3 weeks.
Directions on Baking Day (For Cold / Chilled / Refrigerated Dough):
Butter or grease a baking sheet or line the baking sheet with parchment paper.
Sprinkle the surface of the dough mixture with flour.
Grab a ball of dough and cut 1 pound (454 g) of the dough using kitchen scissors or a serrated knife.
Dust the cut dough with more flour and quickly shape into a ball.
Gently roll and stretch the dough to form a long rope that is ¾ inches (19 mm) thick, allowing the dough to rest 5 minutes between rolling to prevent tears in the dough.
Braided Challah (Braided from One End):
Use a dough scraper or knife to divide the long rope into 3 equal length sections.
Line the 3 cut sections next to each other to have a left, middle, and right dough strand.
Starting from the middle strand, pull the left strand over the middle strand and lay it down in the center.
Next pull the right strand over the center strand.
Continue alternating the left and right strand over the center strand until you reach the end of the dough section.
Pinch both ends of the strands together.
Place the shaped dough onto a baking sheet covered with parchment paper and allow the dough to rest for 90 minutes before baking.
Preheat the oven to 350 °F (177 °C).
Using a pastry brush, add egg wash to the dough and sprinkle with seeds.
Bake for 30 minutes or until the bread has a golden-brown color and its center has some resistance to pressure.
Allow the bread to cool on a rack before serving.
If you want a more even loaf, start your braid mid-way from the length of the dough.
Table 3. Brioche Master Dough Recipe
INGREDIENT
WEIGHT (IMPERIAL)
WEIGHT (METRIC)
Lukewarm Water (100 °C (212 °F) or below)
1 ½ Cups
340 g
Granulated Yeast
1 Tbs
10 g
Kosher Salt
1 to 1½ Tbs
17 to 25 g
Large Eggs, Slightly Beaten
8
455 g
Honey
½ Cups
170 g
Unsalted Butter, melted
1½ Cups (3 Sticks)
340 g
All Purpose Flour
7½ Cups
1065 g
Egg wash (Combine 1 egg (slightly beaten) with 1 tablespoon or 10 grams of water)
(Hertzberg et al, 2013)
Directions for Mixing Brioche Dough:
Unlike Challah dough, Brioche dough can be used immediately after the 2-hour rise at room temperature.
In a mixing bowl, combine lukewarm water, yeast, salt, eggs, honey, melted butter, margarine, or oil in a 6-quart (6 Liter) bowl or a lidded food container.
Use mixing spoon or stand mixer, mix in the flour without kneading until a consistent and uniform dough forms.
If prepared in a heavy duty stand mixer, transfer the dough mixture into a plastic container using a dough scrapper.
Cover the container (not airtight) and place on the countertop until the dough rises and collapses. This process should take 2 hours.
The dough can be stored in the refrigerator over 5 days. Beyond 5 days, freeze the dough in 1-pound (454 g) portions in an airtight container up to 3 weeks.
Directions on Baking Day:
Butter or grease an 8 ½ x 4 ½ inch (216 mm x 114 mm) nonstick loaf pan.
Dust the surface of the dough mixture with flour.
Grab a ball of dough and cut 1 pound (454 g) of the dough using kitchen scissors or a serrated knife.
Dust the cut dough with more flour and knead (Yes, I said Knead the dough for 30 seconds or more). Kneading this dough REALLY improves the bread’s texture.
Shape the dough into a ball and allow it to rest for 10 minutes.
Gently roll the dough into an oval shape and place in the loaf pan.
Allow the dough to rest for 90 minutes before baking.
Preheat the oven to 350 °F (177 °C).
Using a pastry brush, add egg wash to the top of the loaf.
Bake for 45 to 50 minutes or until the bread has a golden-brown color and it’s well set.
Allow the bread to cool on a rack before serving.
So now you know how to prepare enriched breads. These breads are easy to prepare, andtheir dough mixtures can be used for several weeks when properly stored. In the next blog, I’ll show you some recipes you can make using the Challah and Brioche dough mixture. But for, now spend 5 minutes preparing the dough mixture and enjoy it as an alone bread or pop it into the freezer until next time.
Is there anything else you’d like to know about baking and wish it was included in this article? Let us know by leaving a comment below.
References
Hertzberg, J. M.D & Francois, Z. (2013). The New Artisan Bread in Five Minutes a Day. First Edition. Thomas Dunne Books.
About Gabby…
Gabby is a hobbyist who enjoys baking for family and friends. She created this blog to provide a comprehensive guide to baking for the everyday baker. Follow her on Twitter, Pinterest, Tumblr, Facebook, Instagram, or become a member of the Blabby Gabby community to get the latest information where she will discuss fundamentals, recipes, historical facts or other content related to baking quick breads, yeast breads and pastries.
Disclosure: Please note that some of the links in the article are affiliate links. Other links are internal links that connect you to in-depth content, within the blog, that relate to the topic of discussion. I’ll earn a commission if you decide to use one of the affiliate links listed in the article for your personal use. My goal is to provide you with quality content and only recommend the products and services I’ve personally used, researched, and stand behind. If you use one of the affiliate links, then the company will compensate me. This compensation helps me run this blog and keep my in-depth content free of charge for readersand/or subscribers.
Join our newsletter where you’ll learn simple techniques that’ll give you the confidence to bake any bread you want.
]]>
https://cloverhousegifts.com/blogs/news/45-women-inventors-who-changed-the-world-and-you-may-not-even-know-it2023-06-27T05:13:50-04:002023-06-27T05:13:50-04:0045 Women Inventors Who Changed The World And You May Not Even Know Itadmin
If you close your eyes and picture a scientist, chances are you're seeing a man. We can't blame you, though. The assumption that science and innovation is a "men-only club" is still going strong. And women's contributions to science? Often treated like mere extras in a testosterone-filled blockbuster. This unfortunate perception has persisted, even after Charles M. Vest, MIT's former president, publicly acknowledged the rampant gender discrimination within his own institution. At MIT, women had fewer resources, earned lower salaries, and their influence... Let's just say they didn't have a front-row seat at the scientific symposium.
But there's a whole universe of things invented by women that changed the world in profound ways. Women have not just been a part of the STEM narrative but are often the authors of some of its most transformative chapters. Still scratching your head and wondering, "What have women invented?" Here's a sneak peek.
Got lost in the middle of nowhere during a road trip? We have Dr. Gladys West to thank for her work on the development of GPS. How about the wonder-material Kevlar, five times stronger than steel, used in everything from bike tires to bulletproof vests? That's Stephanie Kwolek's brainchild. Not forgetting the ever-practical dishwasher, brought to you by Josephine Cochrane. Next time you feel grateful for everyday conveniences that make your life so much easier, don't just assume there's a "he" behind these famous inventions. There's a good chance it may be a woman who used her brains, creativity, and tenacity to find a concrete solution to a shared problem.
Here's to celebrating the work of these unsung (s)heroes: the innovative women who've propelled humanity forward, one patent at a time! Our list features some of the most famous women inventors of our past who contributed greatly to science and technology. Plus, we'll highlight today's most noteworthy women in STEM who, standing on the shoulders of their brilliant predecessors, are actively shaping the world of tomorrow.
#1 Margaret Eloise Knight – Paper Bag
Margaret Eloise Knight is known for inventing a machine that could shape and glue paper into a flat-bottomed bag. The popularity of her invention caught the eye of a man who stole her idea to patent it himself. When Knight took him to court, he stated that a woman "could not possibly understand such mechanical complexities." Knight won the case by proving that she had designed the machine, earning herself the right to patent it. She invented over 100 machines during her career and patented 20 of them.
#2 Katalin Karikó – Modify Messenger Ribonucleic Acid
Katalin Karikó, a Hungarian American biochemist, developed a way to modify messenger ribonucleic acid (mRNA) for safe use in humans. This innovation laid the foundation for mRNA-based vaccines, including the COVID-19 vaccine, and heralded prospective therapies for cancer and heart disease.
Hedy Lamarr was a glamorous black-and-white film star, but did you know she was also a gifted inventor? She worked with a composer to develop the principle of "frequency hopping," an innovation aimed at preventing torpedo control signals from being jammed by enemies. Even more impressively, this technology became the foundation for many modern-day inventions, including GPS and our precious Wi-Fi.
#4 Helen Lee – DNA-Based Instant Blood Diagnostic Kit
Chinese medical researcher Helen Lee developed an instant blood diagnostic kit based on DNA that can immediately detect infectious diseases like HIV, hepatitis B, and chlamydia. Her test cartridges, unlike others, don't necessitate cold storage or transportation, making them ideal for regions with limited technical infrastructure.
#5 Gertrude B. Elion – The Woman Who Made Organ Transplants Possible
Gertrude B. Elion was the biochemist and pharmacologist behind multiple curative treatments. Her work contributed to the development of treatments for viral diseases, including one of the first treatments for AIDS. Last but not least, she's behind the creation of azathioprine, the first immunosuppressive used to fight rejection following an organ transplant — one of the greatest medical advances in centuries.
In 1978, Gladys West became the project manager of Seasat, the first satellite to monitor the changing conditions and features of the oceans. Her work eventually evolved into GEOSAT, a satellite that could create models of the surface of the Earth. With her team, she developed a program to compute satellite orbits with extreme accuracy, assisting in the formulation of a mathematical representation of Earth's shape, the geoid. The geoid is a critical component of GPS technology, used to determine the precise location of a GPS receiver on the Earth's surface.
#7 Laura Van 'T Veer – Gene-Based Breast Cancer Test
Dutch biologist Laura van 't Veer developed a gene-based breast cancer test. The test scrutinizes tumor tissue to evaluate the 10-year risk of cancer recurrence, effectively distinguishing high-risk patients needing chemotherapy from low-risk patients who can avoid toxic chemical treatments.
Italian researcher Catia Bastioli found a way to create biodegradable plastics from waste and agricultural raw materials. Her starch-based shopping bags can be processed similarly to regular plastics but decompose within weeks when composted. Made from crops, they reduce greenhouse gas emissions and the consumption of nonrenewable resources.
English Countess Ada Lovelace, daughter of poet Lord Byron and mathematician Anne Isabella Noel Byron, holds a unique place in the annals of science as the first computer programmer. Her collaborations with Charles Babbage on the Difference Engine project led her to recognize the machine's potential beyond mere calculations. Lovelace was the first to publish an algorithm intended for this machine, thus earning her the title of the world's first computer programmer.
During World War II, Katharine Burr Blodgett was a crucial mind behind several inventions, including gas masks, smoke screens, and a technique for de-icing airplane wings. However, her work in chemistry resulted in her most important creation: non-reflective glass. This technology is used in several applications today, including eyeglasses, car windshields, and computer screens.
James Watson and Francis Crick are credited with discovering the DNA double helix. Still, it was British biophysicist Rosalind Franklin's vital work that provided the proof they needed. Franklin's "Photo 51," the first photograph of a molecule captured through her expertise in X-ray diffraction, confirmed their theory. Her colleague Maurice Wilkins allegedly showed this photograph to competitors Watson and Crick without her knowledge or consent, forever attaching their name to a discovery that was never theirs.
In 1944, Grace Hopper co-designed Harvard's behemoth Mark I computer together with Howard Aiken. Hopper's ingenuity resulted in the compiler, a transformative tool that translated written language into computer code. She's also behind the popularization of the term "debugging," born while removing a moth stuck in the device.
Stephanie Kwolek, a Polish American chemist, transformed material science in 1965 by inventing Kevlar. This super-material, five times stronger than steel, now underpins over 200 applications ranging from bicycle tires, body armor, and frying pans to building construction and musical instruments.
#14 Ann Lambrechts – Mixing Steel Wire Elements Into Concrete
Belgian inventor Ann Lambrechts invented a method of mixing steel wire elements into concrete, which improved structures' stability, reduced building costs, and created new architectural possibilities. Steel fiber concrete was employed to construct significant projects, like the Gotthard Base Tunnel.
#15 Margarita Salas Falgueras – Improved DNA Replication
Spanish scientist Margarita Salas Falgueras, renowned for her research in molecular genetics, developed a more efficient, reliable, and simpler method to replicate trace amounts of DNA into quantities large enough for complete genomic testing. Her invention, utilizing phi29 DNA polymerase, is now widely employed in oncology, forensics, and archaeology.
#16 Virginia Apgar – Apgar Score And Her Contributions To Neonatology
Virginia Apgar was a leader in anesthesia and pediatrics, and her research did much to reduce infant mortality. She invented the Apgar score, still used today as a way to quickly assess the health status of a newborn immediately after birth, an unprecedented advance in the field of neonatology.
Theoretical physicist Shirley Jackson etched her name in history as the first African American woman to earn a doctorate from the prestigious MIT in 1973. With her groundbreaking work on subatomic particles at Bell Laboratories, she laid the foundation for inventions like the portable fax, the touch-tone telephone, solar cells, fiber optic cables, and the technology integral to caller ID and call waiting.
Marie Curie, a preeminent Polish physicist, revolutionized the scientific world with her comprehensive theory of radioactivity (a term that she coined). Her ingenious techniques for isolating radioactive isotopes, along with the discovery of polonium and radium, positioned her as the first-ever double Nobel laureate, spanning multiple scientific fields.
Better known as Madam C.J. Walker, Sarah Breedlove became the first self-made female millionaire in the United States. She was only 20 when she realized that black women struggled with hair loss and scalp diseases because of inadequate plumbing and harmful product ingredients. Over several years, she developed her own hair care product line, specifically targeting African American people, and branded them as Madam C.J. Walker, chosen to evoke Parisian luxury. She also set up a school to train hairdressers. This initiative created employment opportunities for thousands of African American women. As her wealth and influence grew, she made considerable donations to African American schools, orphanages, and retirement homes.
#20 Christine Van Broeckhoven – Contribution To Understanding Neurodegenerative Brain Diseases
Belgian biologist Christine Van Broeckhoven's groundbreaking work has advanced our understanding of neurodegenerative brain diseases, including Alzheimer's, Parkinson's, and bipolar disorder. Throughout her research, she has acquired several patents on various genes and protein products, thus forging a path toward effective treatments for these diseases.
Austrian Swedish physicist Lise Meitner was the brain behind nuclear fission, yet the Nobel committee overlooked her contribution. Many speculate that her active opposition to using nuclear fission for destructive purposes, such as in the Manhattan Project during World War II, affected her chance at the award, even after 48 nominations during her career.
Originally a housewife, Melitta Bentz grew tired of the challenges associated with making coffee and decided to devise a solution. After testing numerous materials, she created a coffee filter, obtained a patent, and established a business for its production. Within a year, she was selling hundreds of filters, and by 1928, her company was employing dozens of people. Known for her generosity and supportive work schedules, she also instituted "Melitta Aid," a welfare fund for her employees. And if the name sounds familiar, don't be surprised: the Melitta Group is still making coffee, coffee makers, and filters today.
Claude Grison, a French chemist, developed a process that uses plants to decontaminate soil polluted with heavy metals. The extracted metals are then utilized as "ecocatalysts" to produce new molecules for use in the chemical, pharmaceutical, and cosmetics industries.
Patricia Bath was the first African American female doctor to get a patent for a medical innovation: the Laserphaco Probe. This medical instrument, invented in 1981, employs a laser to non-invasively dissolve cataracts and clean the eye, simplifying the lens replacement process. The Laserphaco Probe is now globally recognized as an efficient and safe solution to prevent cataract-induced blindness. Bath is also the mother of community ophthalmology, which integrates public health and community medicine practices to ensure universal access to proper ophthalmological care.
Maria Telkes, a visionary Hungarian scientist, introduced the world's first thermoelectric power generator in 1947. Harnessing this groundbreaking technology and the principles of semiconductor thermoelectricity, she engineered the pioneering solar heating system for the Dover Sun House and designed the first thermoelectric refrigerator in 1953, securing more than 20 patents throughout her career.
Spanish roboticist Elena García Armada developed a flexible robotic exoskeleton tailored for children who use wheelchairs. This exoskeleton allows children to walk during muscle rehabilitation, improving their quality of life and potentially extending the life expectancy of those afflicted with degenerative neuromuscular diseases.
#27 Esther Sans Takeuchi – Batteries For Cardiac Defibrillators
Esther Sans Takeuchi is the inventor behind the compact batteries that power the majority of implantable cardiac defibrillators (ICDs). Her battery, which significantly benefits millions of heart patients globally, is just one of her 150 patented inventions.
Josephine Cochrane's invention, the mechanical dishwasher, transformed household chores forever. The device used pressurized water to clean dishes held in a rack and was initially marketed to hotels before becoming a standard home appliance.
Swiss physicist Ursula Keller pioneered the technology for commercial ultrafast lasers used in a wide array of manufacturing and medical applications. Over a 30-year career, Keller has relentlessly progressed laser science, delivering more compact, efficient, and powerful designs crucial to fields spanning from scientific research to telecommunications and consumer electronics.
During a visit to New York City in 1902, Mary Anderson observed the danger of driving in bad weather conditions. This motivated her to devise a mechanism — a lever inside the vehicle controlling a rubber blade on the windshield — designed to enhance visibility. Despite initial difficulties in marketing her invention, the windshield wiper eventually became standard equipment on Cadillac vehicles in 1922.
Nancy Johnson forever altered our summers in 1843 when she earned a patent for a hand-operated ice cream maker — an innovation still utilized today. With her device, she turned sweltering hot days into opportunities for delicious, cooling relief.
Maria Beasley significantly improved existing life raft designs, creating a version that has since saved countless lives. Her life-saving innovation played a critical role in the survival of 706 people during the tragic sinking of the Titanic in 1912.
Agnès Poulbot and co-inventor Jacques Barraud designed an "auto-regenerating" tire tread that enhances tire durability and performance, significantly reducing fuel consumption and CO2 emissions from vehicles equipped with them.
#34 Madiha Derouazi, Elodie Belnoue And Their Team – Therapeutic Cancer Vaccines
Madiha Derouazi and Elodie Belnoue, along with their team, have developed a platform for creating therapeutic cancer vaccines to aid the immune system in identifying and eradicating cancer cells in the body.
Ann Tsukamoto and her team reshaped the landscape of medical science in 1991 when they found out how to identify and isolate stem cells. Their groundbreaking findings have enabled life-saving medical procedures like bone marrow transplants for blood cancer patients.
French marine biologist Jeanne Villepreux-Power came up with an invention that significantly simplified the study of marine life: the aquarium. Her creation offered a controlled environment for observing marine species. Villepreux-Power improved her design by introducing two additional models. One featured a glass compartment within a cage for watching shallow-water dwellers, and the other consisted of a caged aquarium adjustable to different depths. Her work led her to become the first female member of the Catania Accademia in Sicily and numerous other scientific academies.
Indian American chemical engineer Sumita Mitra developed a nanomaterial-based dental filler offering superior strength, wear resistance, and aesthetic appeal. As the first to apply nanotechnology to create fillings, her invention has revolutionized dentistry. Today, dental products based on her design have been employed in billions of procedures globally.
#38 Gordana Vunjak-Novakovic – Regenerative Medicine
Gordana Vunjak-Novakovic, a Serbian engineer and academic, has broadened the horizons of regenerative medicine. She has developed a method to grow new tissue outside the body using the patient's own cells. This innovative approach presents a safer, more precise, and less invasive procedure for tissue reconstruction and holds promise for replacing damaged lung and heart tissue.
#39 Anna Stork And Andrea Sreshta – Luminaid Solar Light
In the wake of the catastrophic 2010 earthquake in Haiti, Columbia University graduate students Anna Stork and Andrea Sreshta were tasked with a disaster relief project. From a conversation with a relief worker, they identified a critical but often overlooked need in post-disaster scenarios: light. The duo designed an inflatable, waterproof, solar-powered light that can be flattened for packing, charged in 6 hours to provide 16 hours of illumination, and is equipped with a handle for easy portability.
In 1967, while analyzing quasar data from a radio telescope in Cambridge, astrophysicist Jocelyn Bell Burnell noticed fast, regular signals emanating from rapidly rotating stars. As she termed them, these pulsars earned her team the 1974 Nobel Prize in Physics — though the award was controversially bestowed only upon her male colleagues. Despite this, she brushed it off, saying that it was standard for the directors of studies, and not all the team members, to receive the accolade.
Irish inventor Jane Ní Dhulchaointigh and her team developed Sugru, the world's first moldable glue. Named after the Irish term for "play," it combines the adhesive power of super glue with the flexibility of rubber, enabling users to repair, enhance, and personalize objects — promoting a culture of "repair over discard."
Florence Nightingale, although not an academic, was revolutionary in her time for her significant contributions to the development of modern nursing. Among her achievements are the creation of the first school for nurses, her advocacy for better hygiene standards and public health, and her patient-centered approach. She also wrote "Notes on Nursing," one of the very first books for nursing, still considered a cornerstone of this profession. International Nurses Day is celebrated on her birthday (May 12th) every year.
Evelyn Berezin paved the way for word processing software like Microsoft Word and Google Docs. In 1969, she founded the Redactron Corporation, the first enterprise to manufacture and sell her computerized typewriters. Though her Data Secretary machine — about the size of a small refrigerator and without a screen — differed drastically from contemporary computers, it revolutionized secretarial work by enabling workers to edit, delete, cut, and paste text.
#44 Beulah Louise Henry – Vacuum Ice Cream Freezer
Celebrated for her 110 inventions and 49 patents, Beulah Louise Henry was a prolific American inventor. As a college student in 1912, she filed her first patent for a vacuum ice cream freezer. In 1924, she relocated to New York City to establish companies to market her numerous creations. During the 1930s and 1940s, she pivoted towards enhancing existing machinery, including typewriters.
Elizabeth Magie crafted The Landlord's Game in 1904. This innovative board game served as a critique of unchecked capitalism and was the first version of the iconic Monopoly. However, Charles Darrow claimed her game as his own and sold it to Parker Brothers in 1935. Eventually, the company tracked down Magie, but only offered her $500 for her groundbreaking invention. In 2019, Hasbro (the company that now owns the game) received criticism for releasing Ms. Monopoly, a supposedly feminist version of the game that still doesn't recognize the woman behind the original concept.
]]>
https://cloverhousegifts.com/blogs/news/21-homesteading-resources-pdfs-books-and-more2023-06-26T17:13:51-04:002023-06-26T17:13:51-04:0021 Homesteading Resources (PDFs, Books, and More)admin
The very best thing about living in our era is that the sum total of the world’s knowledge is at our fingertips, very literally! With an internet connection, you can soon have all the info you need to take a real master class on any subject.
stacked homesteading books
And while it is true that nothing beats actual lived experience and guided instruction, for go-getters having a detailed plan and answers to any puzzling questions at the ready can make all the difference. This certainly applies to homesteading.
You don’t need to have grown up in the country to make a go of it, and you don’t have to blunder your way through with the expert guidance and info contained in the following homesteading resources.
Crops and Gardens
1. Master Gardener Program Handbook, University of Idaho
If you don’t know a thing about growing any kind of plants, and especially fruits and vegetables, this is where you should start.
This huge book, developed and put out by the University of Idaho, covers absolutely everything you need to know to start growing your own food.
Growing zones, techniques, best practices, tips and tricks and adaptations for every sort of fruit and veggie you can imagine are all contained within.
It’s a lot to take in, but what you learn in this download will take you far beyond your first starter garden. Download here.
2. Planning a Garden, Clemson University
Believe it or not, the very first thing you’ll need to do when starting a garden is sit down and start planning.
Sure, anybody can till the soil a little bit, throw down some seeds, grab the water hose, and hope for the best but that sort of method is not a recipe for success.
If you want anything you plan to prosper, you’ll need to plan out your garden. You’ll need to account for things like shade and irrigation, room to work, and of course leaving plenty of room for the plants themselves to grow properly.
It’s more complicated than you might think if you’ve never done it before, but easy enough to learn but this helpful guide from Clemson University.
No matter how much room you have, or how little, there is bound to be a solution that will work for you. Link.
3. Permaculture: Organic Gardening
Permaculture is a concept that is increasingly popular for homesteaders. It means different things to different people, but typically the concept is one of growing and harvesting your fruits and vegetables in a way that is compatible with nature and the local ecosystem.
When you have specific goals in mind, it can definitely seem counterintuitive to be constrained by such concerns, but the benefits are bigger and healthier plants, and ultimately a lot less work because you are acting in harmony with nature, rather than trying to bend it to your will.
It makes things a little bit more challenging to get started, but the results are so worth it. Download here.
4. The Drip Irrigation Handbook
Everybody knows that plants need water to survive, even the most water miserly plants like cacti.
But, if you want a large scale garden or you genuinely want to grow crops on your homestead, you have to start thinking about watering differently.
We’re talking about proper irrigation here, and setting up a functional, sustainable and effective irrigation system is a skill in itself, and there’s a lot to know.
Luckily, this is another subject that people have pretty much figured out, and you can benefit from all this accumulated wisdom using this handbook.
It covers all facets of setting up and maintaining an irrigation system for various purposes and in various kinds of terrain and biomes. Link.
If you don’t have a lot of land, or even very much room you can make use of on your property, it’s easy to think that growing a highly productive garden is simply an impossibility.
That’s not true! You just need a different approach. And that approach is square foot gardening.
Square foot gardening is exactly what it sounds like, a space efficient method that breaks up your usable planting area into one foot by one foot tiles.
It will tell you what primary and secondary plants you can grow within that tile and next to adjacent tiles for minimum work and maximum return on investment.
Trust me, once you give this a try, you’ll find it hard to go back to the old way! A great approach, and not just for homesteaders pressed for space.
Livestock
6. The Best and Worst Livestock for Beginners.
Maybe it’s just me projecting, because I know taking care of animals is my favorite part of living on a homestead, but it sure seems like this is the number one activity blossoming homesteaders want to get into.
But, if you weren’t privileged to grow up on a farm or benefit from any other specialist training in animal husbandry, it can be truly bewildering.
I know more than a few homesteaders who’ve picked animals on the basis of personality or simple favoritism, and I watched their life slowly devolve into total chaos…
Picking the livestock species that is right for you based on your property, your aptitudes, and your objectives is essential.
Just because you know their names doesn’t mean you know anything meaningful about them, and this helpful video will tell you what you need to know to make an informed decision for your homestead.
So, let’s say you settled on the ever popular cattle for your homestead. Or perhaps, for whatever reason, you have chosen whichever species you chose, it is milk that you are after. It’s perennially useful, nutritious, and valuable, so it makes perfect sense.
However, as simple as it is in theory this is one of those things that is not as easy as it looks, that’s for sure.
Especially if you plan on getting milk from your animals the old fashioned way you are probably going to get frustrated if you don’t have any experience, and that’s going to make your animals agitated!
It sounds funny, but your animals must be milked effectively and in a timely fashion in order to stay healthy.
It’s hard to get the hang of it, but with this instructional video you’ll have it down in no time.
8. Cattle Care and Handling Guidelines from Beef Quality Assurance
If you want to raise cattle for beef, taking good care of them is even more important than usual if you want to ensure you get safe and high quality products for them.
Dairy cows are usually said to be more complicated to raise overall compared to cows intended for slaughter.
But, I don’t think that’s true when you consider just how much goes into every phase of raising, slaughtering and processing beef cattle.
There’s an awful lot to learn, and it’s easy to mess up at any given phase of the process if you don’t know what you’re doing.
This guide from Beef Quality Assurance will tell you everything you need to know about proper care and handling of beef cattle. Download.
Self-Sufficiency
9. The Homesteading Handbook
I know a lot of folks who dream of having their own honest to goodness homestead.
The yearn for a lifestyle there’s much closer to the way we all used to live, that is closer to the land and filled with plenty of exertion and sometimes difficult work, but work that is far more meaningful than being trapped in the concrete and glass termite mounds we call society today.
But, having known nothing else, they might see it as a dream they’ll never achieve.
It doesn’t have to be that way, and it’s hardly impossible to learn the lifestyle and the requisite skills. As always, there’s a book for that!
When you visit a link in this article that takes you to a different website where you can purchase something, I may earn a commission. Read my full disclosure for more details.
The Homesteading Handbook is on Amazon. If you don’t know a thing about it, but you know you want it, get this book and start here.
10. Off-the-Grid Water Harvesting
Water is among the very most precious resources on Earth. Everyone knows you can only live a couple of days without water, but if you live on a working homestead you’ll have a whole lot more depending on water than just yourself and your family: you’ll have plenty of crops and animals depending on it too!
If you’re very fortunate, you might have dedicated public water supplies on your property, but otherwise you’ll need a well.
Wells are the standard, but they are hardly infallible, so to provide a backup you’re going to need to learn all about off the grid water harvesting.
This will serve you well in times of trouble and also work as a reliable backup when your usual water sources go down or get compromised.
This is a great book for any homestead that wants to be truly self-sufficient. On Amazon, and free in digital format.
11. Mistakes to Avoid when Buying Land
Unless you’re lucky enough to already own land that is suitable for homesteading, the purchase of your new parcel is often the first step on the journey.
It has been said that even the longest journey begins with a single step, and that’s true, but this is one step that can do you if you get it wrong.
Buying land that is improperly zoned, unsuitable for crops or animals, can’t pass a perc test, or has clouded water, rights issues and other problems can turn your foray into homesteading into a living nightmare.
Luckily, seasoned homesteaders and land experts can teach you all about the most common mistakes when buying land and how to avoid them, and they can do it for free. You probably cannot afford to mess this up!
Food Preservation and Storage
12. Principles of Home Canning, USDA
I don’t think there’s anything more satisfying than growing your own food, prepping it, and then preserving it before putting it in your pantry for later consumption.
Just the notion that you can make your own shelf stable, safe and nutritious food that literally started from a single seed is a pretty heady feeling, I’m not going to lie!
Canning is the technology that homesteaders have relied on for ages now, but it’s a lot more complicated and far more exacting than you might think.
Getting this wrong can lead to spoilage and that can lead to severe illness aside from loss of the food you work so hard for.
The good news is that the USDA knows literally everything there is to know on the process, and has put together a truly complete and easy to understand guide for beginners. Complete guide here.
13. Tips for Dehydrating Food You’ll Want to Know
Another ancient practice for preserving food is it dehydration, and whether or not you do it with the power of the sun or an electrically powered dehydrator, or maybe even your oven, there is a lot to know.
Dehydration is a little bit funny because it is so simple in theory, but it really is tiny little mistakes that can lead to total loss.
You might not even know you’ve made a mistake until you see your fruits, vegetables or meats spoiling on the rack, and that can be seriously disheartening.
But as always, there are many homesteaders that have gone before you and struggled through these problems so you don’t have to.
This nice lady will tell you about several issues that you’ll want to know as a beginner before you start dehydrating:
14. Vegetable Storage in Root Cellars, University of Alaska
Long before electrically-powered refrigeration was ever a thing, people and cultures around the world relied on root cellars to help keep their produce pressure for longer, and to help greatly extend shelf life generally.
With the rise and interest of getting back to basics here in the US, root cellar storage of food is once again a popular topic.
But a root cellar is a lot more than a basement, and it isn’t just some dank hole in the ground you dig beside your house. The principles are simple, but the execution is surprisingly sophisticated.
However, it’s not too hard to learn with a little bit of study and depending on your needs it could be really easy to put in your own functional root cellar.
The University of Alaska is here to help with an excellent guide. Learn how.
15. Food Storage in the Home, Utah State University
So much of being a happy and prosperous homesteader is it simply in eliminating waste wherever possible.
This is especially important when it comes to food and absolutely critical if you are growing or raising most of the food that you and your family eat.
And whatever you think you know about food storage and the best practices, there’s probably a lot you don’t know, especially as it concerns storing food in bulk for a long period of time without it spoiling.
The best thing you can do is to make no assumptions whatsoever when putting together your new food storage plan.
Utah State University has assembled a truly comprehensive guide on the subject for your review, and you’d be wise to heed their advice. See it here.
16. Water Storage
Even more important than properly and it safely storing food on your homestead is the storage of water.
We’ve already touched on how important it is for people, of course, and also your plants and animals, but you’ll need water for a whole lot more than just drinking and irrigation.
If you are wise, you’ll learn how to use and reuse gray water for various purposes, and also how to store any captured or reclaimed water without it going bad.
The trick with water is that it’s extremely heavy and highly destructive, meaning that even small leaks or mistakes made when it comes to storage can turn into huge headaches and sometimes major repair bills.
Anybody can fill up a water barrel in and out of the way place, but maximizing your efficiency with water and keeping a large stockpile both safe and easily usable is a serious challenge.
You’ll have some homework to do if you want to get this right, and this water storage primer will show you how. Download here.
Calculators and Utilities
17. USDA Tools and Resources for Producers of Small and Midsize Poultry and Livestock
Whew! What a mouthful! If you are living on a homestead that is going to provide more resources than just farm-to-table meats and vegetables for your family, meaning you’re going to make your homestead a business, keeping costs under control is paramount.
Chances are good you’ll be forced to put up with USDA guidelines on a whole bunch of things.
To help take the sting out of that they’ve produced a great directory for lots of things that can help you save money and improve efficiency if you want to sell the products you raise. Link.
18-21. Livestock Calculators from Big Pond Farm Livestock Mgmt
So, you want livestock. Super. Do you know how to increase the size of your herd or flock? How long does it take for a baby cow to be born? How many males should you have to females for various species?
How long does it take for a chicken to hatch? How long does it take for a chicken to hatch under a chicken or in an incubator?
Just how much food do these animals need anyway, and under what conditions? How much room do my animals need to thrive?
All these questions are only scratching the surface, and they all need answers if your critters are going to thrive.
Luckily, you won’t have to bust out the legal pad and try to figure all this out the old-fashioned way since we have various accurate calculators that can tell you all the above precisely, quickly, and easily.
These are provided by Big Pond Farm Livestock Management. Four special calculators at the links here.
]]>
https://cloverhousegifts.com/blogs/news/everything-you-need-for-an-actually-enjoyable-beach-picnic2023-06-26T13:13:51-04:002023-06-26T13:13:52-04:00Everything You Need for an (Actually) Enjoyable Beach Picnicadmin
Wet Wipes and airtight storage containers are non-negotiable.
Welcome to Beach Week, a celebration of the best place on earth.
What feeling does the phrase "beach picnic" bring about within you? Is it that of excitement—the thrill of imagining a romantic champagne toast over an expertly prepared cheese board, while watching the sun set over the ocean? Or is it that of dread—the pain of imagining unintentionally crunchy sandwiches and sticky children shooing away various insects, as the ocean breeze blows the contents of your entire blanket into the sand?
Both feelings are valid, and both scenarios are correct: beach picnics can either be a successful delight or a horror show from which you may never recover. To help you inch a bit closer to that first scenario, we’ve gathered up a few tools and tricks to ensure beach picnic success. So plan accordingly, have fun, and do all you can to consume slightly less sand.
Make beachgoers notice with this patented sand free beach mat. The upright sides help block sand from getting all over you, your food, and your stuff. Complete your beach essentials with this cool water resistant large beach blanket.
How committed are you to keeping sand off of your towel? Because the "Surf Sheet," which dubs itself the "ultimate sand free beach blanket," is made for people dedicated to the cause. The blanket is weighted down by beanbags in each of its corners, and features a sturdy upright "sand guards" all along its perimeter, made to block any sand that might think of creeping in. It might feel a bit extreme, but sometimes extreme measures need to be taken.
Don't let the wind ruin your fun! Stakes will pierce through soil, lawn or sand and securely grip the edges and corners of your towels and blankets
Shoes and other personal belongings never really suffice in keeping down the corners of a beach towel or picnic blanket. These stakes, which clamp onto the corners of your towel and pierce into the sand, will keep your towel from flying up, inviting in sand, and tossing the contents of your cheese plate every which way.
Whether it’s the weekend, you need to catch up with your friends, or you are planning a romantic date night, why not take that bottle of wine you’ve been eyeing all week out into nature? With the Kango Mango Champagne Picnic Table, you aren’t restricted to enjoying wine and food in the confines of your home. With a surface area that is 13" (W) x 17" (L) and legs that fold underneath the base, these retractable snack tables are lightweight and simple. Easy to set-up, break-down, transport, and store, our folding snack and dinner table is a picnic accessory you won’t want to do without. With 4 divots to hold wine glasses and a hole in the surface for wine or champagne bottles and bowls to nestle in, this functional design prevents spills and optimizes space.
For those who are looking to go the romantic route, this portable folding table has slots made for holding glasses that don’t interfere much with the table’s surface area and leave your hands free. Perfect for a little snack and a little drink while doing the macarena.
Our classic table in a bag unfolds in grey-finished mahogany to a low profile for beach blanket bingo or casual dining at outdoor concerts or picnics. Easy-assembly folding table comes with a charcoal canvas carrying bag. Mahogany is certified by the Forest Stewardship Council (FSC ®)—the "gold standard" designation for wood harvested from forests that are responsibly managed, socially beneficial, environmentally appropriate and economically viable.
For those looking for something a bit larger and higher, this outdoor table comes disassembled in an easy-to-carry bag. It’s easy to dress up with a cute little table cloth or runner, too, if you’re looking for a more stylish picnic.
Crafted with durable fabric, Sunflora outdoors picnic baskets for 4 are thoughtfully designed for rugged use. You can't go wrong with eye catches classical picnic set that keeps up with the times. Comfortable & portable to carry outdoor, with multiple colors to express your style.
This is basically a Swiss Army Knife of a picnic backpack. It comes with four sets of flatware and plates, four wine glasses, a cheese knife, a wine opener, a salt and pepper shaker, and a cutting board. It’s also insulated, and comes with a detachable waterproof pouch to put ice in, or whatever. And a picnic blanket! That’s more stuff than I had at my first post-college apartment.
The picnic basket size is 16.9"×13"×7.8" Inches. Comes with cutlery service and is insulated to keep food and beverages cold.
If you’re looking to be painfully cute with your picnic, this little insulated wicker picnic basket will keep your food at the correct temperature, and comes with a dining set for two.
Perfect to pack up lunch and a few drinks for you and a buddy for a great day out. Fits 24 cans (only) or 16 lbs of ice (only).
"Yeti is my boyfriend. Yeti is a god, Yeti is the wind in my hair on the weekends…" That’s Taylor Swift singing a parody song about Yeti. And she’s right to do it! The study Yeti cooler is for the professional type of picnic host, who wants to be sure all of their food and drinks remain cold, safe, tidy, and unspoiled. It’s super study and the best option if your primary concern is insulation.
StainShield plastic is lightweight and shatter resistant making it perfect for on the go. Designed with an airtight leak-proof seal and innovative latches. All containers are BPA-free, microwave-safe for reheat only, top-rack dishwasher- and freezer-safe.
When transporting food to the beach, leak-proof is the name of the game. You don’t want to show up and have not only no edible onion dip, but also a backpack full of loose, now-inedible onion dip. Get a couple leak-proof containers for all your spillables.
Get back to the basics with this 3-pack of sandwich bags. Whether you are packing your lunch or bringing your important documents on a flight - the sandwich has got it covered. This is a great bundle if you're new to the reusable world or you just need to grow your collection!
And for your dry snacks and pre-cut veggies, etc., there’s reusable storage bags.
This airtight, leakproof, shatterproof, BPA free pitcher is as versatile as it is functional. Great for iced tea, lemonade, cold brew, sangria, or a batch of smoothies. Lightweight and airtight, this pitcher is picnic perfect. Lid twists into pitcher to keep beverages fresh and allow pitcher to be stored upright or on its side and are designed to withstand temperatures from boiling hot to ice cold. Takeya brings over 55 years of Japanese design heritage to our line of insulated, BPA free water bottles, our sustainable iced tea, fruit infusion, and cold brew pitchers, and our Pickleball bottles and equipment.
Can you sense a theme? Yes, we’re doing our best to manage spillage here, and this airtight, spill-proof pitcher will let you sneakily transport a pre-batched cocktail (or non-sneakily transport a pre-batched mocktail) of your choosing.
Keep your beverages safe and upright on the beach with these handy cup holders / coasters from Iconikal! Spiked bottom easily wedges through sand to provide a secure anchoring point for the holder. These holders nest together for easy storage and travel.
These little coaster cups are handy for holding beverages, but also for holding whatever else you don’t want to set down on the sand—sunglasses, your phone, sunscreen, your wallet, your magazine. Plus they’re cute.
A picnic is a great escape from our day-to-day and a chance to turn a meal into something more festive and memorable. The Picnic shares everything you need to plan an effortless outdoor get-together: no-fail recipes, helpful checklists, and expert advice. With variations on everyone’s favorite deviled eggs, 99 uses for a Mason jar (think cocktail shaker, firefly catcher, or cookie jar), rules for scoring lawn games, and refreshing drinks to mix up in crowd-friendly batches, let The Picnic take the stress out of your next party and leave only the fun.
The Picnic is the perfect book from which to gain inspiration for what to serve, and how to serve it, at your beach picnic. Inside you’ll find helpful tips and tricks and thoughtful recipes, plus—and maybe most worthwhile—a few handy ways to sneak in alcohol.
No shade, no problem. Take a breather from the beach volleyball or a nap at the park in the shade of this pop-up tent’s lightweight polyester shell. (On breezy days, keep the shelter in place with stakes.) Our favorite part: It’s super fun to set up! Packed away as a round disc, all you have to do is hold it away from you, give it a little toss, and boom, it snaps right open. We were gonna to say it’s magic, but we’re resisting the urge. Okay, it’s pretty magical.
One thing that can really kill a beach picnic is a lack of shelter from the blazing hot sun. A pop-up tent can provide a guaranteed sun break, which can be particularly important for little kids.
Always have shade at the beach with this portable, lightweight shelter. A unique, innovative moveable wall lets you adapt it to different sun angles. Fabric provides UPF 50+ sun protection that blocks over 97% of the sun's rays. Dimensions: 5'8" x 5'8". Weight: 12 lb. Peak height: 6'3". Packed dimensions: 43"L x 7.5"W x 7.5"H.
Or maybe you’re more of a cabana type? This luxurious option, while portable and lightweight, will still obviously require a bit more effort to transport and set up. But maybe you have a friend who owes you a favor?
This invisible-finish sunscreen provides broad spectrum UVA and UVB protection and helps prevent photoaging. Light, fluid texture. Does not leave a white cast. Enriched with hyaluronic acid and aloe vera, and formulated with mineral and organic filters. 82% naturally derived. Vegan. Made in France.
Sunscreen is a nonnegotiable at this point in human history, both for your face and your body. Typology’s sunscreens will provide you with the sun protection and hydration you need, plus they’ll provide you with the ability to say, "Oh, my sunscreen? It’s French." (Typology is French.)
Plush, fast-drying, and woven from ultra-soft, certified organic cotton. Hand-tied tassels and a sun washed rainbow palette on natural cotton backing will bring extra life to your bathroom and bathing adventures.
You need a cheerful towel to remember that life can be beautiful even if your beach picnic ends up sucking. This one from Bathing Culture is beautiful and happy.
Ideal for backyard barbecues and summer picnics, the Folding Outdoor Chair is a playful take on a nostalgic classic. Crafted from durable, fade-resistant webbing designed to hold up to the elements, and a foldable lightweight frame, these colorful chairs are simple to take with you on the go or store away during the colder months. A Schoolhouse Exclusive.
Speaking of beautiful and happy, this folding outdoor chair from Schoolhouse will make it difficult not to have a good beach day. How can you have a bad beach day when you’re sitting in this joyful little chair? Come on.
Wirelessly connect up to 2 smartphones or tablets to the speaker and take turns enjoying powerful sound. Built-in rechargeable Li-ion 7500mAH battery supports up to 20 hours of playtime and charges your device via USB port. Take Charge 4 to the beach or the pool without worrying about spills or even submersion in water.
No one single item will enhance the vibe of a beach picnic greater than the portable bluetooth speaker. Be the perfect host, or the friend who saves the day.
Leave your hands feeling smooth, soft, and clean—not dry or uncomfortable—with Wet Ones Tropical Splash Antibacterial Hand Wipes. Wet Ones kills 99.99% of germs* while wiping away dirt and messes yet leaves behind no sticky residue. Plus, our hypoallergenic hand sanitizing wipes—made with a touch of aloe—are pediatrician tested and paraben free. Designed with our signature Wet Lock Seal to help keep wipes from drying out between uses, these travel size wipes are perfect for the car, carry-on, or purse, keeping you going through your busy day.
If you learn nothing else from this shoppable list of items that might make your beach picnic more enjoyable, please learn this: wet wipes. Wet wipes, wet wipes, wet wipes. Wet wipes. Wet wipes. You need to bring wet wipes. Wet wipes.
We love the products we feature and hope you do, too. If you buy something through a link on the site, we may earn an affiliate commission.
Organize the space under your cabinets with this 2-tier under sink storage. This under the sink organizer can solve your under cabinet storage troubles and increase the utilization of limited sink space. With pull out cabinet organizer, you have room for all your stuff, and a slide-out system like this makes it easier to access everything you store under the sink
[User Friendly]: An adjustable, pull out L-shaped under sink organizers and storage that makes room for pipes and garbage disposal, ideal for use under the sink. The design works well under sink cabinets, as the top rack can be easily installed on the left or right side, giving you the flexibility to work around the plumbing and organize more efficiently
[Made to Last]: Made of high-quality steel and with four loop sticky hooks to fix the position if you do not want it to move. Under kitchen sink organizer has a stable structure and can hold up to 50 lbs. The trays are removable and washable, and the slide-out shelving adds more cabinet space, giving you a tidy home, a must-have for anyone who loves to organize
[Assembly size]: The dimensions of under bathroom sink organizer is 14.4″Lx10.6″Wx10.4″H. The distance between the two shelves is 6.88″. The bottom area can hold bottles up to 6 inches high, enough for storage in most bathrooms or kitchens. ❀Please make sure to measure before ordering.❀ The user-friendly pull out cabinet storage installs quick with no experience necessary
[Service Guarantee]: Among our products designed to create home storage and organization solutions that make your life easier, include this pull out cabinet organizer. If for some reason you’re not 100% SATISFIED, please let us know and we will help you RETURN OR REFUND. We are here for you and would love to help you! Note : Our under sink organizer has been applying for a patent for appearance, application number: 29859961
Remember, Amazon prices can change at any time.
This post contains affiliate links.
]]>
https://cloverhousegifts.com/blogs/news/affordable-stylish-amazon-decor-in-my-home2023-06-26T09:13:54-04:002023-06-26T09:13:54-04:00Affordable & Stylish Amazon Decor in My Homeadmin
Hi friend! Welcome to a brand new week! Elliott and I got back from San Miguel last night, so I’m getting back to reality now. The trip was absolutely incredible and even better with my companion. I can’t wait to share a full trip recap with you, but in the meantime, you can check out my San Miguel instagram highlight.
Also, Friday’s Amazon Summer in Color post malfunctioned and several links were wrong when the post went live. They are all corrected now, thank you for letting me know about the issue!
AMAZON HOME DECOR
Creating as stylish and inviting home doesn’t have to break the bank. Thanks to the huge selection of affordable and on trend home decor items available on Amazon, you can transform your living space without draining your wallet.
My own home is styled with several items from Amazon. In this post, I’ll take you room by room and share the budget friendly Amazon home decor finds that add warmth, personality and style to your own home.
In the photos below, I’ve tried to link everything you see, even if it’s not Amazon. If you have any questions, feel free to leave it in the comment section and I’ll be sure to respond.
]]>
https://cloverhousegifts.com/blogs/news/ciabatta-bread2023-06-26T07:13:51-04:002023-06-26T07:13:51-04:00Ciabatta Breadadmin
This homemade CiabattaBread has a chewy, golden crust and is the light and airy bread your sandwiches and soups are missing. Plain, herby, or cheesy, it’ll turn your kitchen into a traditional bakery any day of the week.
Why You’ll Love This Homemade Ciabatta Recipe
Aside from being the perfect baking project, you’ll love making ciabattas because they’re healthy, simple, and versatile.
Simple. The ingredients list is only 4 items long, keeping things nice and simple for all-level bakers. While there are quite a few steps, the steps themselves are super easy to do.
Chewy. With a perfect chewy crust and soft tender center, this bread has the texture you expect from a bakery bought ciabatta bread.
Versatile. Toast it and make your favorite sandwiches, use it to make mini pizzas, or dip it into your favorite soups. It’s good either way!
What Makes Ciabatta Bread Different?
Ciabatta is a unique kind of bread because it has a high hydration-level. This means there’s a lot more moisture in the dough, resulting in larger air pockets as it bakes despite the bread being quite thin. High-hydration breads also tend to have thin, crunchy crusts and a tender, airy crumb.
What Do You Need To Make Ciabatta Bread from Scratch?
This recipe takes ciabattas back to their roots with a short ingredient list. Check the printable recipe card at the bottom of this post for exact ingredient amounts.
For the Starter
All-Purpose Flour: You can use bread flour for this if you have some.
These tips provide extra guidance so that you can make the best ciabatta even if you’re not an experienced baker.
Let it rest. To ensure a light and airy texture, you need to follow the resting and stretching times as instructed. Depending on how the dough reacts, you might need to let it rest for longer. Don’t rush the process because you need the build up the gluten for the best loaves.
Make the crust golden. Keep the bread in the oven once it has baked for 30 minutes. Increase the oven temperature to 425°F and bake for an additional 5-10 minutes, depending on how crusty you want the loaves to be.
Add cheese. Sprinkle 1/4 cup of parmesan cheese over each risen loaf before placing them in the oven. Bake as usual for some cheesy ciabattas.
Avoid cloudy days. Working with dough is much harder when it’s cloudy or cold outside because it’s harder for the dough to relax. If possible, avoid those kinds of days when bread baking for best results.
Go whole-wheat. Make it healthier by swapping the all-purpose flour for whole-wheat flour.
Add herbs. Sprinkling 1 teaspoon of garlic powder and 2 tablespoons of dried parsley, rosemary, or basil into the dry ingredients will give your loaves a kick of flavor.
What to Serve with Ciabatta Bread
This ciabatta is perfect for sandwiches, mini pizzas, and dipping into soups.
Sandwiches. Slice it in half and spread the inside with 1/2 tablespoon of butter. Toast it and then add your favorite fillings.
Mini pizzas. This one’s perfect for the little ones. Slice it, sprinkle it with cheese, and add pepperoni. Pop it into a toaster oven at 320 for 10-12 minutes and enjoy.
If you’d like to keep things nice and easy, just slice it and spread it with butter, pesto, or your favorite spreads!
Should I Warm Ciabatta Bread?
You can, but it’s not necessary. Place it in the toaster or on a griddle over medium-low heat until nice and toasty. If it’s slightly stale, sprinkle it with 1/4-1/2 teaspoon of water and reheat it as usual. If it’s still fresh, feel free to eat it at room temperature.
How to Store Homemade Bread
There are three ways to store ciabatta:
Counter. Place the cooled bread in a paper bag and store it for up to 3 days. To keep it fresh for longer, store it in an airtight container away from the sun for up to 5 days.
Fridge. Pop it into an airtight container and refrigerate it for up to a week. Set it on the counter for 10-15 minutes before serving so it’s not cold or dense.
Freezer. Wrap the fully cooled loaves with plastic wrap and then in aluminum foil. Place them in a freezer-friendly bag or container. Freeze for up to 3 months. Thaw them overnight in the fridge or over the counter for 2-4 hours.
Starter – The night before making bread: In a medium sized mixing bowl combine flour, water and yeast. Cover with plastic wrap and let the mixture sit out overnight. It should be bubbly and risen the next day.
Dough: In the bowl of a stand mixer fitted with a hook attachment combine starter, flour, water, yeast and salt. Knead together for 10 minutes. The dough will be very sticky – this is normal.
Once the dough has been kneaded, transfer it to a well greased bowl. Cover with plastic wrap or a clean kitchen towel and let rest for 30 minutes.
Once the dough has rested, grease your hands and stretch and fold each side of the dough to the opposing side, about 4 stretches and folds.
Recover with plastic wrap and let rest for another 30 minutes.
Repeat the resting and folding process another 3 times, for a total of 2 hours of rest time and 4 stretches. After the last stretch, let the dough rest for another 30 minutes.
Once rested, turn the dough out onto a clean, lightly floured surface. Press the dough out into a rough square. This does not have to be perfect. Cut the square in half to make 2 loaves.
Grease a baking sheet with baking spray, then transfer the loaves onto the sheet, spacing them about 3" apart. Let the loaves rise for 30 minutes.
While the loaves are rising for the final time, preheat the oven to 350°F. Place a baking sheet filled with water into the bottom rack of the oven. This will create steam while the oven is preheating.
Once the dough has risen, spray well with water, then quickly place into the oven to not let too much steam escape.
Bake for 30 minutes, until golden and baked through. Once baked, remove from the oven and place onto a wire cooling rack. Allow the loaves to cool down before slicing.
Notes
Storage:
Counter. Place the cooled bread in a paper bag and store it for up to 3 days. To keep it fresh for longer, store it in an airtight container away from the sun for up to 5 days.
Fridge. Pop it into an airtight container and refrigerate it for up to a week. Set it on the counter for 10-15 minutes before serving so it’s not cold or dense.
Freezer. Wrap the fully cooled loaves with plastic wrap and then in aluminum foil. Place them in a freezer-friendly bag or container. Freeze for up to 3 months. Thaw them overnight in the fridge or over the counter for 2-4 hours.
]]>
https://cloverhousegifts.com/blogs/news/the-ten-best-wooden-play-kitchens-for-kids2023-06-25T23:13:51-04:002023-06-25T23:13:51-04:00The Ten Best Wooden Play Kitchens For Kidsadmin
Cooking is a timeless fascination for children. This type of play goes beyond gender and teaches kids loads of life skills along the way. An investment in a play kitchen is money well spent, as it can provide hours of entertainment. We've rounded up the ten best wooden play kitchens for kids to help get your little chef's imagination to work. Please note: this post contains affiliate links (including Amazon) but NO paid placements. Affiliate links allow us to earn commission on products we recommend.
BEST HANDCRAFTED WOODEN PLAY KITCHEN
The ZOE kitchen was spotted on Etsy and has AMAZING reviews. This is the kitchen most likely to get me to play for hours. I love all the hand crafted accessories and the design element makes me swoon. And the artist is willing to CUSTOMIZE this design.
The surface has enough space for them to make a 'bake' which can then be popped in the oven (with magnetic door) or set on the hob to 'cook'. Utensils and equipment can then be packed away in the handy cupboard or placed on the rack above the sink.
I'm sold on the overall sweetness of this play kitchen. The colors and design harken back to a simpler time when bakers could be found in every home. With an oven and integral microwave and plate rack, this kitchen range is made extra special with a multitude of original accessories.
Two wicker baskets provide lots of storage space for other pretend play food within the mini chef range, two wooden jars, three racks of herbs, three pretty plates, a printed gingham potholder, a printed mini chef tea towel and three cooking utensils. Pretend play food here is a delightful two-part fish with garnishes in an oval fish pan. Lastly but not least, don't forget to wash your hands at the sink with a handy soap dispenser.
I love the simplicity of the Hape Play Kitchen. It has all a little cook needs with a sink, stove, oven with window, cabinet, spice shelf, and turn able clicking knobs. Hope kitchen and grill Playset is made from durable wood, child safe materials and non-toxic water-based paint. This toy could be passed along for generations. There's nothing trendy about it.
The Sloan Play kitchen from West Elm will have a home in any home that errs on the side of form over substance. The clean simple lines will look good in every living room, though it's missing the bells and whistles of other brand. It's got a solid poplar frame, solid birch legs and engineered wood body and shelves. It features a pretend sink, oven, fridge and set of salt and pepper shakers.
The Ikea Duktig is our pick for the budget play. And if you want to save money and know how to quickly assemble Ikea furniture, this is the one for you! The Ikea kitchen is a dream come true for tiny master chefs and bakers. In this modern the cooktop lights can be switched on/off and give a realistic glow but do not get warm.
If you love Chip and Joanna Gaines and all things farmhouse, the Chelsea kitchen from Williams Sonoma is the one for you. It’s an all-in-one stove, oven and refrigerator with tons of interactive opportunities – knobs turn, doors open and the sink is watertight for real cleanup.
If you have a super small space, this Small Foot mini play kitchen is perfect. The cooking event can begin! This comprehensively equipped play kitchen, made of FSC certified wood, has everything that young chefs need for preparing a feast. Knobs on the stove and oven make realistic clicking sounds. For the price it also includes folding oven, saucepan, lid, pan, salt and pepper shakers and three small kitchen utensils. The toy measures 14.57" H x 6.5" W x 13.98" H.
If you child wants a FULL kitchen with every gadget and loads of counter space, this is the one. It's idea for a large family with a big playroom. the set up comes with an oven, microwave, refrigerator, freezer and washer doors. The burners have realistic lights and sounds and there is shelving and hanging pegs for pots, pans and accessories.
A dream play set for any growing foodie or mini chef, the Djeco Lila’s Cooker is just under 15" wide. I personally love the tea towel. Featuring a range of accessories, your tot can stir, whisk, flip, and mix their creations before adding the finishing touches with the bird-shaped salt and pepper shakers.
If features a play oven, microwave and cupboard with magnetic doors. Plus, the reverse side features a play washing machine with sound-effect buttons and storage shelves for toy food. Includes 7 kitchen accessories.
I'm now obsessed with the PairPear Coffee Maker Espresso Playset. If you love coffee, you've got to get this for your kiddo. This wooden set comes with 13 pieces and is the perfect way to get your kids started on making latte art. Thanks to it’s functional filter, coffee beans will drop into the cup!
Momtrends was not paid for this post. This post contains affiliate links.
]]>
https://cloverhousegifts.com/blogs/news/how-to-make-baked-potatoes2023-06-25T21:13:53-04:002023-06-25T21:13:54-04:00How to Make Baked Potatoesadmin
The perfect baked potato really does exist! Learn how to cook a baked potato in the oven so that it’s fluffy on the inside and crispy on the outside. It’s so easy to make, and you can finish it off with the best toppings. It’s a great side dish for any dinner!
What’s in this Baked Potato Recipe?
Cooking baked potatoes in the oven with my tried and true method is so easy. They come out with crispy, well-seasoned skin, and a fluffy, moist interior.
Potatoes: I recommend using Russet potatoes for this recipe (I’ll tell you why below). 7-9 ounce potatoes are the perfect portion size and are ideal for the exact cook times listed here.
Salt + Warm Water (Brine): Dissolve salt in warm water to soak the baked potatoes before baking. This draws out moisture to create the perfect texture.
Oil: Vegetable oil works best since we’re roasting at a high temp. This crisps up the skin on the potato as it bakes.
Seasonings: Salt and pepper work great, but you can use other seasonings you like as well. Get creative!
Pro Tip: Use any toppings or add-ins you like. Butter, sour cream, chives, and shredded cheese are classic options. Check below for even more topping ideas!
Variations on a Baked Potato
There are so many delicious ways to enjoy baked potatoes. Try some of these fan favorites:
Loaded: Add bacon bits, shredded cheese, sour cream, and chives.
Broccoli Cheddar: Melt lots of cheddar and sprinkle in some small broccoli bits (cook and cut beforehand).
Mexican: Top with shredded Mexican blend cheese, sliced jalapeños, sour cream, pico de gallo, and green onions.
Russet potatoes are the perfect option, because the skin gets crispy (not waxy) and holds up through baking, while the inside gets so soft and fluffy!
What temperature should I cook a baked potato?
I recommend setting your oven to 450°F to bake. Use a thermometer to check the center of your potato–it’s done when it reaches 205°F.
How long do you bake potatoes in the oven?
At 450°F, bake for 45-60 minutes (until the interior reaches 205°F), and then you’ll bake another 10 minutes to finish them off with the oil and seasonings. So the total time is around 1 hour.
Are baked potatoes healthy?
They are high in magnesium and potassium which are both great for heart health. They also contain about 28% of your daily fiber.
Why do you use a wire rack?
Setting them on top of a rack ensures that the hot air fully circulates around every inch of the potato. This prevents any sogginess or uneven cooking.
How to Store and Reheat
Store leftover baked potatoes in an airtight container or Ziplock bag in the refrigerator for up to 2 days.
I recommend reheating in the oven for the best results. Preheat to 350-400°F, then bake for just 15-20 minutes (or until heated through). You can also microwave to speed things up, but the skin will likely be soggy and the inside might dry out.
How to Freeze
Wrap baked potatoes in aluminum foil, then place in Ziplock bags and remove all air. Freeze for up to 6 months (but best within 3 months). Let thaw overnight in the refrigerator before reheating.
Serving Suggestions
Oven baked potatoes are my favorite side dish for almost any meal. They’re simple enough to complement any main dish, but you can also add all the intricate toppings you like to make it just right for tonight’s dinner. Here are some serving ideas!
A classic baked potato pairs perfectly with a nice restaurant-style steak and a glass of red.
Serve it along with your favorite chili recipe, and load that right on top of the potato!
Discover how to bake a perfect potato in the oven with a fluffy interior and crispy skin, and top it off with your favorite toppings for a delicious and easy-to-make side dish that complements any dinner!
Transfer potatoes to the prepared baking sheet and bake at 450°F, 45-60 minutes. If using a food thermometer, the center of the largest potato should register 205°F.
Remove potatoes from the oven and leave the oven on. Brush the tops and sides of the potatoes with oil, and sprinkle them with the seasonings (or at least salt and pepper). Place the potatoes back in the oven and bake another 10 minutes.
Vegetable oil, Favorite seasonings or seasoning blend
Transfer potatoes to a serving dish or plates. Immediately after removing the potatoes from the oven, use a sharp paring knife to cut a large X into the top of each potato (to release steam). Use paper towels to hold both ends of the potato and push together. Push firmly (but not too hard), and squeeze the potatoes (slightly harder from the lower sides of the ends of each potato). The flesh will push slightly up and out.
Top the potatoes with your favorite baked potato toppings and serve. Enjoy!
Butter, Sour Cream, Shredded Cheese, Bacon crumbles, Chives, Green Onions, Tomatoes, Cooked broccoli, Sautéed onions, Caramelized onions, Cooked Hamburger or Sausage, Chili, Goat Cheese, Sautéed mushrooms, Grilled or Rotisserie Chicken
Video
Notes
The best type of potato for baking is a Russet potato. Russets are starchy and have a high water content, which makes them ideal for baking.
Scrub the potatoes thoroughly with a brush under cold water to remove any dirt or debris. Dry them with a paper towel to remove any excess water.
Use a fork to poke several holes in the potatoes. This will allow steam to escape and prevent the potatoes from exploding in the oven.
Nutritional information does not include optional ingredients.
Storage: Store baked potatoes in an airtight container or Ziplock bag in the refrigerator for up to 2 days or in the freezer for up to 6 months.
]]>
https://cloverhousegifts.com/blogs/news/coconut-oil-chocolate-chip-cookies2023-06-25T19:13:51-04:002023-06-25T19:13:51-04:00Coconut Oil Chocolate Chip CookiesadminThese thick and chewy coconut oil chocolate chip cookies are made with coconut oil instead of butter, and the resulting recipe is absolutely delicious!
Chocolate chip cookies with no butter
If you’ve never tried coconut oil chocolate chip cookies before, you are in for a treat.
The cookies turn out soft, sweet, buttery, and impossible to resist. The recipe can absolutely hold its own against any classic chocolate chip cookies.
Bring a batch to your next party or event, and watch how fast they disappear!
Above, watch the coconut oil chocolate chip cookie recipe video
Coconut oil chocolate chip cookie ingredients
To make the super simple recipe, you will need flour, sugar, baking soda, salt, chocolate chips, coconut oil, pure vanilla extract, and milk of choice.
The recipe can be egg free, dairy free, gluten free, refined sugar free, and vegan.
Spelt flour, oat flour, and white all purpose flour all work here. I have not tried whole wheat flour in this recipe.
For low carb and keto coconut oil cookies, try these Coconut Flour Cookies or the almond flour keto chocolate chip cookies mentioned in the recipe box below.
The sugar can be coconut sugar, unrefined turbinado sugar or evaporated cane juice, brown sugar, or regular white sugar. Xylitol or granulated erythritol will most likely also work for sugar free cookies, but I haven’t tried either of these options yet.
Or for oatmeal raisin cookies, go with oat flour as your flour of choice. Replace some or all of the chocolate chips in the oatmeal cookies with raisins or even dried cranberries.
How to make coconut oil cookies
Before beginning, make sure all ingredients (especially the milk) are not cold.
The coconut oil should be liquid. If it is rock hard or has a texture similar to peanut butter, put the oil in a warm place or microwave for just a few seconds to soften it.
Preheat the oven to 325 degrees Fahrenheit, and get out a nonstick cookie sheet.
In a large mixing bowl, stir all dry ingredients to combine. Then stir in the remaining ingredients to form a cookie dough texture.
The dough will be dry at first, so keep stirring. After about a minute or two, it should magically turn into cookie dough.
Press the coconut oil cookie dough into one big ball. Now break off smaller pieces and roll them into cookie balls with your hands.
Place the balls on the baking sheet. They will not spread much, so you can press them into cookie shapes before or after baking. Or leave them as chocolate chip cookie dough balls. It is entirely your choice.
Bake for eleven minutes on the center rack of the oven. Remove from the oven and let the under-baked cookies cool completely (at least ten minutes). This is important because they will firm up considerably while cooling.
Chocolate chip cookie storage tips
The best way for how to store chocolate chip cookies is to first let them cool.
Once cooled, I like to move the cookies to a serving plate or airtight container and enclose the entire plate in a large Ziploc or close the container with a lid.
This keeps the coconut cookies soft and chewy, even without butter.
The coconut cookies are great for bringing to parties or events, because they are easily portable. Package them in a large container, with a layer of parchment paper in between each layer of cookies.
They also make great gifts!
If you are short on time, you can make the coconut cookie dough up in advance and roll it into cookie balls. Place the raw cookie dough balls in an airtight container so they are not touching each other. Add a sheet of parchment paper in between each layer, and freeze until ready to use. There is no need to thaw before cooking. Simply increase the baking time by two minutes.
The really great thing about coconut oil is that you can control whether or not to taste the coconut flavor.
If you want your cookies to not taste like coconut at all, buy refined coconut oil. It is made from dried coconut meat and is processed over high heat. This type of oil will have a neutral flavor.
Unrefined virgin coconut oil is made from fresh coconut meat and is minimally processed. It will impart a hint of tropical coconut flavor into your baked goods.
Look for coconut oil in most health food stores or regular grocery stores, including Whole Foods, Trader Joe’s, Target, Walmart, Giant, and Safeway.
Tips for baking with coconut oil
Unlike olive oil or vegetable oil, coconut oil can be in either a liquid or solid form.
It has a melting point of around 75 degrees Fahrenheit and will solidify at cooler temperatures, making it a great substitute for butter in recipes.
When baking with coconut oil, be sure that all of your other ingredients are at room temperature. Using cold milk, for example, can cause the coconut oil to become rock hard when mixed with the milk.
If you need to microwave coconut oil to liquify it, let the liquified oil sit for a few minutes before stirring it into the cookie dough. Otherwise it may melt the chocolate chips in the dough, producing a marbled effect. Then again, who could say no to marble chocolate chip cookies?
After adding the oil and forming a dough, I recommend rolling into balls and baking right away. If you refrigerate the dough, it will firm up due to the coconut oil, making it difficult to roll balls until it is brought back to room temperature.
Making the recipe with a food scale
If you prefer to make chocolate chip cookies with a food scale, using gram measurements instead of cups and tablespoons, here are the amounts to use:
120 grams flour, 100 grams sugar, 60 grams coconut oil, 15 grams milk of choice, and 40 grams chocolate chips. Also remember to add the baking soda and salt.
1cupwhite,spelt, or oat flour (for low carb, try these Keto Cookies)
1/2tspbaking soda
1/4tspsalt
1/2cupsugar,unrefined if desired
1/4cupchocolate chips
1/3cupcoconut oil
1tbspmilk of choice
1/2tsppure vanilla extract
Instructions
*Measure one cup flour, loosely packed. Then remove and discard one tablespoon. (Measure out 110 grams if you have a food scale.) Be sure to read the tips for baking with coconut oil above before making this recipe.Preheat the oven to 325 F. Stir dry ingredients in a bowl. Stir in remaining ingredients to form a dough. It will be dry, so keep stirring for at least a minute, and it will suddenly turn into a cookie dough texture. Roll into balls. Place the cookie dough balls on a cookie tray, and form into cookie shapes. Bake 11 minutes. Let the coconut oil cookies cool completely before handling, because they firm up considerably while cooling. Once fully cooled, I like to move them to a plate and enclose the entire plate inside a large ziploc. They are super soft and chewy the next day!View Nutrition Facts
]]>
https://cloverhousegifts.com/blogs/news/the-best-folding-squat-racks-for-home-gyms-according-to-professional-gym-designers2023-06-25T13:13:50-04:002023-06-25T13:13:51-04:00The Best Folding Squat Racks for Home Gyms, According to Professional Gym Designersadmin
Our editors independently select the products we recommend. We may earn a commission on items bought through our links.
Justifying the space for a full squat rack in a city apartment is a tall order. Folding squat racks are a new, unique addition to the pantheon of equipment that can transform any space into a functional gym in a few steps. “It is kind of like how the Murphy Bed is for a guest room slash office. You could be like, ‘now it’s an office, now it’s a guest room.’ With the folding racks you can now say: ‘now it’s a gym, now it’s an office,’” said Chris Howell, founder, and CEO of spxfit, a premium New York City-based luxury gym design group.
What was once a garage, guestroom, or abandoned living room corner can become a multi-faceted gym thanks to a folding rack and the myriad of accessories available.
An additional benefit beyond their compact designs is that, for the most part, folding racks are less expensive than their larger counterpart full racks, which leaves room in the budget for add-ons like J-hooks and specialty barbells. The precarious downside is that even when they’re set up correctly, folding squat racks are less stable and require extra care to make sure they’re safe to use.
What the Experts Say
Before purchasing a folding squat rack, it is extremely important that it’s set up and mounted correctly. “Make sure you get it mounted really well in the studs,” said Nathan Lewis, a doctor of physical therapy and owner of Rogue Physical Therapy. “Whether you are a good DIY-er or you have a handyman—get it done right. You can’t have it fail on you.” He also said that holding a loaded barbell in place before a lift or catching it after a release are not just the most common jobs for a rack, they also put a lot of stress on the machine, so it’s worth investing in high-quality equipment and making sure it can do the job.
After a great deal of research, Lewis chose this option from Rogue because he can’t afford to gamble with the safety of his equipment, and he finds more reputable brands more trustworthy. “The worst thing that could happen is a failure,” said Lewis. Failure is never pleasant, but in this instance it means a 400-pound barbell landing squarely on the neck, back, or shoulders, so we’d have to agree.
On top of its reliability, this rack also folds down to take up just five inches of space on the wall., and the modular design makes it easy to implement accessories. “They are modular and being able to tie into a Land-Mine press is essential and the pull-up bar is fine. It is an efficient use of space,” Lewis said.
Howell has personally used and really likes folding racks from Rogue as well. “I like Rogue because you know what you are going to get with them,” Howell said. “Rogue really hit the folding rack market hard, which was nice, especially during the pandemic.”
The Heavy: Howell mentioned Titan’s folding racks as a high-quality, reasonably-priced option in the folding squat rack space. “It is a strong off-the-shelf direct-to-consumer company,” Howell said. The X-3 is SPY’s pick because it comes in at a price point just above the budget pick but boasts multiple depth options from the wall for different spaces and has a solid 1,100-pound weight capacity.
The Hot Take: A simple, sturdy, and effective rack
PRX Profile One Folding Squat Rack with Multi-Grip Bar
The Heavy: “PRX really pioneered folding racks with their vertical push storage racks,” Howell said. The patented sliding system — as opposed to swinging out and using pins to affix the rack like the others on this list — saves the end user a few minutes with each use. “PRX is just faster. Now we are talking 0-60 between a fast car and a really fast car. It is not much of a difference, but there still is a difference. When it becomes an issue of convenience, that can make a difference in how much you use it.”
The Hot Take: If someone is looking to avoid a lengthy setup before their workout, this is their best bet
The Heavy: With ten attachment points and hundreds of possible configurations, Force’s MyRack delivers the highest number of gym setups of any of the options on this list. It’s able to handle a wide variety of exercises and accessories, and MyRack also has an impressive 2,000-lb capacity thanks to its burly 12 GA steel uprights.
The Hot Take: An extensive gym with a tiny footprint
The Heavy: This sub-$350 option can get the job done and is compatible with an impressive number of accessories.. It doesn’t have a ton of premium features or quick folding technology, but its 800-pound weight limit is great for a beginner and it folds down smaller than a large TV console.
The Hot Take: Money saver for beginners or lighter weightlifters
Frequently Asked Questions About Folding Squat Racks
How do folding squat racks work?
Two emerging technologies exist in the folding squat rack space. One is a rack that folds down from the wall vertically — think of the visual of Howell’s Murphy Bed analogy — and is patented by the company PRX which makes a wide variety of folding squat racks. The other technology, which all the other brands share more or less, swings out from the wall horizontally and is affixed by pins once deployed. The PRX vertical fold saves a few minutes on each deployment when compared to the horizontal fold.
What are the unique benefits of a folding squat rack over a traditional one?
“A folding rack is low-profile, but if you have the space you should get a stand-alone,” Lewis said. While Lewis loves his folding rack, he ultimately prefers something with a more stable spotting system than what is available in folding squat racks. “You can use four sides, you can get inside the rack, you can have support arms there. A standalone is burlier but it is a huge amount of space so for the average garage gym there is no way to do that,” he said.
How long does it take to set up a folding squat rack?
Some manufacturers will claim extremely fast setup times, as fast as 30 minutes, but setting up a folding squat rack is not a task that should be rushed. Since the attachment to the wall provides a great deal of support for the entire system, poor attachment could be catastrophic. It would be wise to budget a few hours to do the job correctly or hire a professional to install it for those who aren’t handy.
How long does it take to assemble a folding squat rack once it’s installed?
The PRX models take seconds to assemble and disassemble once properly installed. The others take a few minutes to assemble and disassemble. A good rule of thumb is adding about 15 minutes to a workout at the beginning and not to rush the process. According to Lewis, his timing is diminished by not folding it in after each use, which is not necessary depending on the space you’re working with. “It does take up less space than a typical free-standing squat rack. It swings in pretty easily but I almost never take it in.”
]]>
https://cloverhousegifts.com/blogs/news/amazon-canada-deals-save-50-on-5pcs-wall-mounted-storage-box-with-promo-code-32-on-1-5-inch-curling-iron-dual-voltage-more-offers2023-06-23T21:13:52-04:002023-06-23T21:13:52-04:00Amazon Canada Deals: Save 50% on 5Pcs Wall-Mounted Storage Box with Promo Code + 32% on 1.5 Inch Curling Iron Dual Voltage + More Offersadmin
Amazon Canada has great Deals, available now, where you can save up to 50% off.
Amazon won’t keep this deal for long since it’s such a good price! The price will probably go back up soon so hurry up if you’re interested in buying it!
Amazon offers FREE shipping for all Prime members or FREE shipping on orders over $35.
]]>
https://cloverhousegifts.com/blogs/news/learn-about-24-stainless-steel-built-in-dishwashers-with-wi-fi-connectivity2023-06-23T19:13:50-04:002023-06-23T19:13:50-04:00Learn about 24″ stainless steel built-in dishwashers with Wi-Fi connectivityadmin
When it comes to upgrading your kitchen appliances, a built-in dishwasher offers convenience, efficiency, and sleek aesthetics. In this comparison, we will explore and analyze some of the top 24″ stainless steel built-in dishwashers that not only deliver exceptional cleaning performance but also offer the convenience of Wi-Fi connectivity. Explore your options in this comparison of the Bosch 800 Series, Samsung, LG, and GE Profile dishwashers, highlighting their key features, performance, and connectivity options.
The most popular dishwashers are 24 inch and stainless steel
You can find built-in dishwashers in several finishes, and there are specialty sizes too. However, the most popular finish, by far, is stainless steel: it’s easy to clean and will match the appliances in most kitchens. Also, if you are replacing an existing dishwasher, then you’ll likely be looking for a 24″; it is the most common size. Even if you are building or renovating a kitchen, you are better off to choose this most popular size for the abundance of choice and the ease of finding a replacement in the future.
Beyond the finish and the size, when it comes to choosing the perfect dishwasherfor your kitchen, several factors should be considered. Understanding what to look for will help you make an informed decision and select a dishwasher that meets your needs and preferences. Here are some essential factors to consider when choosing a dishwasher:
Cleaning Performance: Look for a dishwasher with excellent cleaning performance that effectively removes food particles and stains. Features such as advanced wash systems, multiple spray arms, and customizable wash cycles contribute to superior cleaning results.
Capacity and Flexibility: Consider the dishwasher’s interior capacity and configuration. Look for adjustable racks, fold-down tines, and a third rack, if available, to maximize the dishwasher’s space and accommodate dishes of various sizes and shapes.
Energy Efficiency: Opting for an energy-efficient dishwasher not only reduces your carbon footprint but also saves on utility bills. Look for dishwashers with the Energy Star certification, which indicates their energy-saving capabilities.
Noise Level: Dishwashers can vary in noise levels, so if having a quiet kitchen environment is important to you, consider dishwashers with low noise ratings. Look for dishwashers with noise levels below 50 decibels (dB) for a peaceful dishwashing experience.
Durability and Build Quality: Stainless steel tubs are highly durable and resistant to stains and odors. Consider dishwashers with stainless steel interiors for their longevity and easy maintenance.
Innovative Features: Look for innovative features that enhance convenience and functionality. Examples include Wi-Fi connectivity for remote control and monitoring, sensor technology for optimized performance, and specialized wash cycles for specific items like delicate glassware or heavily soiled pots and pans.
Brand reputation and customer reviews
Most people also seek out brands with great reputations for consistent quality. This is easy to determine with a little research. Especially helpful when shopping for a major appliance, including a new dishwasher, is to read authentic customer reviews like those you’ll find on many products sold online at Best Buy. These can help you to gain insights into the dishwasher’s reliability, performance, and after-sales service. By considering these factors and understanding what to look for in a dishwasher, you can make an informed decision that aligns with your needs and preferences.
Why do you want Wi-Fi connectivity in a dishwasher
Wi-Fi connectivity in a new dishwasher can greatly enhance user experience, convenience, and efficiency in managing household chores. With Wi-Fi enabled, users can remotely control and monitor their dishwasher from their smartphone or other device. This means they could start or stop a wash cycle while out of the house, receive notifications when the cycle is complete, or even when it’s time to add more detergent or rinse aid. Additionally, smart dishwashers can potentially provide useful data on usage patterns and efficiency, allowing users to better optimize their energy and water use. Lastly, in the event of a malfunction, the dishwasher could send diagnostic information directly to a service centre, facilitating faster and more accurate repairs.
Four models worth considering for your next dishwasher
Now, let’s dive into the detailed product descriptions of four highly-rated dishwashers available at Best Buy.
The Bosch 800 Series 24″ 42dB Built-In Dishwasher is a standout dishwasher known for its remarkable cleaning performance and quiet operation. Equipped with a stainless steel tub, this dishwasher ensures durability and efficient drying. Its third rack provides extra loading capacity and organization options, allowing you to maximize the dishwasher’s space for utensils and small items. Additionally, its Wi-Fi connectivity enables you to remotely control and monitor the dishwasher using the Home Connect app, providing a seamless integration into your smart home ecosystem.
Samsung brings innovation to the forefront with the Samsung 24″ 44dB Built-In Dishwasher with Third Rack. With its stainless steel construction and sleek design, it adds a touch of elegance to your kitchen. This dishwasher features a third rack for additional storage and organization. The Wi-Fi connectivity enables you to control and monitor the dishwasher remotely using the SmartThings app, ensuring you have complete control even when you’re away from home. The DW80B6060US/AC combines efficient cleaning power with smart features to streamline your dishwashing routine.
The LG 24″ 44dB Built-In Dishwasher with Stainless Steel Tub & Third Rack is a feature-rich built-in dishwasher that combines sleek design, exceptional performance, and connectivity options. Its stainless steel tub ensures durability and efficient drying. With Wi-Fi connectivity, you can control and monitor the dishwasher remotely using the ThinQ app. The third rack provides additional space for utensils and small items, optimizing the dishwasher’s capacity. The LDPS6762S offers a range of wash cycles and features, allowing you to customize your dishwashing experience to suit your specific needs.
The GE Profile 24″ 45dB Built-In Dishwasher with Stainless Steel Tub & Third Rackis a reliable and stylish built-in dishwasher that delivers exceptional cleaning performance. Its stainless steel tub ensures durability and longevity. With Wi-Fi connectivity, you can monitor and control the dishwasher remotely using the GE Appliances Kitchen app. The third rack provides additional loading capacity, making it easy to accommodate larger utensils and dishes. The PDP715SYNFS combines efficient cleaning, smart connectivity, and a sleek design to enhance your kitchen experience.
When it comes to choosing a 24″ stainless steel built-in dishwasher with Wi-Fi connectivity, the Bosch 800 Series, Samsung, LG, and GE Profile dishwashers stand out as top contenders. Each model offers its own unique features, excellent cleaning performance, and the convenience of remote control through Wi-Fi connectivity. Consider your specific needs, such as loading capacity, quiet operation, and smart connectivity options, to determine the best dishwasher for your kitchen. Explore these dishwashersat Best Buy Canada and make an informed decision to upgrade your kitchen with a reliable and technologically advanced built-in dishwasher.
This article was drafted using AI technology and then reviewed, fact-checked, and revised by a member of our editorial team.
]]>
https://cloverhousegifts.com/blogs/news/gluten-free-chocolate-cake2023-06-23T13:13:51-04:002023-06-23T13:13:51-04:00Gluten Free Chocolate CakeadminThis easy Gluten Free Chocolate Cake recipe features simple, gluten-free, dairy-free ingredients for a rich, fudgy cake that’s so delicious, you’d never guess it’s allergy-friendly! Moist cake is topped with fluffy chocolate coconut whip frosting for a sweet dessert that’s perfect for birthdays, holiday parties, weekend get-togethers, and every occasion in between.
Have Your Cake, and Eat It, Too!
Let’s be honest for a second. Finding really good gluten-free recipes can sometimes feel impossible, but just because you or someone you know can’t eat gluten doesn’t mean we don’t all deserve to indulge every once in a while! So, instead of settling for a dry, crumbly store-bought cake, we decided to make our own with this easy gluten-free chocolate cake recipe!
Simple to prepare, it’s soft, fluffy, and absolutely bursting with decadent chocolate flavor. Topped off with a creamy coconut whip icing, it’s guaranteed to have all your guests raving! In fact, it’s so good we’re willing to bet they won’t even realize it’s gluten-free. Feel free to mix and match different toppings to make it your own. No matter how you serve it, you really can’t go wrong.
Gluten-Free Ingredients You’ll Need
This gluten free chocolate cake recipe features all the typical ingredients you would expect to see in a cake just with a twist. The main ingredients are listed below, but be sure to scroll to the recipe card at the bottom to find everything you’ll need.
For the Cake
Gluten Free Flour – We recommend using store-bought 1:1 gluten-free baking flour. Or, opt for a homemade gluten-free flour blend with xanthan gum.
Sugar – Fine raw sugar or a sugar substitute is used to sweeten the batter.
Unsweetened Cocoa Powder – Dutch cocoa powder adds the strong chocolate flavor we want in this recipe.
Non-Dairy Milk – Any milk like almond milk, oat milk, cashew milk, etc. can be used.
Almond Butter – This replaces the need for lots of butter while keeping the cake moist. Just make sure it’s creamy! Otherwise, your batter is likely to turn out lumpy.
Eggs – For easy mixing and the best results, let them come to room temperature before beginning.
Instant Coffee or Espresso – Technically optional but highly recommended, combining coffee or espresso with boiling water before adding it to the batter helps enhance the chocolate flavor. Opt for caffeine-free, if needed.
Baking Essentials – Baking powder, baking soda, salt, and vanilla extract are included to enhance the flavor and help the cake rise.
For the Chocolate Frosting
Canned Coconut Cream – Use full-fat canned coconut, not liquid coconut milk.
Maple Syrup – This is used to sweeten the frosting. Or, powdered sugar can be used, too. Just note that the consistency will be a little thicker.
Dutch-Processed Cocoa Powder – Used to infuse chocolate goodness into the frosting.
How to Make This Gluten Free Chocolate Cake Recipe
We don’t call this the best gluten-free chocolate cake for nothing! Not only does it require minimal prep time, but it comes together quickly and tastes like a dream. Just follow the steps below, and it’s ready in no time!
For the Cake
Prepare. Preheat the oven, and line or lightly oil two round cake pans or one large baking pan. If using cake pans, line them with parchment paper.
Combine the Dry Ingredients. In a large mixing bowl or the bowl of a stand mixer, whisk the dry ingredients until they’re well combined.
Add the Wet Ingredients. Add the milk, almond butter, and vanilla. Mix with an electric mixer or stand mixer until the ingredients are smooth. The batter will be dry and clumpy at this point. That’s okay! Simply, increase the speed, and continue to mix until smooth. Then, add the eggs, mixing until combined. Finally, add the boiling water with coffee or espresso, and whisk just until there are no clumps.
Note: At this point, the batter will be very thin. So, be careful not to overmix!
Bake. Pour the batter into the prepared pan or pans, and bake until a toothpick can be inserted into the center and comes out clean. Keep a close eye on the oven! The baking times will vary slightly based on the type of pan and size used.
Cool. Set the cake on a wire rack until the pan is cool enough to handle. Then, remove the cake from the pan, and let it cool on the wire rack completely.
Pro-Tip: If making a layer cake, chill the layers in the freezer before assembling the frosting. This will minimize crumbling, making the layers easier to frost. See below for layer cake instructions.
For the Frosting
Chill. Before you begin, place the coconut cream to chill in the back of the fridge to harden.
Mix. Being careful not to shake the can, remove the thickened cream at the top, and transfer it to a stand mixer or a large bowl. Discard the water portion.
Combine. Add the sweetener and vanilla, and whip on high until it is has a light and fluffy texture. Add the cocoa to the mixture, and whip again.
Frost. Once the cake has cooled, frost it, and enjoy!
How to Make a Layer Cake
If you baked your gluten free chocolate cake in a regular pan instead of a cake pan and you want to make a layer cake instead, we’ve got you covered. Here’s what to do!
If the cake is uneven, use a sharp serrated knife to level it off.
Place the bottom layer on a cake stand or a large serving plate. Spread 1 cup of the frosting evenly on top.
Gently place the second cake on top of the frosting.
Spread the remaining frosting on top, spreading it down the sides as well.
Place the cake in the fridge to chill before slicing and serving, and enjoy!
Pro-Tip: An icing spatula works best for spreading the frosting evenly. Or, a warm spatula can be used as well.
Frosting Options
We love our coconut whip frosting for cakes, brownies, cookies, and more. But, if you don’t want to make your own, no worries! Use a store-bought gluten-free vanilla icing, chocolate buttercream icing, chocolate ganache, Cool Whip, or even powdered sugar instead.
Storage Tips
If you’re planning on making this gluten free chocolate cake ahead of time, we recommend leaving it unfrosted. Wrapped tightly in plastic wrap or placed in an airtight container, it will stay fresh at room temperature for up to 2 days.
Or, wrap leftovers (preferably unfrosted) with plastic wrap, and place them in the freezer for up to 3 months. To serve, let it thaw at room temperature, frost, and enjoy!
Common Questions About Gluten-Free Chocolate Cake
Can I make gluten-free chocolate cupcakes with this recipe?
We haven’t tested it, but we think it should work! Just fill a cupcake tin ¾ of the way full, and adjust the baking time as needed. Or, make our gluten-free chocolate cupcakes instead.
How do you keep gluten free cake moist?
Fat included in the batter keeps gluten-free cake moist. In this recipe, we use almond butter to create a rich flavor, too.
Are all cake mixes gluten-free?
No, unless specifically marked as being gluten-free, most standard cake mixes are made with all-purpose flour, meaning they contain high amounts of gluten.
Can I make this recipe egg-free?
We haven’t tested it, but do not recommend replacing the eggs in this recipe. That being said, we plan on testing a vegan option soon! So stay tuned!
What causes gluten free chocolate cake to crack on top?
Using too much baking powder will cause the cake batter to rise too quickly and crack. Be sure to measure carefully!
Why did my cake sink?
The most common reasons cakes sink include underbaking and using too much baking soda.
More of Our Favorite
Gluten-Free Desserts
If you enjoy this gluten free chocolate cake, you won’t want to miss out on more of our staple gluten-free dessert recipes below!
¼ to ⅓cup maple syrup or ½ cup to ⅔ cup powdered sugar (for thicker frosting)
1 teaspoon pure vanilla extract
4 Tablespoons Dutch cocoa powder
1 to 2 Tablespoons arrowroot starch, as needed for desired thickness
Instructions
Before you begin– If making the frosting, place the canned coconut cream in the back of the fridge to chill and solidify for 12-14 hours
For the Cake
Preheat the oven to 350°F (175°C). Line or lightly oil two 8-inch round cake pans or one 9″ x 13″ pan (for one layer cake) and set it aside. Line the base of the 8-inch pans with parchment paper, skip this step if baking in a 9×13 pan.
In a large mixing bowl or bowl of a stand mixer, combine the gluten free flour, sugar, cocoa powder, baking powder, baking soda, and salt. Whisk to combine. Add the non-dairy milk, almond butter, and vanilla extract to the bowl of the dry ingredients.
With an electric mixer or stand mixer (with whisk attachment) mix on low-medium speed until ingredients are combined. The batter will be dry and clumpy.
Turn the speed up to medium and mix an additional 1 to 2 minutes until the batter is smooth.
Add the eggs and mix until combined. Add the boiling water with optional instant coffee/espresso and whisk until there are no clumps. The batter will be very thin.
Pour the batter evenly into the 2 prepared cake pans and place in the preheated oven for 22 to 25 or until a wooden toothpick comes out clean. See notes for baking times and types of pans.
Cool the cake on a wire rack until the pan is cool enough to handle. Remove the cake from the pan and place on the wire rack. If layering the cake, chill the cake layers in the freezer for about 10 to 15 minutes before assembling and frosting the cake. This will minimize crumbing and will be easier to frost.
If frosting the 9×13 cake, completely cool on a wire rack or place in the fridge to chill before frosting.
Store the frosted cake in the fridge for up to 5 days. See notes for more storage options.
Frosting
Place the canned coconut cream in the fridge for 12 to 24 hours to harden (best to do a couple days before).
Remove the canned coconut cream from the fridge, careful not to shake the can. Remove the thickened coconut cream (top portion) and place into a stand mixer bowl or mixing bowl. Discard the coconut water portion.
Add sweetener of choice and vanilla. Place the stand mixer (or handheld mixer) on high, and whip until the cream is light and fluffy.
Add the cocoa powder and whip again until combined and fluffy.
If the frosting isn’t firming up as desired, add 1 to 2 Tablespoons arrowroot starch, and whip to desired thickness.
Store in an airtight container in the fridge for 4-5 days.
Layering Cakes
If necessary, level the top of the baked cake with a sharp serrated knife.
Place the bottom cake on a cake stand or large serving plate. Spread 1 cup of frosting evenly on top. Gently place the second cake on top of the frosting.
Spread the remaining frosting on top and all around the sides using an icing spatula or warm spatula if you don’t have an icing spatula. The warm spatula helps distribute the frosting more smoothly.
Place the cake in the fridge for a couple hours before serving and slicing.
Notes
Baking Tips – Baking times vary depending on the type of pan used. 8-inch round pans and a 9×13 pans will bake faster (22 to 25 minutes). If using a gluten free flour blend that does not contain xanthan or guar gum, add 1 teaspoon xanthan gum to the dry batter before mixing with the wet ingredients. The hot water (with or without espresso powder) is to activate the cocoa powder.
Storage Tips – Unfrosted cakes are best stored in the fridge for freshness but can be left at room temperature for up to 2 days, wrapped tightly in plastic wrap or in an airtight container. If not serving/frosting cakes within 2 days, tightly wrap the cakes to prevent freezer burn, and place in the freezer for up to 3 months. It’s best to freeze a whole cake without frosting or filling, then defrost at room temperature, frost and serve as fresh.
Prep Time:10 minutes
Rest/Chill Time:if applicable 10 minutes to cool before frosting
Cook Time:22 to 30 minutes depending on type of pan
]]>
https://cloverhousegifts.com/blogs/news/9-stores-you-might-forget-to-check-out-to-find-awesome-decor-and-you-shouldn-t2023-06-23T07:13:51-04:002023-06-23T07:13:51-04:009 Stores You Might Forget To Check Out To Find Awesome Decor (And You Shouldn’t!)admin
Look, there are A LOT of places to buy home decor, especially on the internet. We even made a HUGE list a couple of years ago. Yet still there are countless times I’m reminded of a really great brand or site that maybe I sourced from a while back but then lost track of because there are new options coming at me every day. Can anyone relate?? So as Caitlin and I were talking, we thought it would be really helpful (we hope) to have a nice quick list of our solid go-to’s that we think should get more attention and others that are just under the radar. Decorating is both fun and yet can feel like an endless journey in search of what we hope will be our holy grail vase, or lamp, or sculptural object. Maybe these stores will be your answer! Or simply might be a great place to poke around and see some great options for the future. Let’s dig in with a strong first option:
I’m sure you’ve seen countless photos of rooms with chic Scandinavian decor (and furniture) all over social media! Well, chances are the Finnish Design Shop carries those pieces. EHD favorite brands like ferm Living (see that little blue jar on the right?) and Skagerak (see that pretty blonde wood tray on the left?) are carried here…so you can only imagine what else they must stock. It’s truly a one-stop shop for all things cool and Scandi. Plus unbeknownst to me, they are currently having a sale in case you are interested! But first, let’s take a look at some of the decor pieces I pulled.
Man, this whole site makes me happy so choosing only six pieces wasn’t easy. I love that graphic yet slightly colorful print. I think it could work in so many homes. That round cushion pattern is SO GOOD! Then all of the candle options are truly so unique. You could easily spend hours on this site with its extensive inventory. Enjoy and sorry if you also fall in love:)
Ok, so I know people know about H&M (understatement??) but I am constantly shocked by their incredible home section. If you want pretty and super-affordable decor, you aren’t going to get much better than this. We are, of course, lifelong Target fans but H&M is seriously giving them a run for their money. Those candlestick holders are vintage H&M home but look how cute they are!?
They are giving a West Elm/CB2 vibe that I am very into. I’ve ordered a couple of vessels from them and Christmas ornaments but I’ll probably be getting more since I’m getting super close to revealing my living room (so I sound like a broken record? I promise I’m still waiting on a custom piece!). But seriously look at this selection below:
Chic, right?!? I would happily have every one of these items in my home. Their prices are unbeatable and the style is cool without feeling like you’re trying to design “too young”. 10000/10.
Ah, the unexpected wildcard! Much like H&M you don’t automatically think “good decor” when you hear the name Nordstrom. But let me tell you there are great pieces at great prices if you are down to search a little. Hey, even Nordstrom Rack has some goodies. But let’s take a look at some of their offerings, shall we?
These are pretty cool, right? They, of course, have plenty of more traditional items but I wanted to show you some “fun” options. How cool is that candelabra or that two-toned vase? Oh, and I am super into that awesome tic-tac-toe set. Go check out what’s on the site!
Ballard has a very special place in my heart. I’ll never forget seeing a Ballard Designs catalog on our counter when I was little and completely falling in love with these white and black fabric-trimmed lampshades. I thought, “I’m going to own those one day!” Unfortunately, I waited too long and honestly don’t think they are my style anymore. It’s crazy how 25 years can do that:) But honestly, they have so many truly great pieces that are traditional in the best way. I mean look at Em’s dining set from her back patio reveal!
Caitlin is also a big fan and got their outdoor curtain for her balcony reveal! But they have way more than just outdoor items (which they are currently having a sale on) so let’s look at the interior products I spotted.
See?! Traditional and modern all at the same time. I mean that leather back cushion is beautiful (and on sale), that gallery wall system is so pretty and takes away the frustration of trying to DIY something similar, I love that oversized firewood holder, and well everything else. Basically, DON’T SLEEP ON BALLARD DESIGNS!
Ok so we haven’t forgotten about one of our absolute favorite retailers, Jayson Home, but we definitely want to make sure everyone knows about them and thinks about them every time they are decorating their house or needs a gift. They are another one-stop shop! Emily and the team have used them for years (remember Em’s vintage chaise lounge?? Yes, they have vintage too!). Also, see that very cool vase ontop of the dresser in the photo above? Ya, they carry that too:)
I actually reached out to them for my friend’s bedroom because their products are so so good and there were so many things both my friend and I wanted for the room. We didn’t want to be greedy so we asked for that sweet glass matchstickcloche (I have the tall one and it’s stunning), that paper mache shell tray, and two of their alphabet vintage brass coasters with each of their initials. They really were the perfect unique touches this room was asking for. But let’s check out some of their other pieces (which doesn’t even scratch the surface!)
See?! Everything is hand curated and you can tell. I love everything. How cute would love rattan shelves be in a vintage-style home?? Or those beautifully wrapped rocks as an extremely cool gift? I would happily have one of those in my home. What I also love about Jayson Home is that they have a wide selection but not so wide that you are too overwhelmed. This is a must-bookmark.
Ah, another incredible shop that’s definitely a luxury brand, helping to preserve Africa’s artisanal heritage. 54Kibo offers stunning pieces that will bring so much depth and beauty to your home. Look at the examples above! Julie used one of their wall mirrors in an MCM eclectic living room she designed and it’s so cool! Then in Emily’s old LA living room, that black drink table is a show stopper. The angles and cutouts make it such a unique piece that brought more dimension into the room. Let’s see some other pieces, ya?
See how textured and joyful everything is?? And that turquoise mirror is all BEADED! This is truly a special shop that we suggest you check out frequently:)
When you hear the online shop Lumens you think of lighting, right? Well, you aren’t wrong but you are also missing out on so much more! Now, Lumens does sell incredible lighting with a lot of intention behind them. Remember my Paris post and that incredible department store I went into with all the lights I loved? Well, they sell ALL of them! BUT, they also sell furniture and decor! Say it with me – a real one-stop shop. Most everything leans pretty modern but don’t run if “modern” isn’t your style! They have so much and a little style contrast makes for interesting homes if we do say so ourselves. Enjoy!
If you’ve been with us for a while then you’ve likely heard of Bloomist. They are a beautiful online shop that sells pretty plants and decor pieces. Like really pretty decor pieces. They did go out of business for a hot second but are back and boy are we happy about it! It’s a very organic natural style with a little bit of edge at times which I love. Come see:
Right? I could look at their site all day because it’s so calming and hopefully you can see that from these photos. That black candle is actually a 2-for-1! When the scented candle burns out, you can then flip it over and place a taper candle in it. What a genius way to get a life-long use out of something. Then that shell pot with a wood base is so unbelievably beautiful it almost hurts. You just have to go to the site and see it all!
We hope Burke Decor is on your radar and if it isn’t, it should be. They really have EVERYTHING. Since this post is all about decor (and not things like furniture) we’ll focus on that. But if you do want interesting, beautiful furniture you should take a look. They give you options! However, look how cute this decor is…
A little modern, a little contemporary, a little natural. See? Everything! If you’ve never checked them out it’s a definite must:)
Ok! That’s it for today. Hope it was helpful and you were either reminded of or introduced to a new brand (or both!). Have a great Friday and we’ll see you all tomorrow.
]]>
https://cloverhousegifts.com/blogs/news/best-in-show-award-winning-gear-from-outdoor-retailer-summer-20232023-06-22T13:13:51-04:002023-06-22T13:13:51-04:00Best in Show: Award-Winning Gear From Outdoor Retailer Summer 2023admin
The Salt Palace Convention Center was bustling this week with brands, reps, outdoor organizations, retail buyers, and journalists. No doubt, the 2023 Outdoor Retailer Summer Market was smaller than in years past. But the gear on display didn’t disappoint.
There were smokeless stoves, wool-down insulated sleeping bags, camping grills, glamping tents, heavy metal bike racks, futuristic travel trailers, inflatable globe lights, stoves, batteries, solar panels, watches, knives, and everything in between. Many of the big-name heavy hitters whose extravagant booths used to dominate the OR floor were not present. There was no sign of Patagonia, The North Face, Mountain Hardwear, Marmot, or REI.
So, smaller brands got a lot more attention from retail buyers and media alike.
As per usual, the GearJunkie team stormed the floor, zigzagging our way through aisle after aisle, booth after booth, taking careful notes on interesting new outdoor items along the way. There was a lot to take in. After 2 full days on the tradeshow floor, we’ve narrowed down our list, distilling it to contain only the coolest, most exciting products we came across.
So, without further ado, here it is — GearJunkie’s Best in Show from the Outdoor Retailer Summer Market 2023.
Lightship’s futuristic-looking travel trailer is fully electric-powered, minimalist, aerodynamic, collapsable, and downright sexy. The battery Lightship built into the trailer is the same size as that of a Tesla. It powers a drive assist on the axle that propels the trailer as you drive — extending your range whether you’re towing it with an electric or a standard vehicle.
It’s also more aerodynamic than any other RV currently on the market. Its shape is sleek, with a tapered rear, and telescoping hard-sided walls that compress the trailer to almost half its standing height when you’re on the road. Lightship says that makes its trailer three times more aerodynamic than standard models. This dramatically reduces the energy (whether it’s gas- or battery-powered) required to move it around.
Of course, the Lightship also has solar panels. And they aren’t just bolted on, either. These solar panels are cleanly integrated across the entire roof of the Lightship and even on its awnings. Ditch the loud gas generator and enjoy the sounds of nature while your trailer provides up to 3kW of solar power, storing up to 80kWh of energy onboard.
Inside, the Lightship is every bit as sleek and modern as its outside. The designers removed a lot of the clutter you find in standard trailers — cabinets, shelves, etc. Instead, it added more panoramic windows, smart appliances, flexible storage and sleeping areas, and a “spa bathroom,” all of which are built using sustainable materials.
There’s a lot to the Lightship. It’s a work of outdoor lifestyle art and a leap forward in trailer and RV tech. It clearly stuck out as a GearJunkie Best in Show winner. Production is expected to start in late 2024 at a brand-new facility in Colorado. Models start at $125,000. See the Lightship website for preorder options.
Most rechargeable lithium-ion batteries use liquid electrolytes that are flammable and prone to combusting if they overheat or are damaged. They’re heavy. They’re bulky. And they never seem to last as long as you need them to. Yoshino aims to change all of that with its proprietary solid-state battery technology.
Yoshino’s batteries use a solid electrolyte, which makes them more efficient than their liquid-state alternatives. Because they’re higher density, Yoshino can pack more power into a smaller, lighter package — about half the weight of most traditional rechargeable batteries. Solid-state batteries also provide twice the power per pound, according to the brand. That could be a big deal with large, high-volume batteries.
Yoshino sells power stations and batteries in different sizes to power your campsite, RV, car, or home. Currently, the brand offers four models of power stations that range in size and output. It hopes that this innovation in battery tech will kick off a new era in power storage and portability, much like liquid lithium-ion batteries did when they hit the scene.
By all accounts, that goal is well within reach. Yoshino’s batteries are a big step forward. Check out its website to peruse its lineup of solid-state batteries.
Foldable camp grills have been a thing for a while now. Some burn wood, some burn charcoal, and some are even gas-powered. But we hadn’t seen one that was designed to use all three — until we came across the Skotti Grill.
The grill itself is only a handful of pieces and weighs just 6.6 pounds. It packs easily into an included bag and sets up in less than a minute (if you know what you’re doing). It’s made with high-quality and durable stainless steel that’s dishwasher-friendly. And Skotti offers a host of accessories you can buy separately, like a lid that turns it into an oven, small and large “boks” for food storage or stovetop-style cooking, and more.
According to Skotti, this is the most widely sold outdoor camp grill in the EU. And we can see why. It allows you to cook anything, anywhere, with almost any fuel you have on hand.
E-bikes are heavy. That not only makes them difficult to load onto a bike rack but also somewhat dangerous. Many mountain bike racks aren’t engineered to hold that kind of weight. And if you hit a bump hard enough, going fast enough, you might lose your rack and everything attached to it.
Enter RadGnarRack. This hitch-mounted bike rack is made with heavy-duty steel and materials used in construction. One side of the rack lowers, creating a ramp to roll your bike onto it. The bike crank slides into a lock, which holds the bike in place. It’s slick and super easy to load, even with heavy bikes. No more lifting heavy bikes to lock them onto your car, and no more anxiety about your bike being too heavy for its rack.
There are a lot of bike racks out there that can carry e-bikes, and even some that offer solutions for lifting heavy bikes. But the RadGnaRack is both simple and — apparently — burly.
On the RadGnaRack website, you can order one of the brand’s standard racks or have one custom-built to your specifications.
PFAS is being phased out by many brands as states like California and New York implement laws to eliminate it from consumer goods. Rightly so — the chemical used in Durable Water Repellent (DWR) is toxic to humans at extremely low levels. It’s also among a class of chemicals known as “forever chemicals” because, unfortunately, they last forever.
Nikwax has come up with an alternative solution, though. The brand’s new Direct.Dry is an industrial PFAS-free DWR coating for synthetic outdoor fabrics. It has the highest achievable spray rating test score and high wash durability, meaning you can wash Nikwax Direct.Dry garments many times before they start to lose their waterproofing.
Nikwax has been making PFAS-free waterproof coatings for decades, but Direct.Dry is the brand’s first factory-applied PFAS-free DWR coating. The hope is that this innovation will enable more brands to easily shift away from toxic PFAS DWR coatings, and toward a more sustainable, equally effective, waterproofing option.
The Grand Trunk Compass 360° Ultra Compact Stool packs down to just 7.5 inches and weighs a mere 1.2 pounds. It sets up in the blink of an eye and allows for 360 degrees of maximum swiveling mobility. The uses for this stool are endless — from campfire hangouts to mountaintop picnics, and field-dressing animals.
While we do love a good camp chair, a stool like this allows you to sit while working on projects like tending fires, cooking, or hunting in a blind. And yes, there are lots of stools out there. But the design of the Compass 360° Ultra Compact Stool won us over, especially for its exceptional packability.
It’s a high-utility piece of gear that comes in a tiny (and notably lightweight) package. Currently, Grand Trunk offers a Compass 360° Stool, but this ultra-compact version will be available in spring 2024.
]]>
https://cloverhousegifts.com/blogs/news/kitchen-of-the-week-colorful-and-custom-with-a-tight-budget-and-even-tighter-footprint2023-06-22T07:13:52-04:002023-06-22T07:13:52-04:00Kitchen of the Week: Colorful and Custom—With a Tight Budget and Even Tighter Footprintadmin
As ardent fans of Shaker-esque kitchens for their simplicity and timelessness, we’ve another favorite specialist to add to our list: Olive & Barr, UK-based makers of bespoke—and, they say, affordable—cook spaces. Today we’re stopping into a petite kitchen in an 1890s terrace house in Stanstead Abbots, Hertfordshire, redone with Olive & Barr fittings and playful color, a request of the homeowner, Temi.
There were practical constraints to consider, starting with the kitchen’s small footprint. But: “Temi had a clear vision of what she wanted to achieve, on a tight budget,” says Olive & Barr founder Al Bruce. “She wasn’t afraid to use a bold color when it came to her cabinetry.” Join us for a look at the finished space.
Photography courtesy of Olive & Barr.
Above: “Beforehand, the kitchen was chaotic, dark, and a small and unusable space,” says Al. “The layout felt disorganized and wasn’t aesthetically pleasing. The existing kitchen needed to be ripped out, and the walls needed plastering.”
For the transformation, the team worked to create a high-end, bespoke look on a minimal budget.
“Although it’s compact, Temi wanted a kitchen that had a freestanding look. She worked closely with our designers, and together they created a kitchen concentrating on space between the cabinets, giving the freestanding look she wanted with all the practicalities and storage she needed.” At Temi’s request, the handmade cabinets got a wash of bold blue-green; she also opted to tighten the usual 1000 mm (39-inch) space between island and counter to 880 millimeters (about 35 inches). Temi chronicled the process on her Instagram, @ahousemadeofbrass.
Above: A custom plate rack and an arched backsplash, Temi’s idea, add to the luxe look. (For more, see Trend Alert: Sculptural Marble Backsplashes—though, in keeping with her budget, Temi’s worktops and backsplash are actually Ventatino quartz.)
Above: A well-worn breakfast table adds to the freestanding look.
Above: The range cooker—tucked into a nook—was kept in place, as was the parquet flooring.
Above: The team designed a custom freestanding larder to fill the corner beside the range.
Above: Inside, there are specially designed spaces for spices and dry goods as well as bulky countertop appliances.
Above: The kitchen is also equipped with an induction cooktop. A sliding glass door leads into the WC.
Above: And a glimpse in the WC, with farmhouse sink and brass taps.


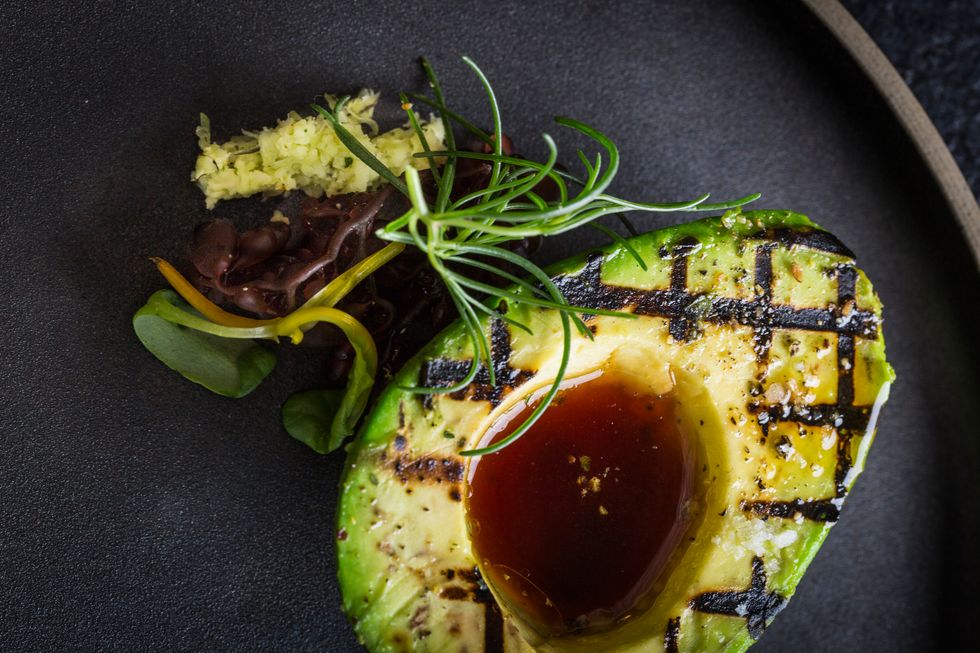


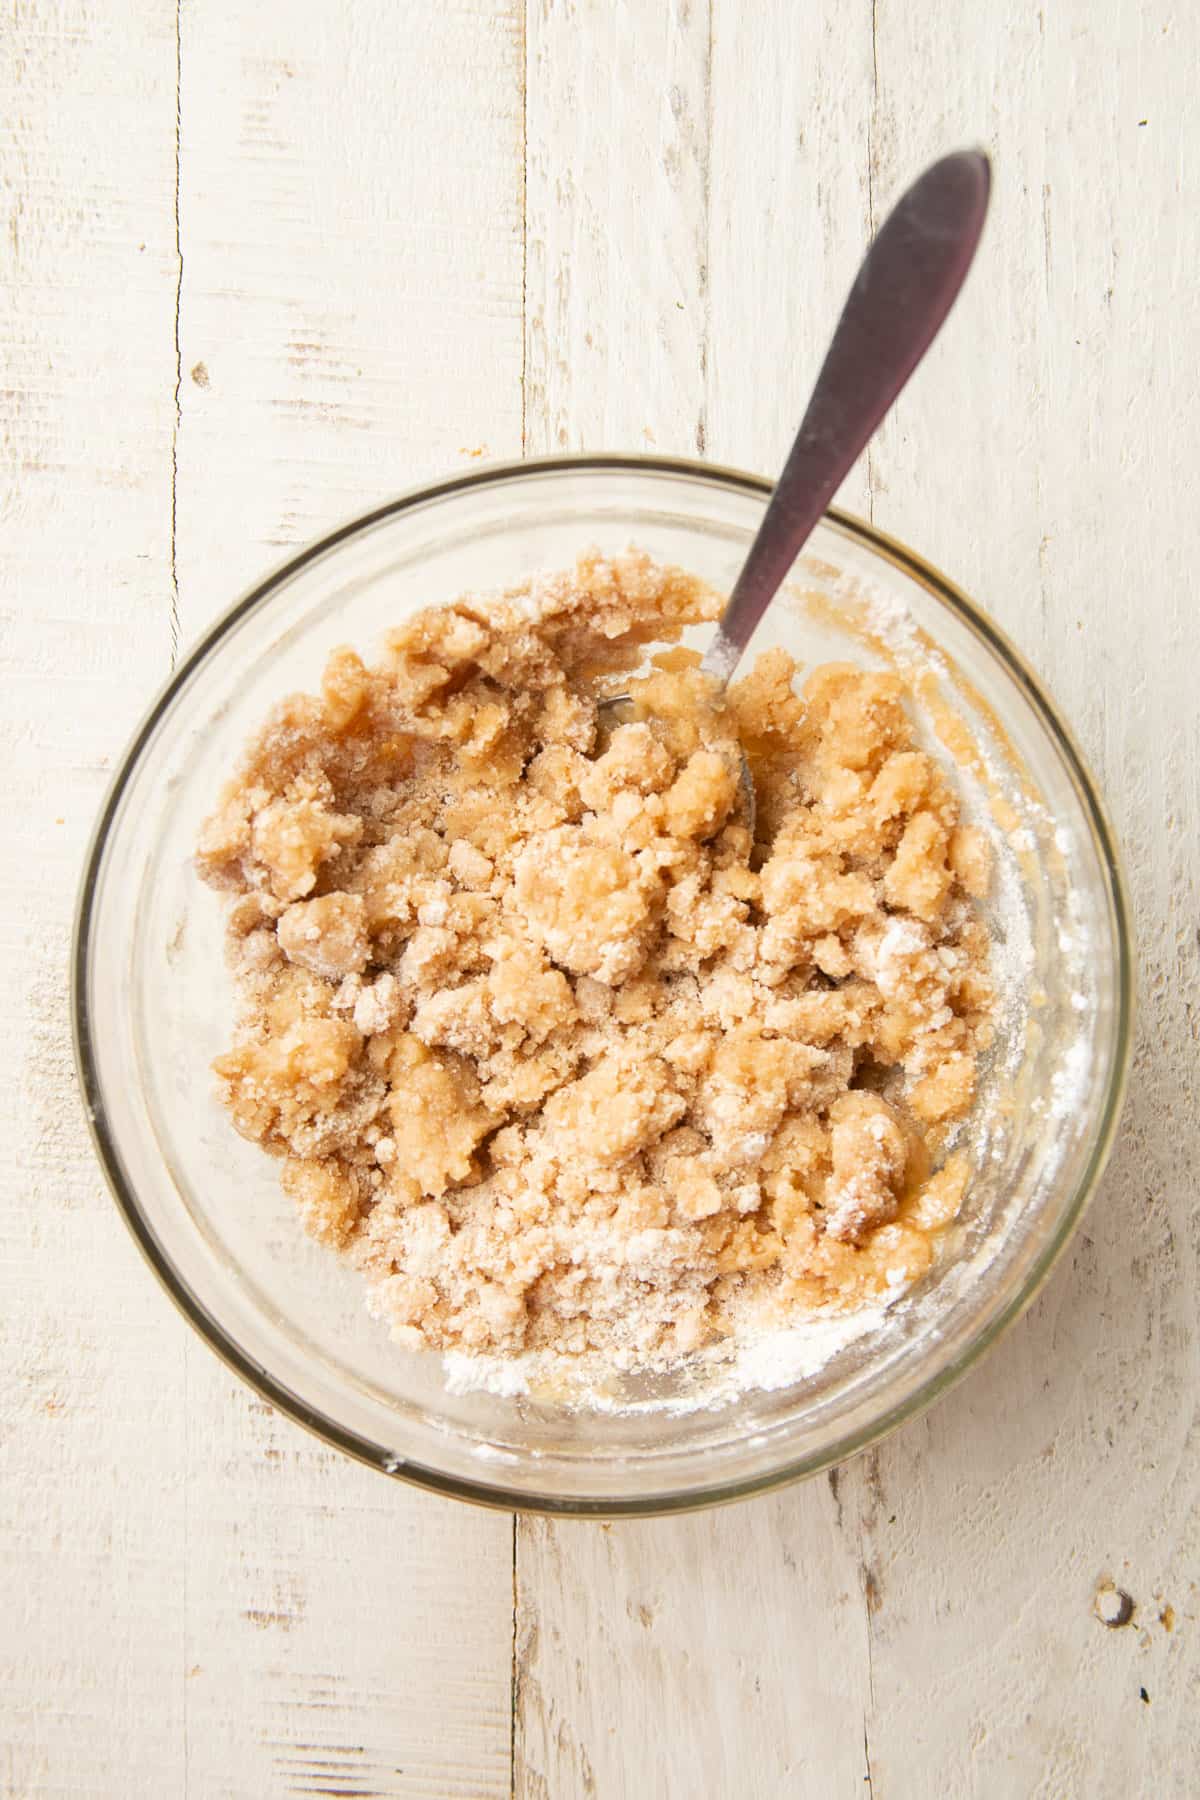


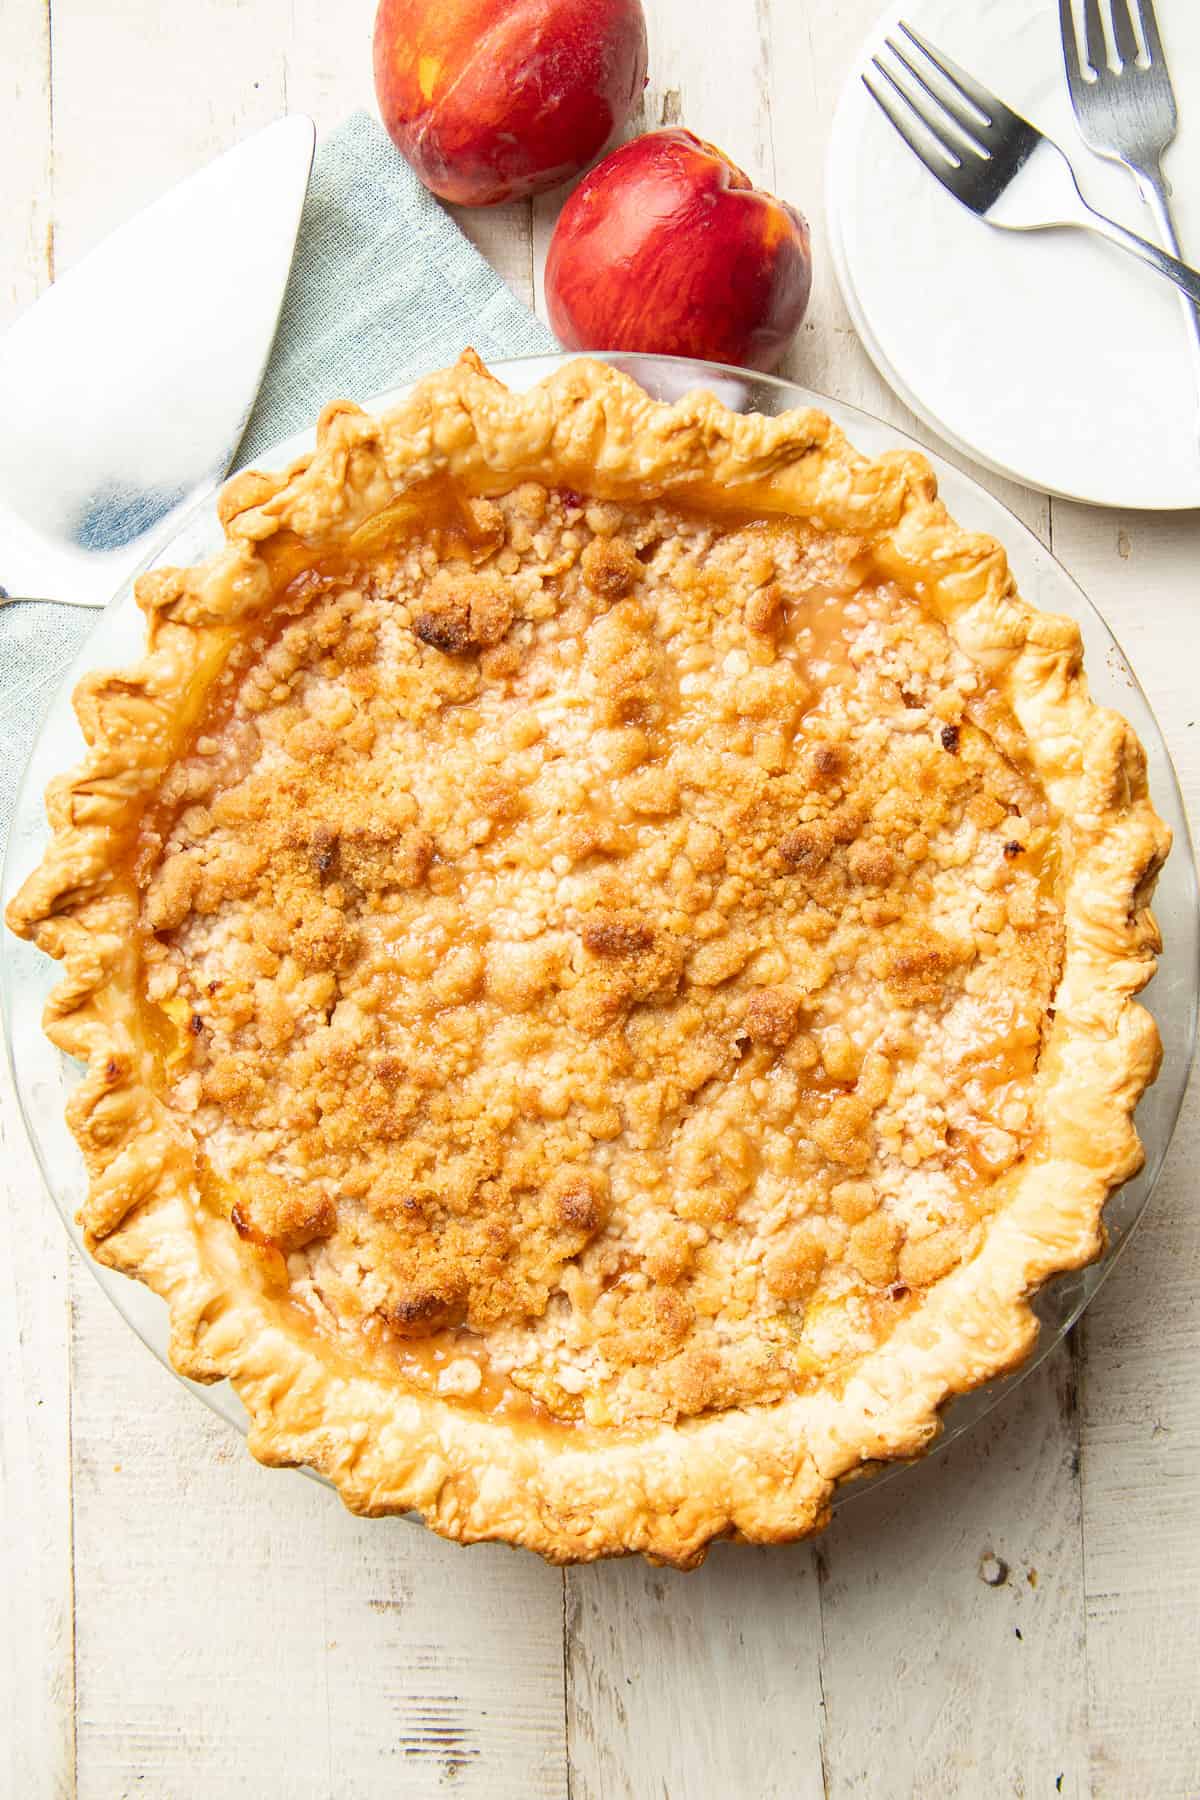


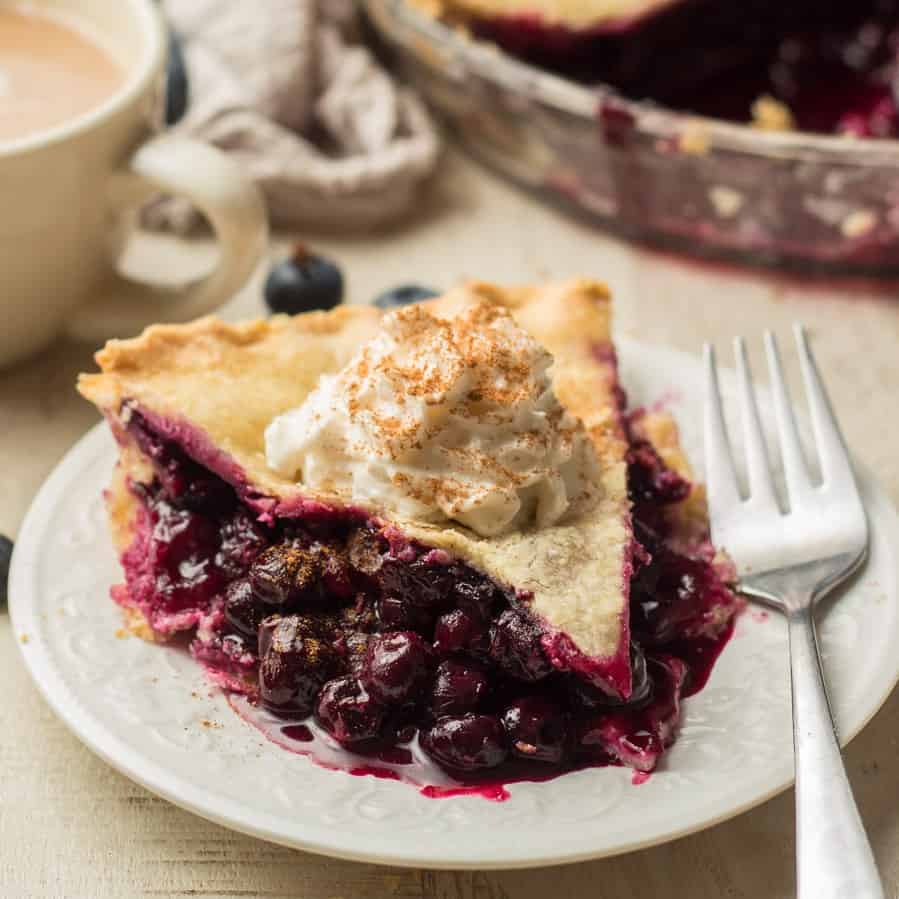


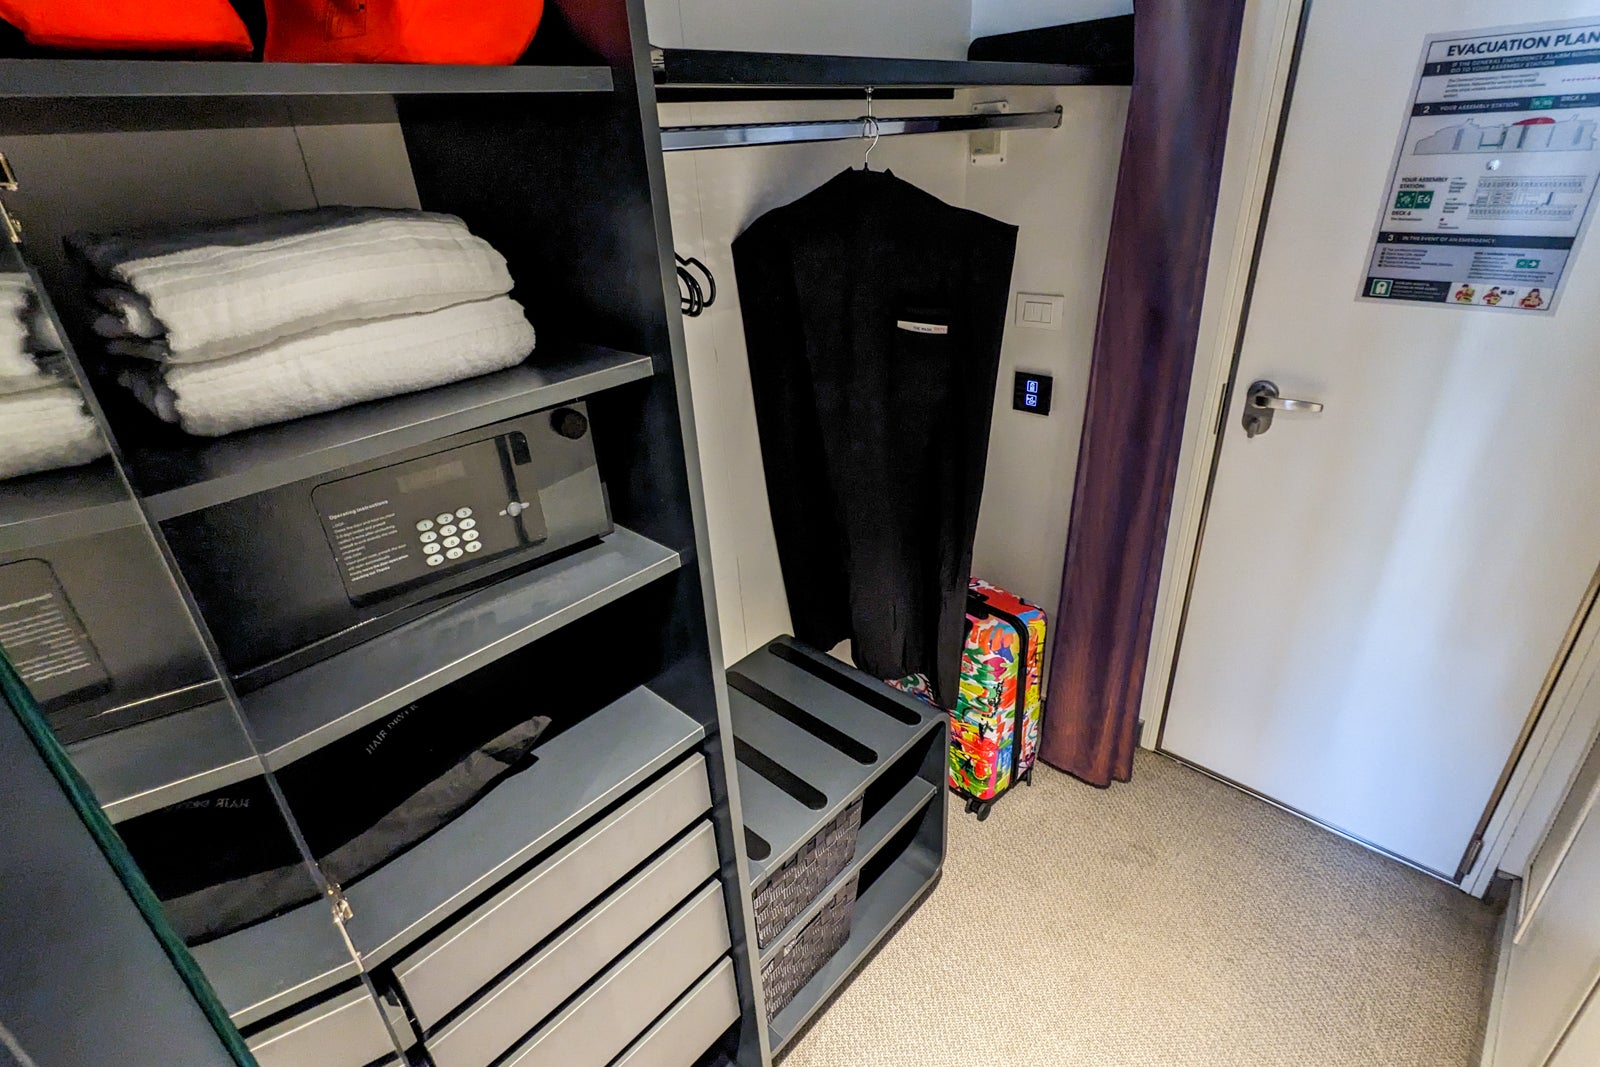


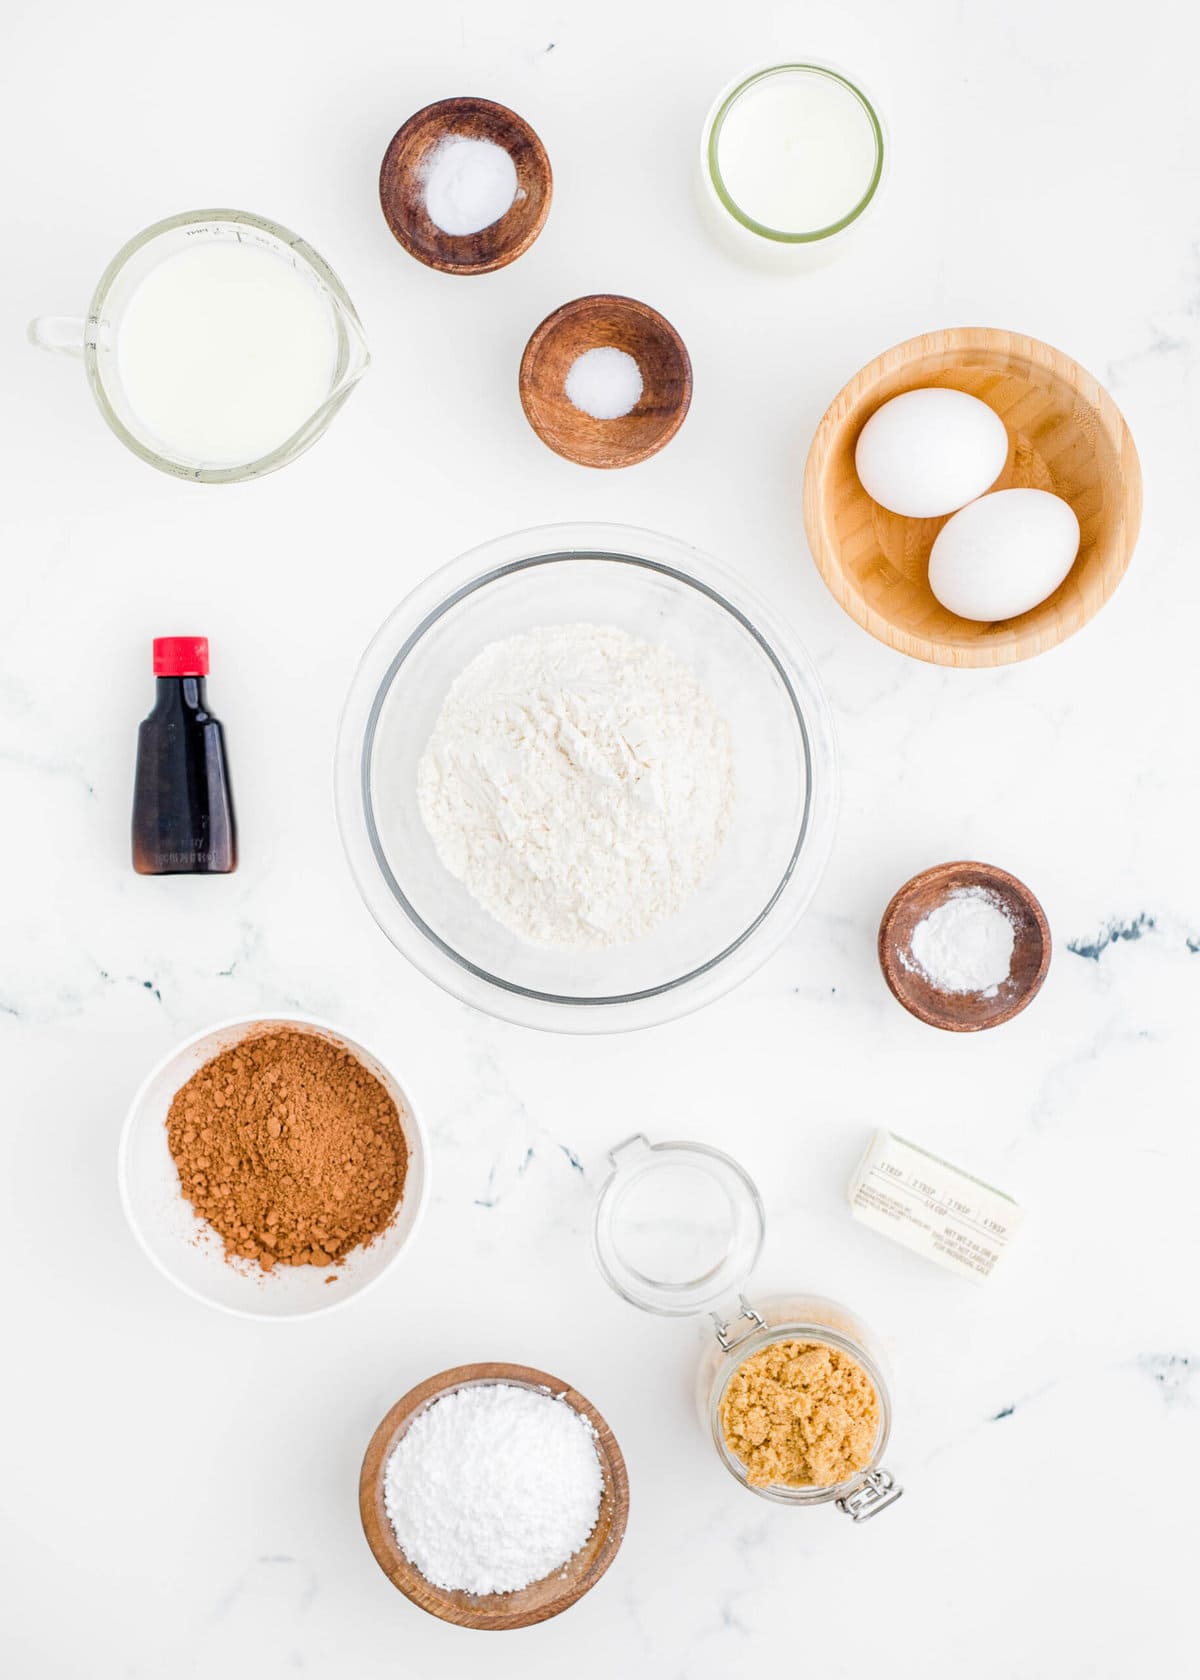

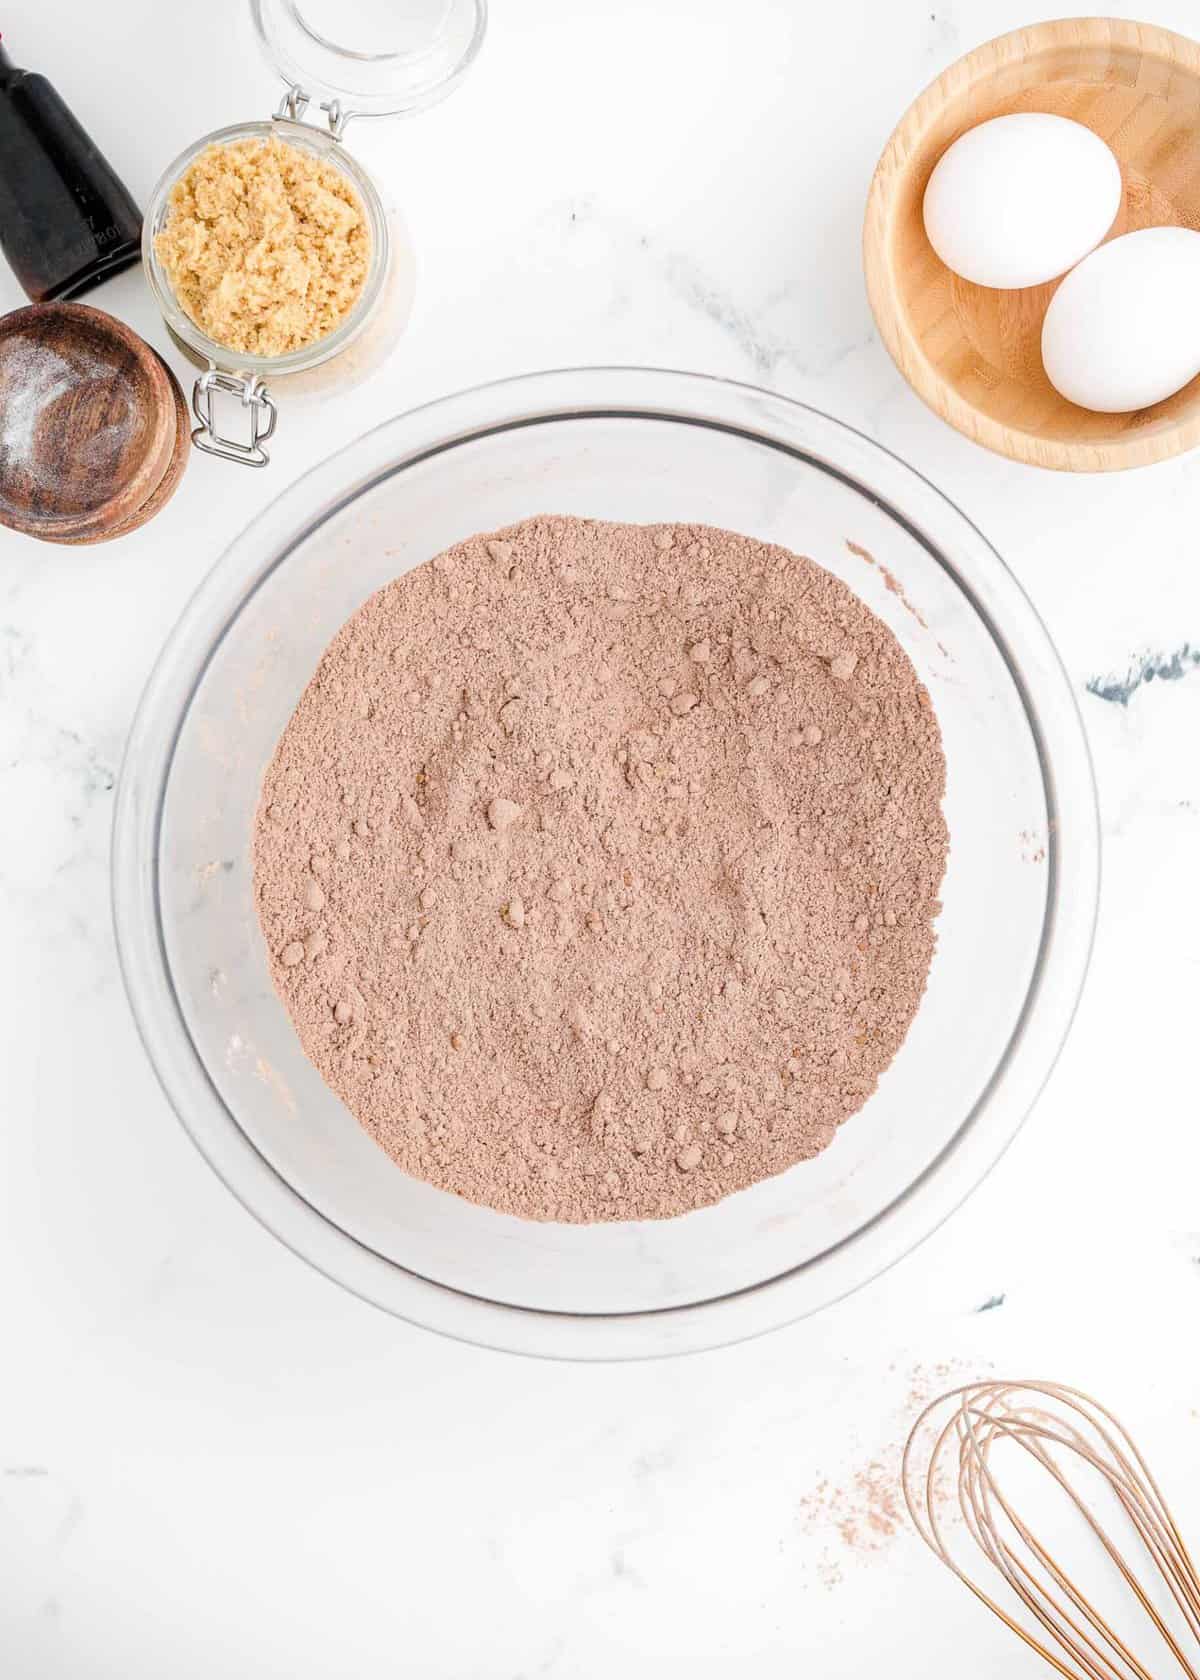

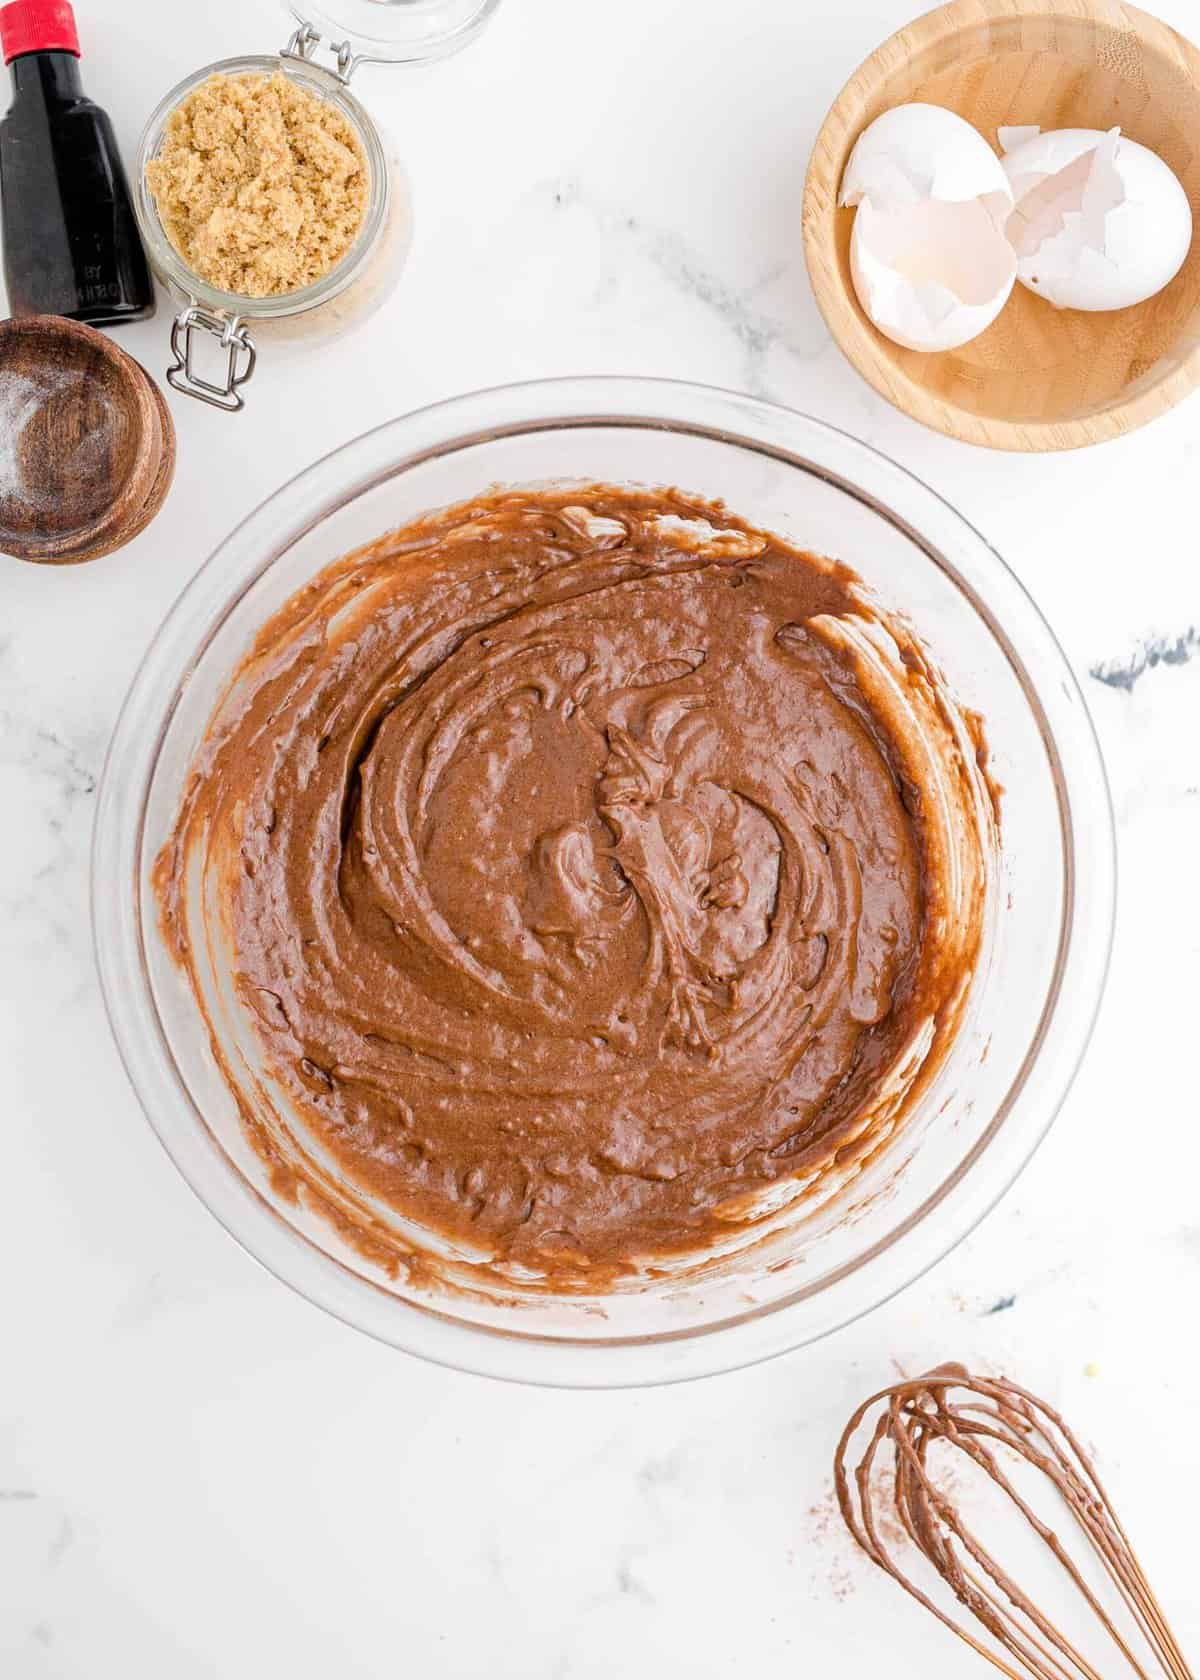

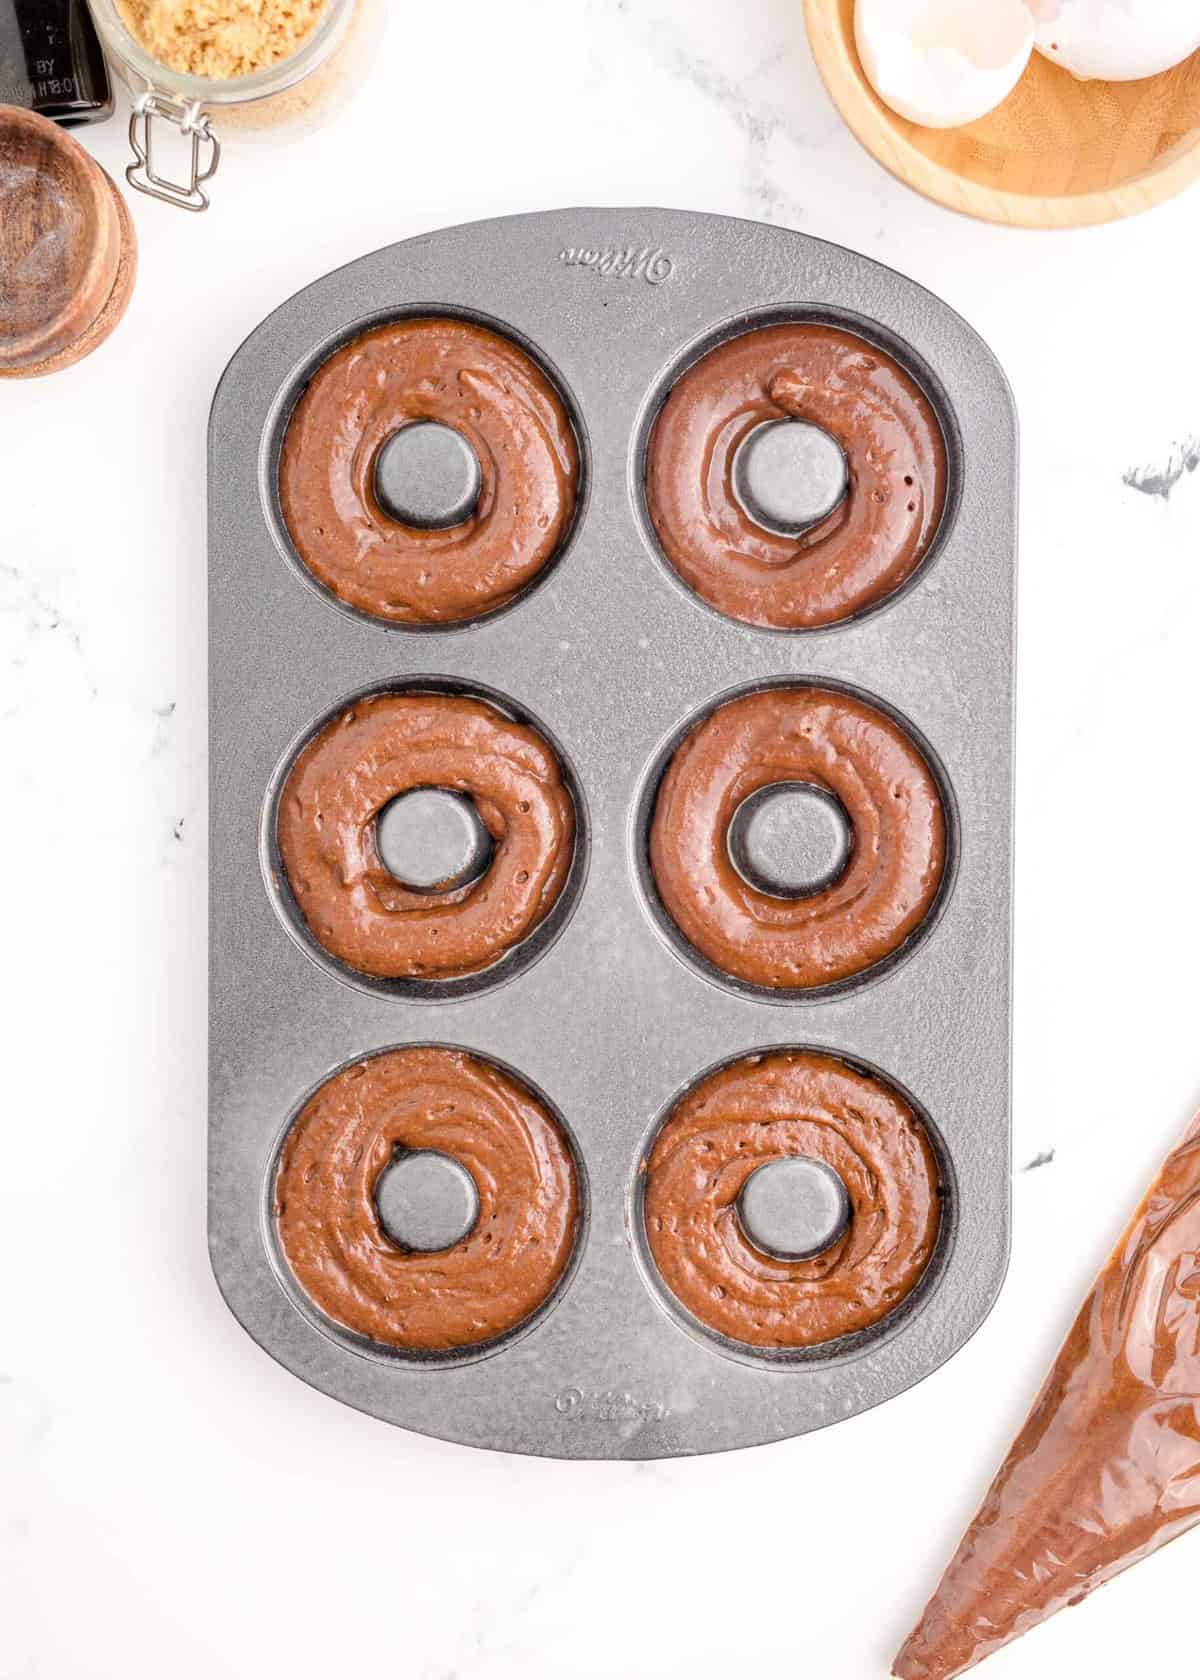


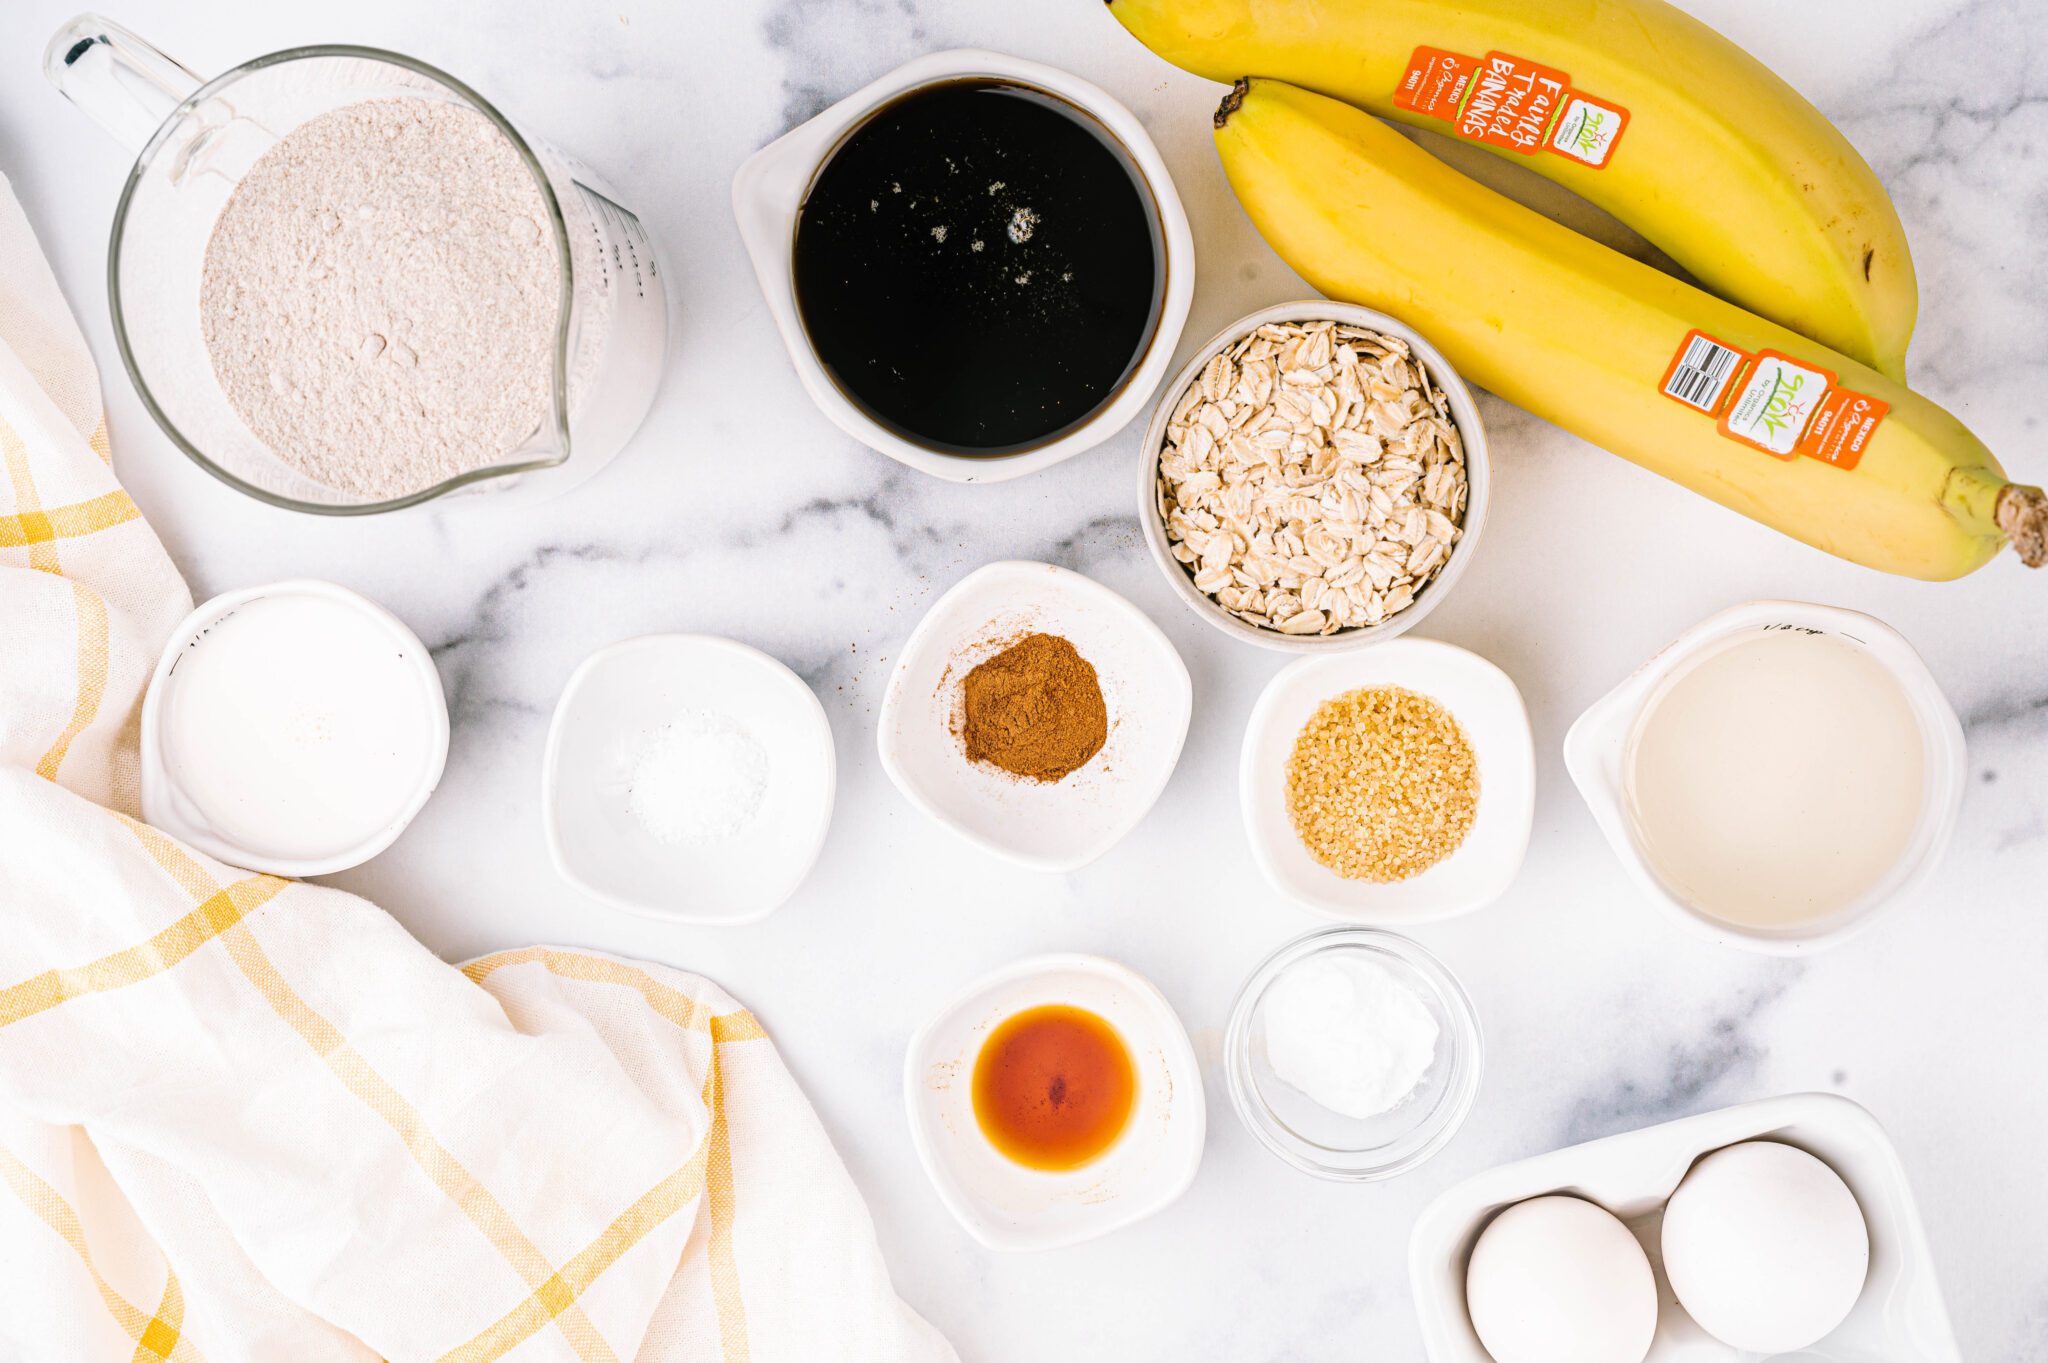


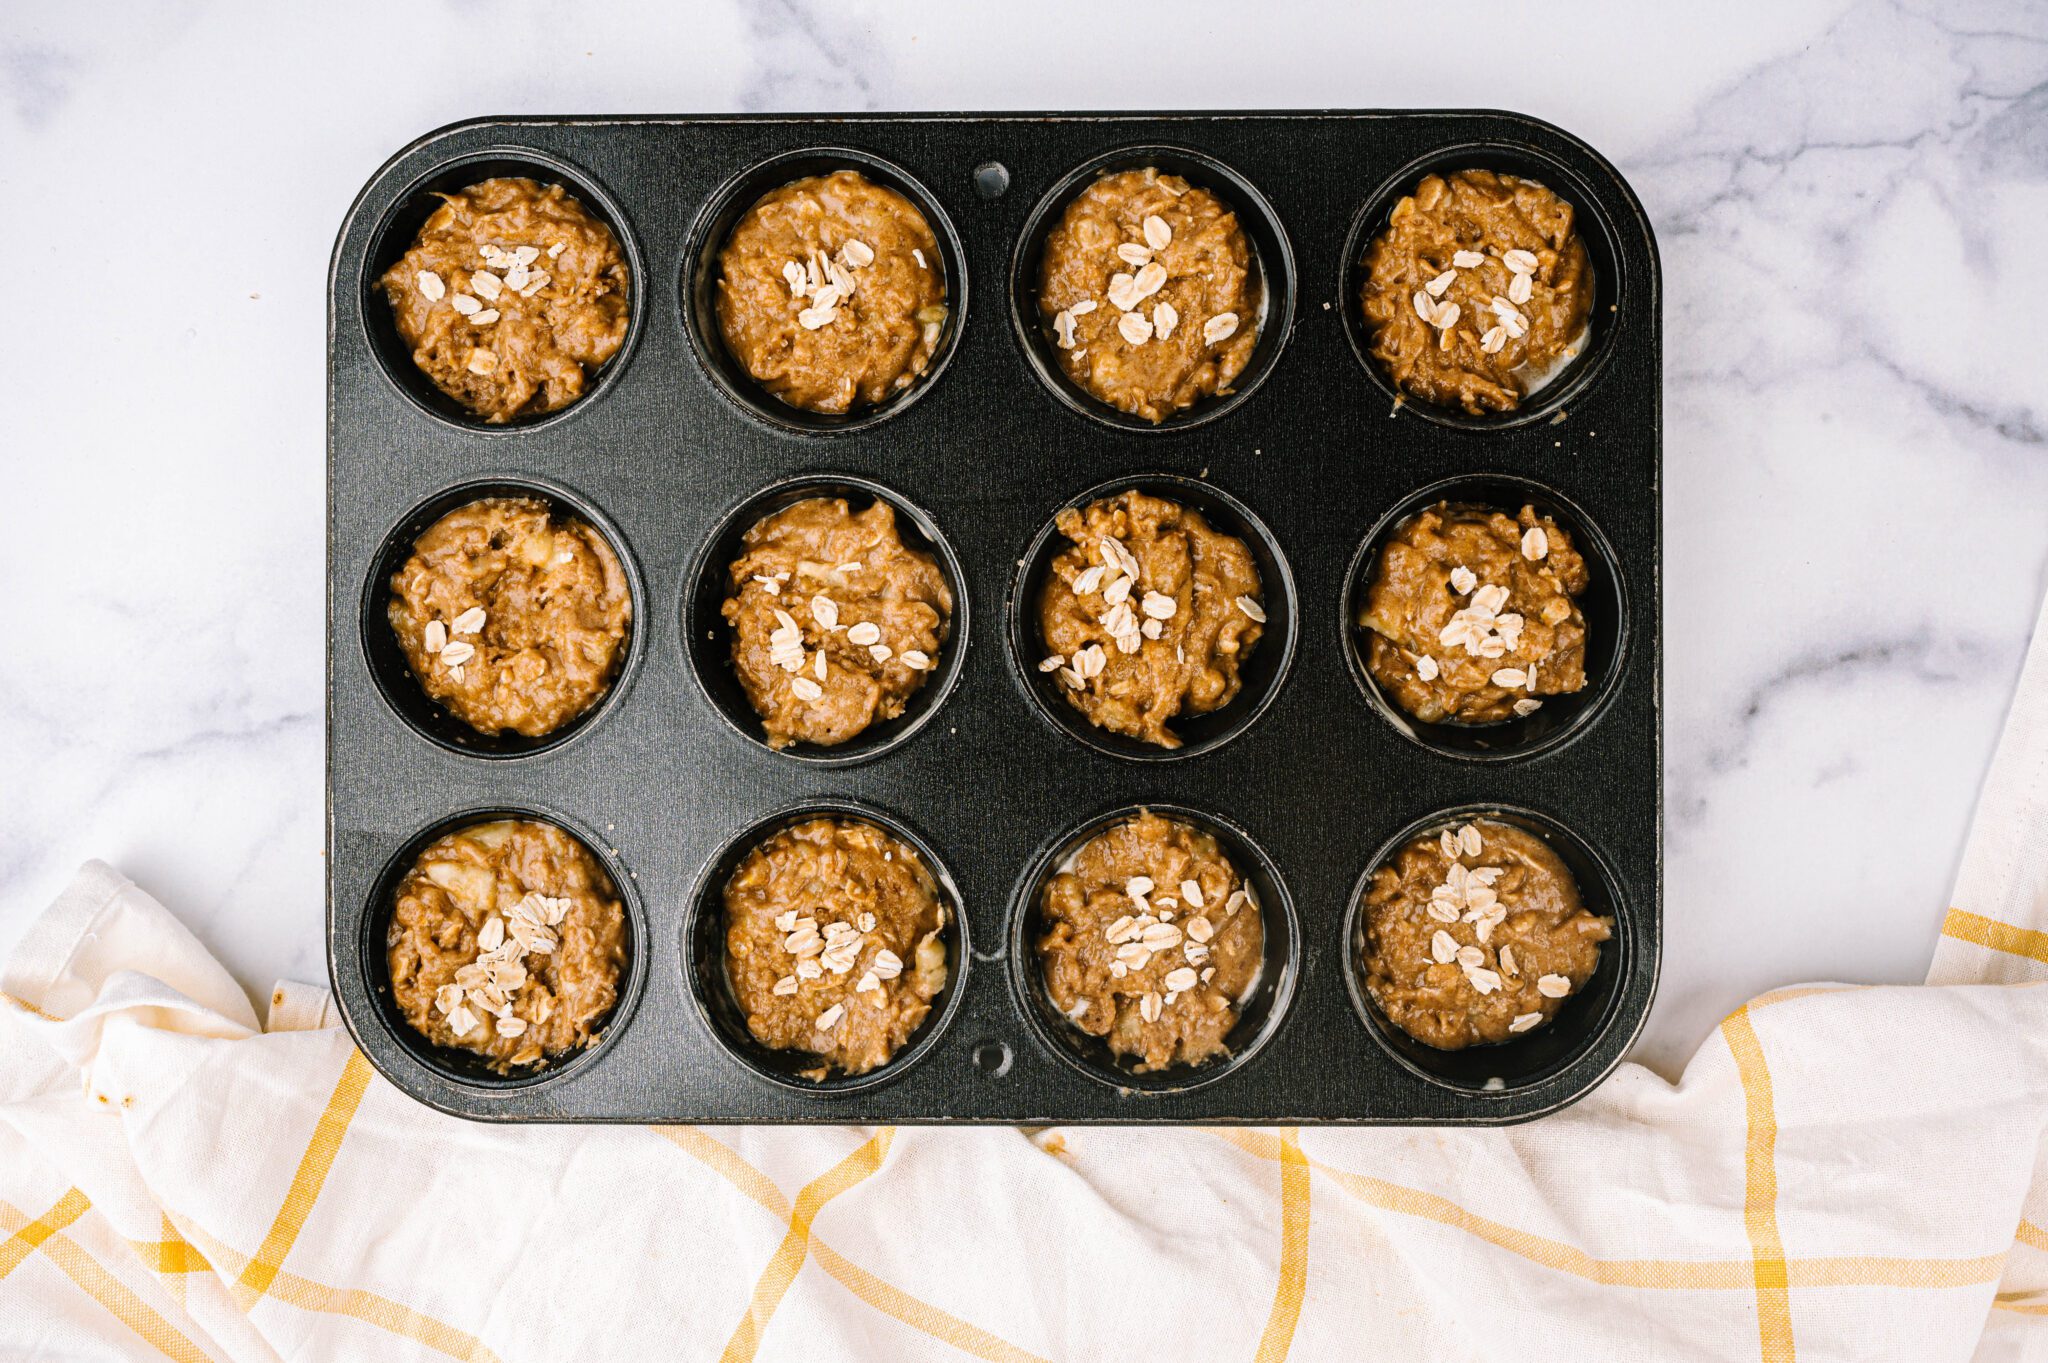
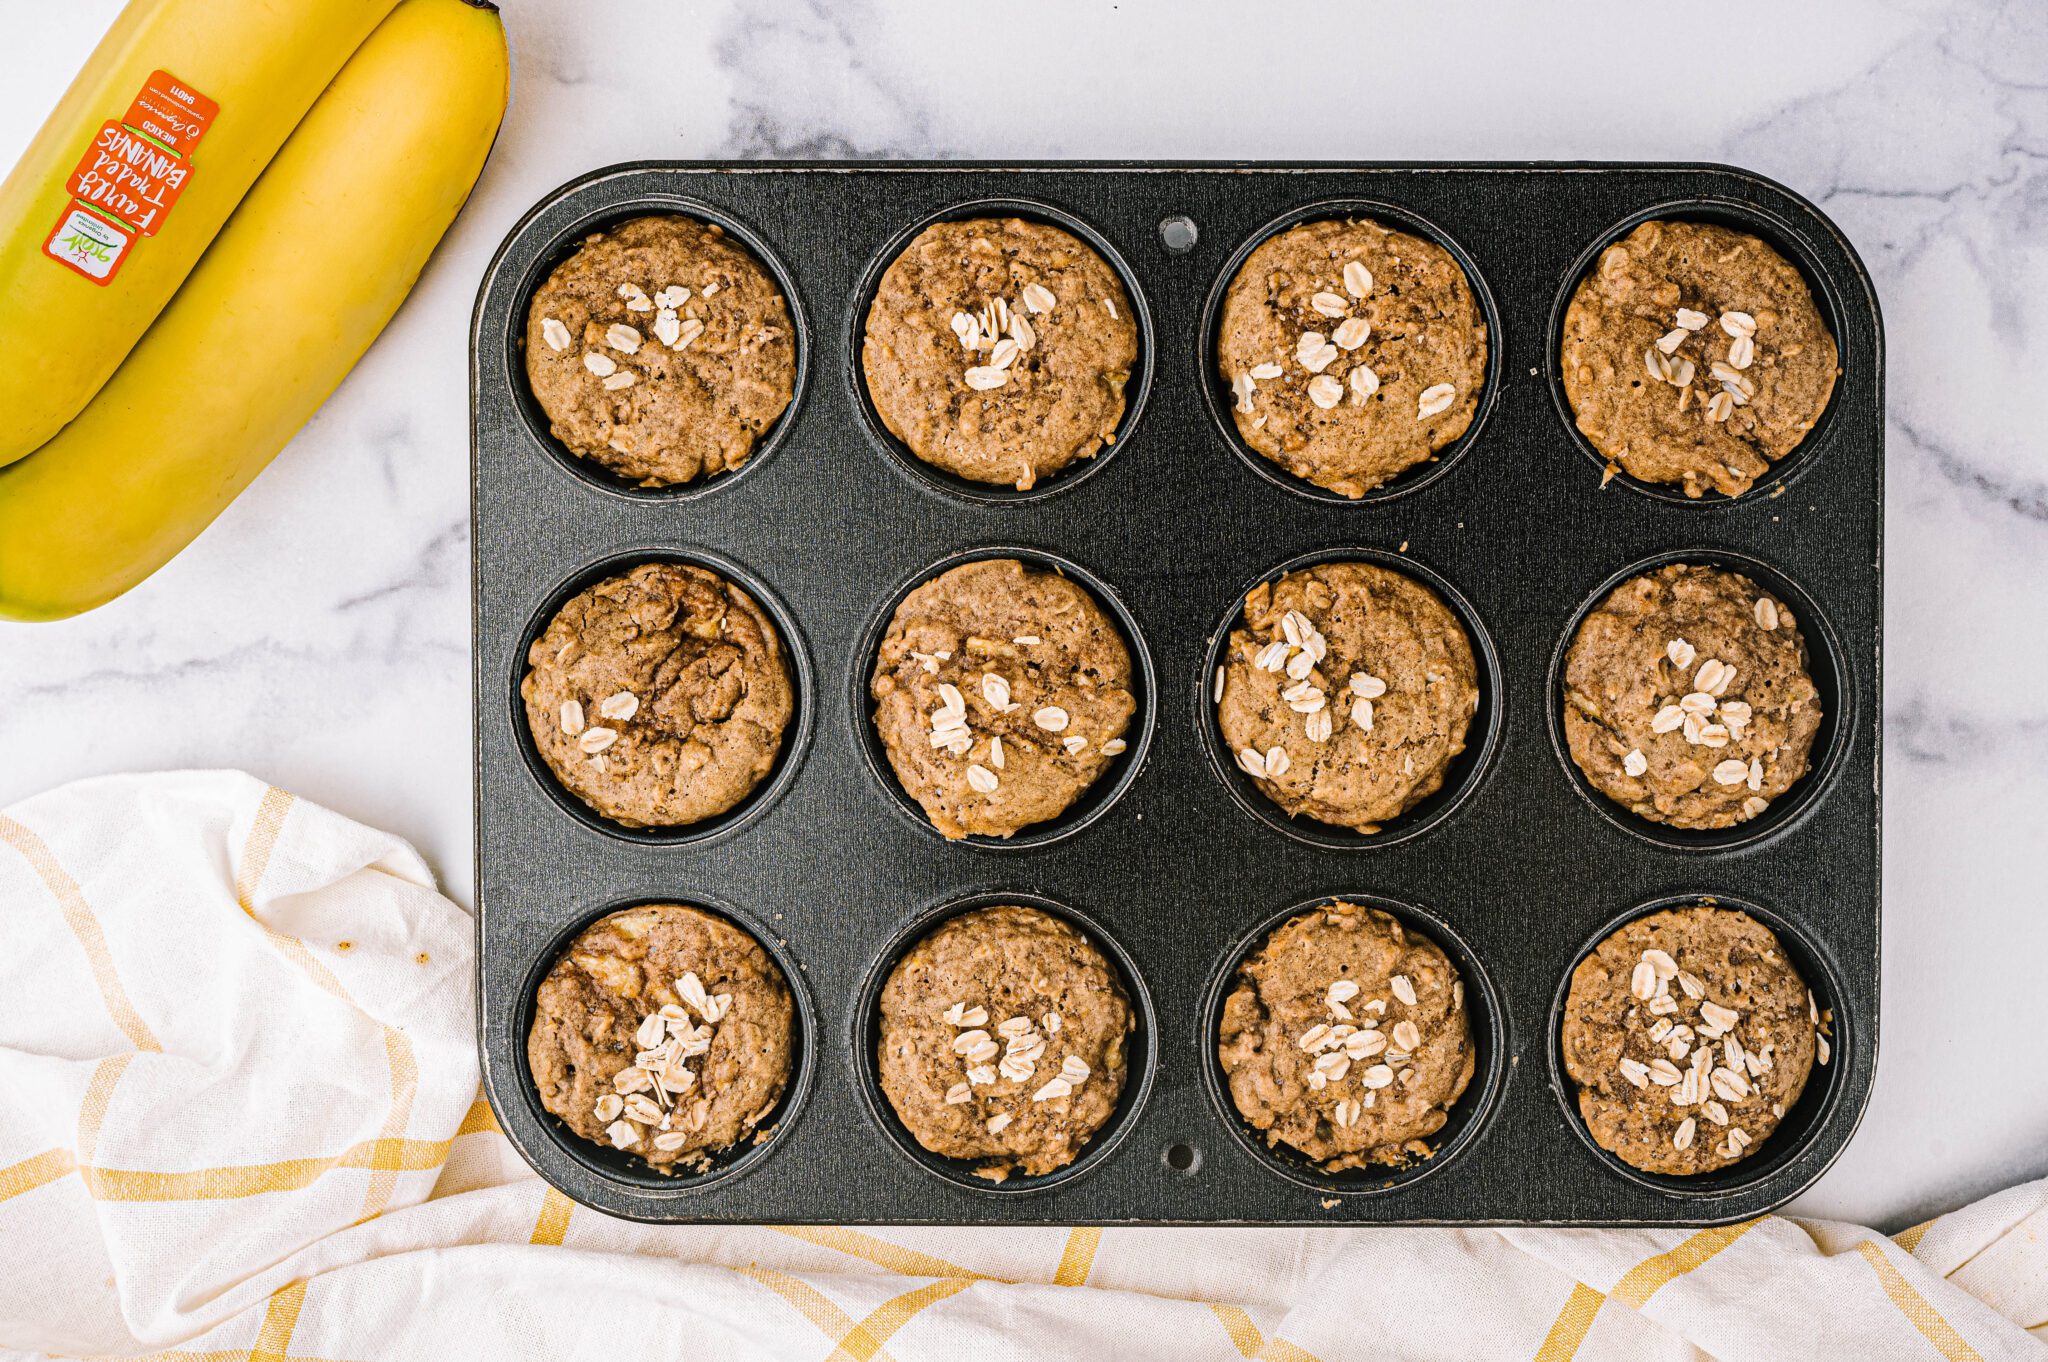
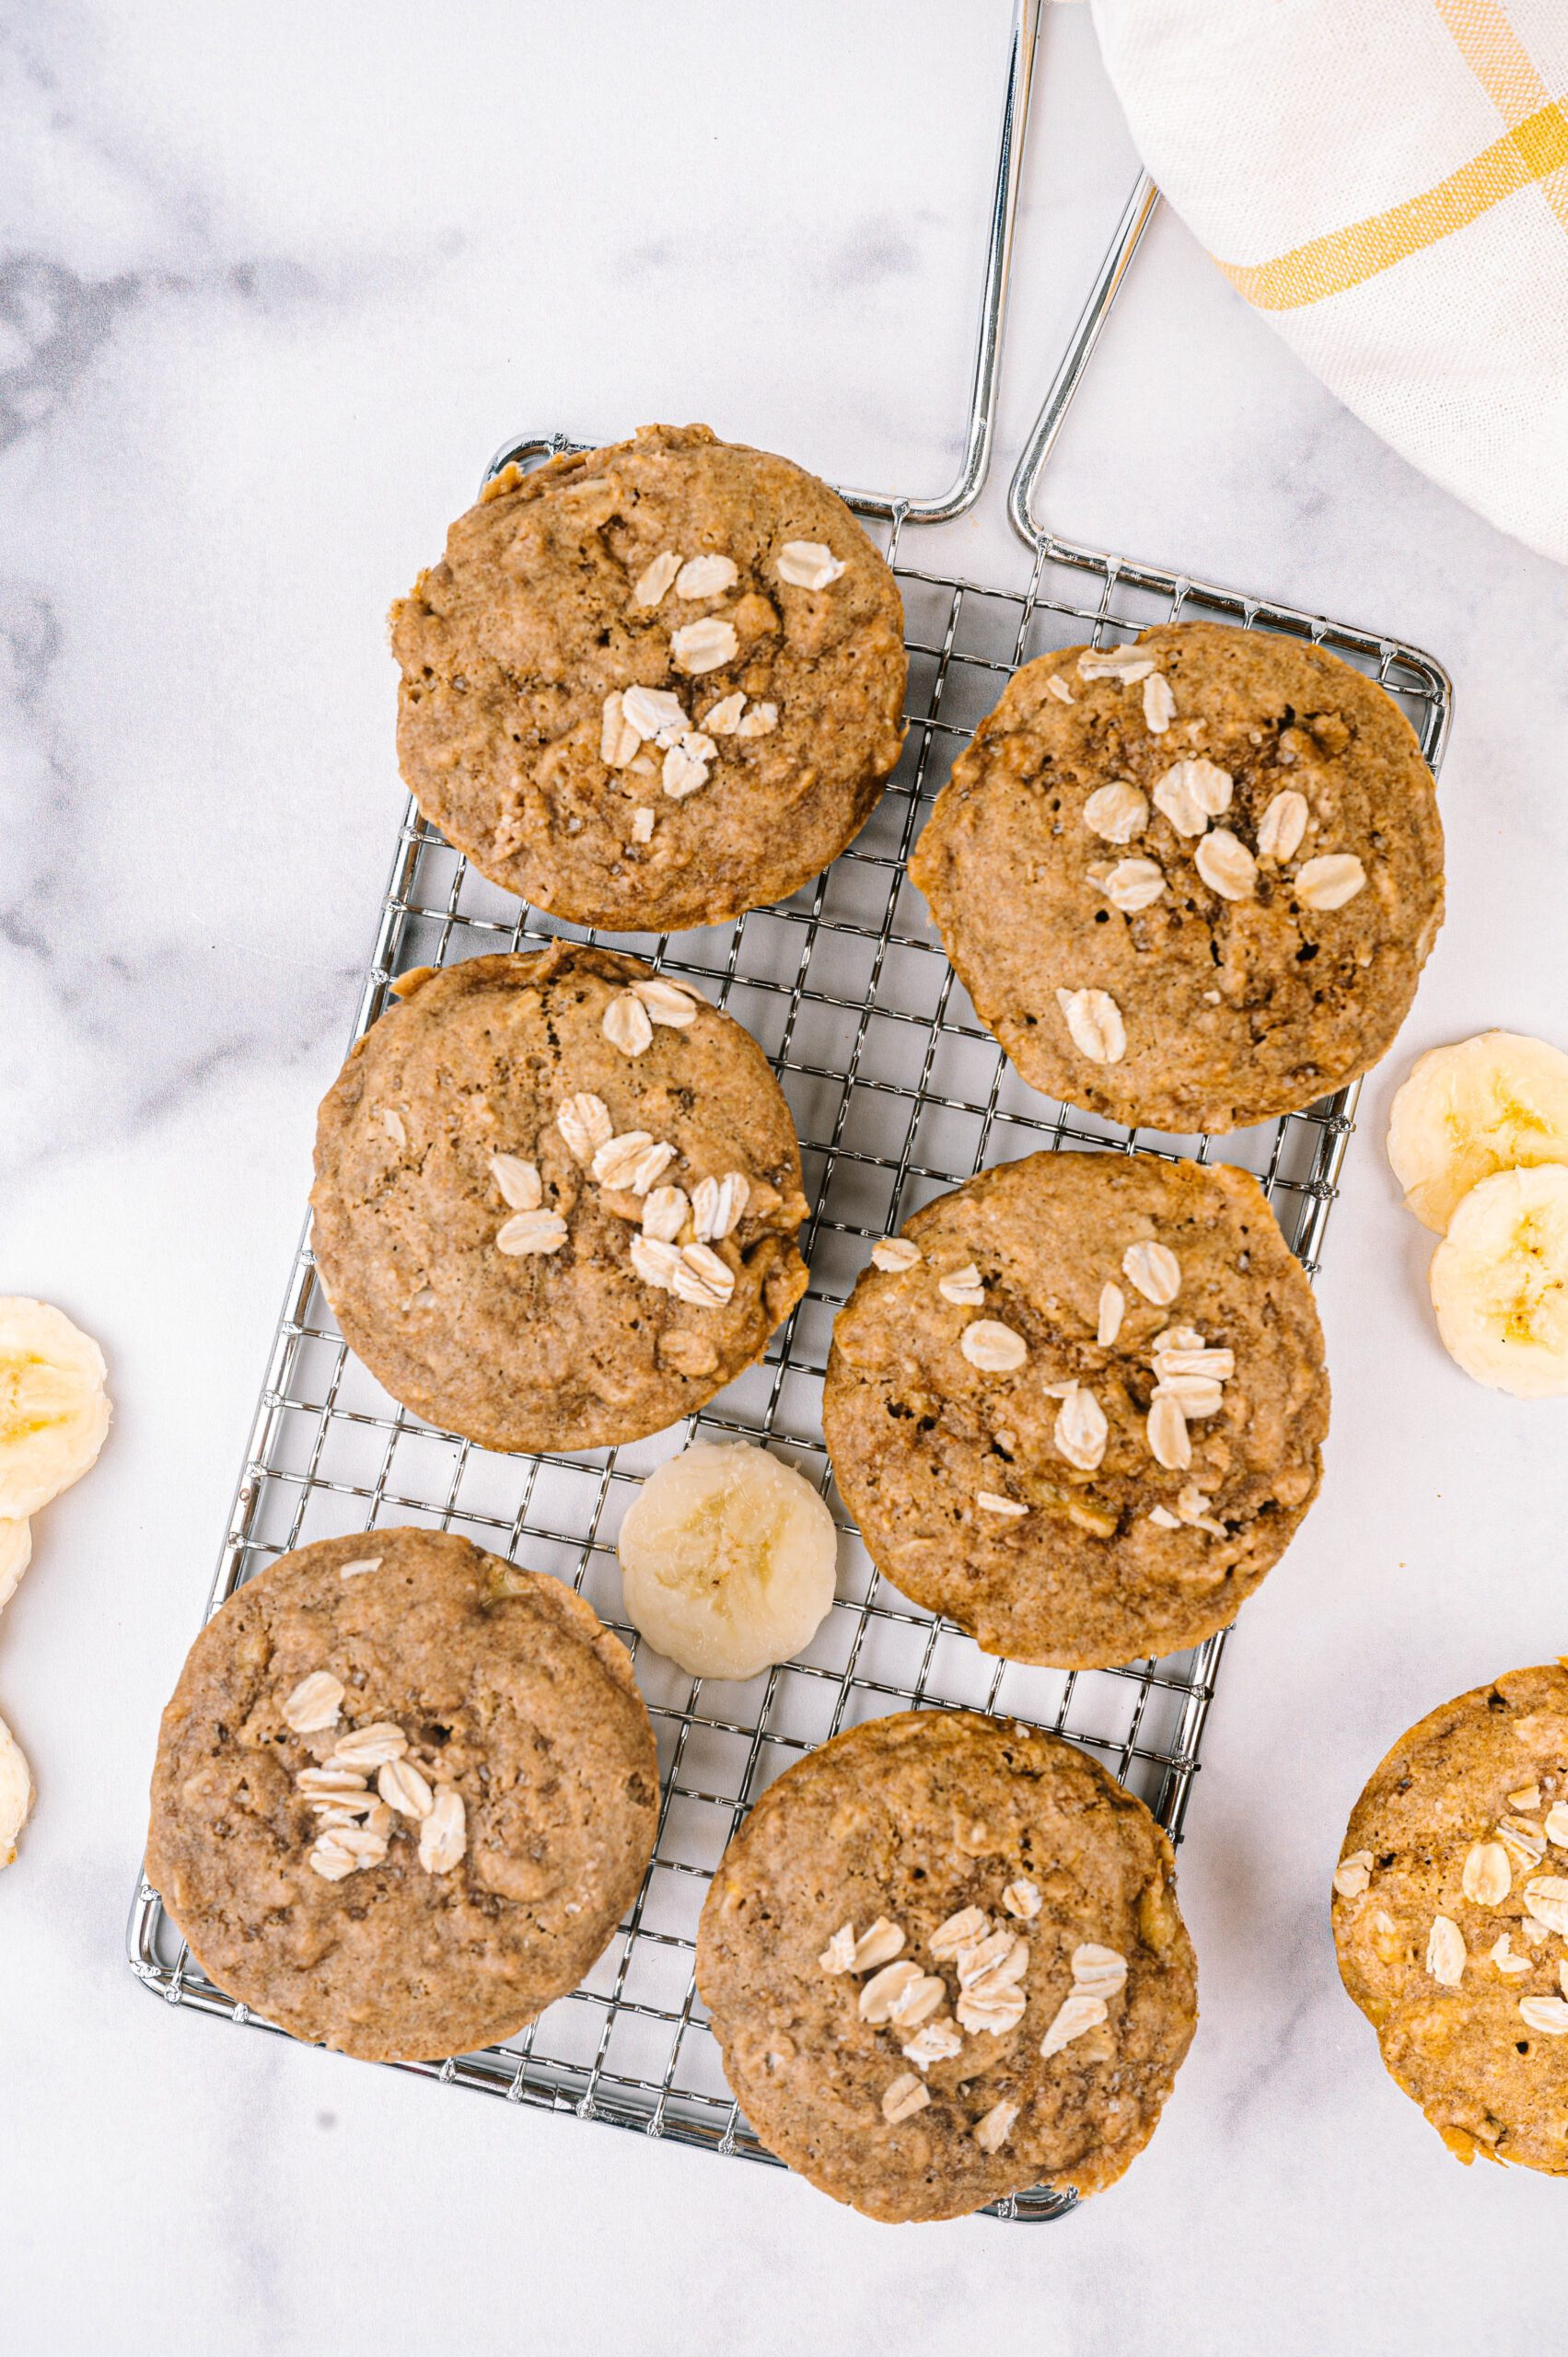
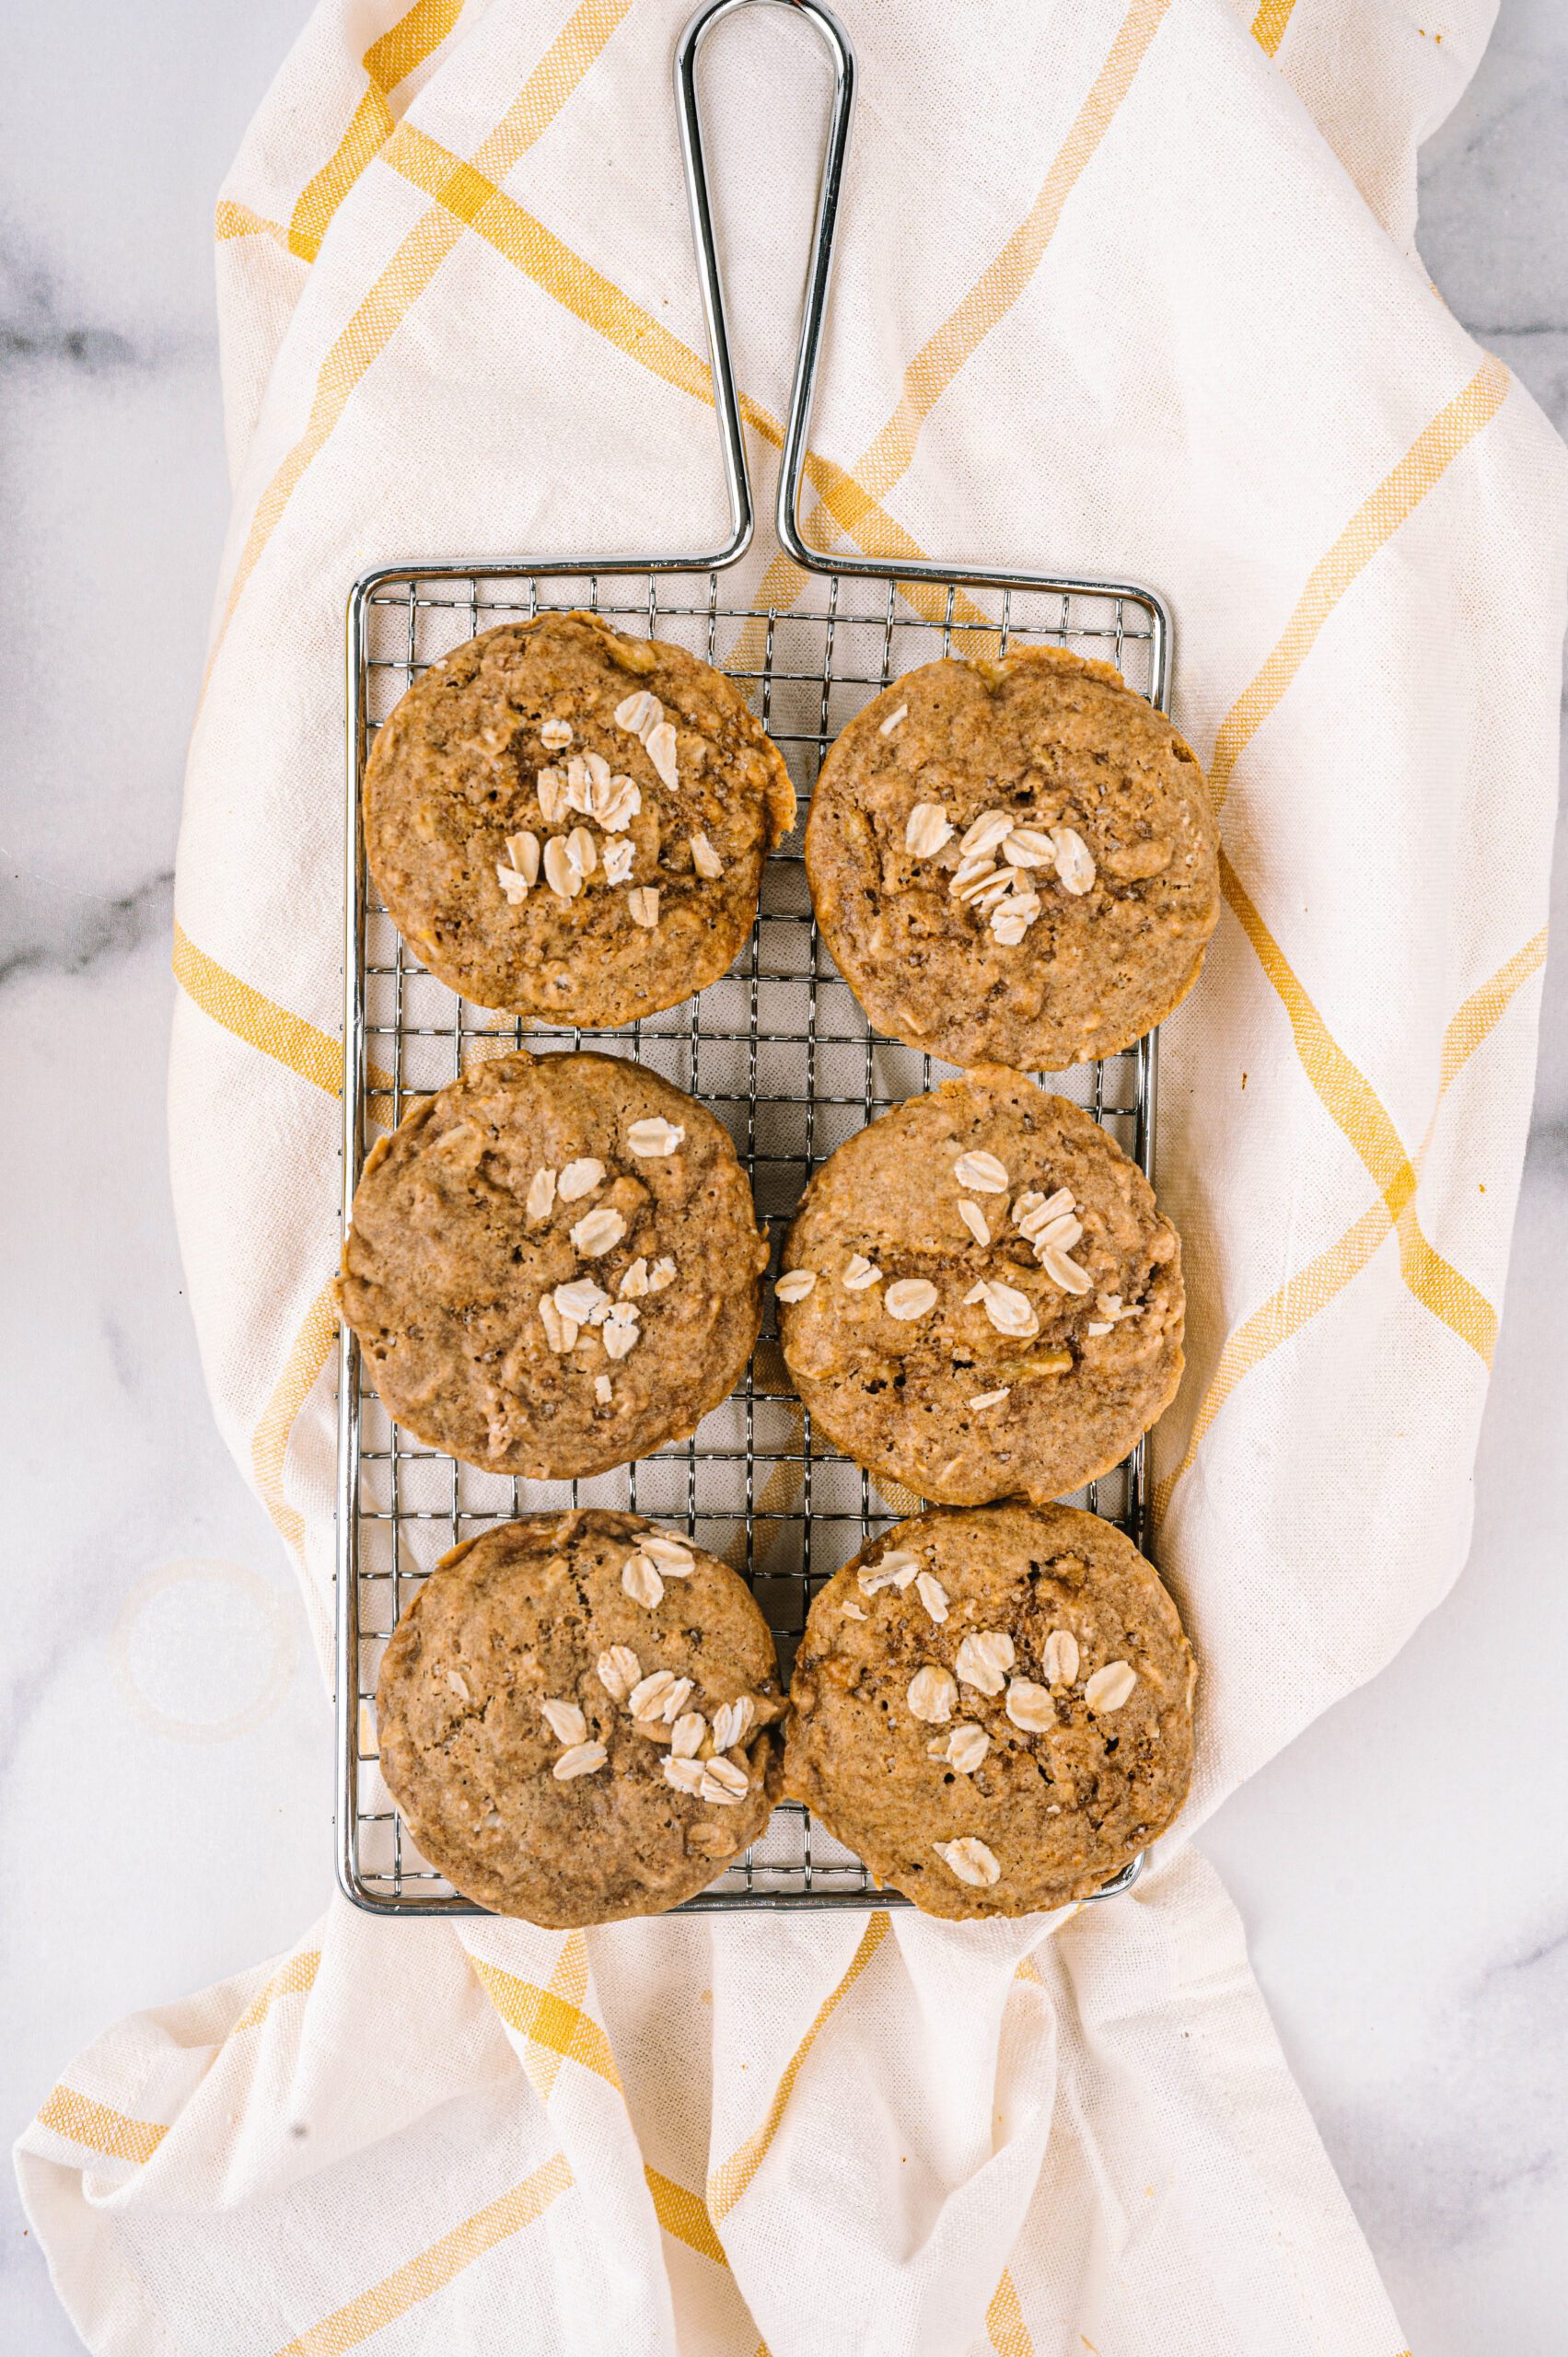
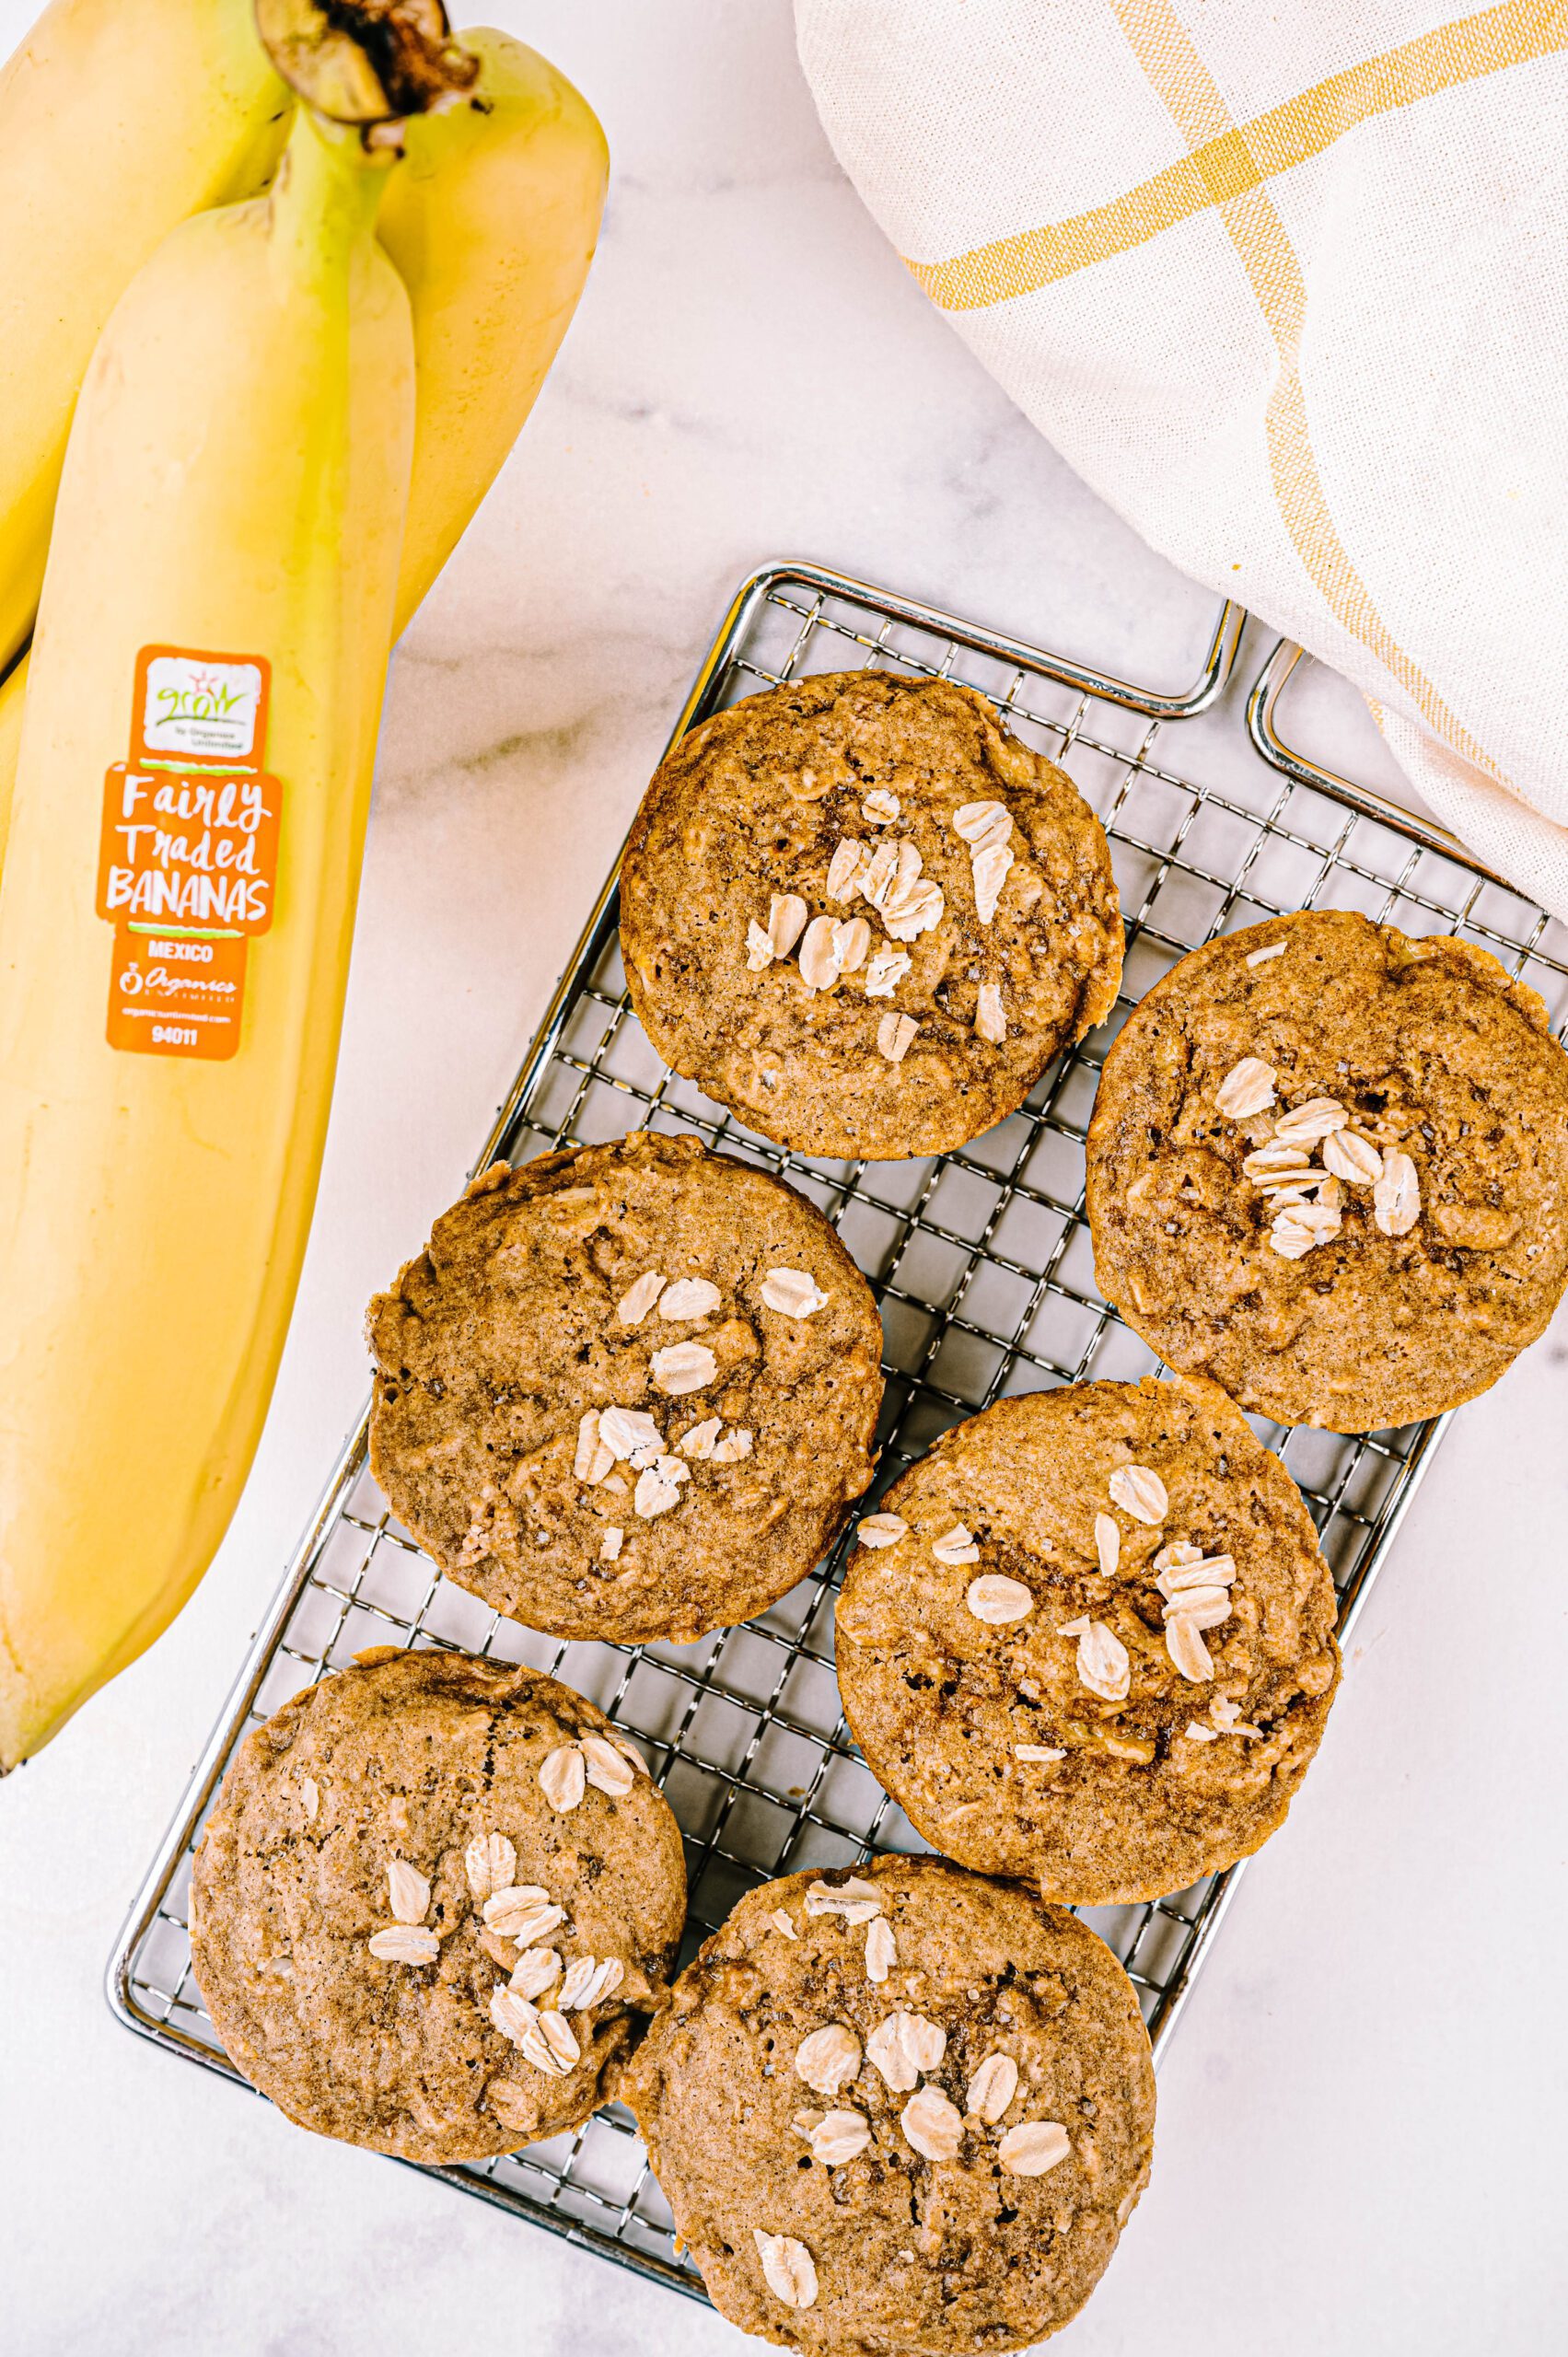


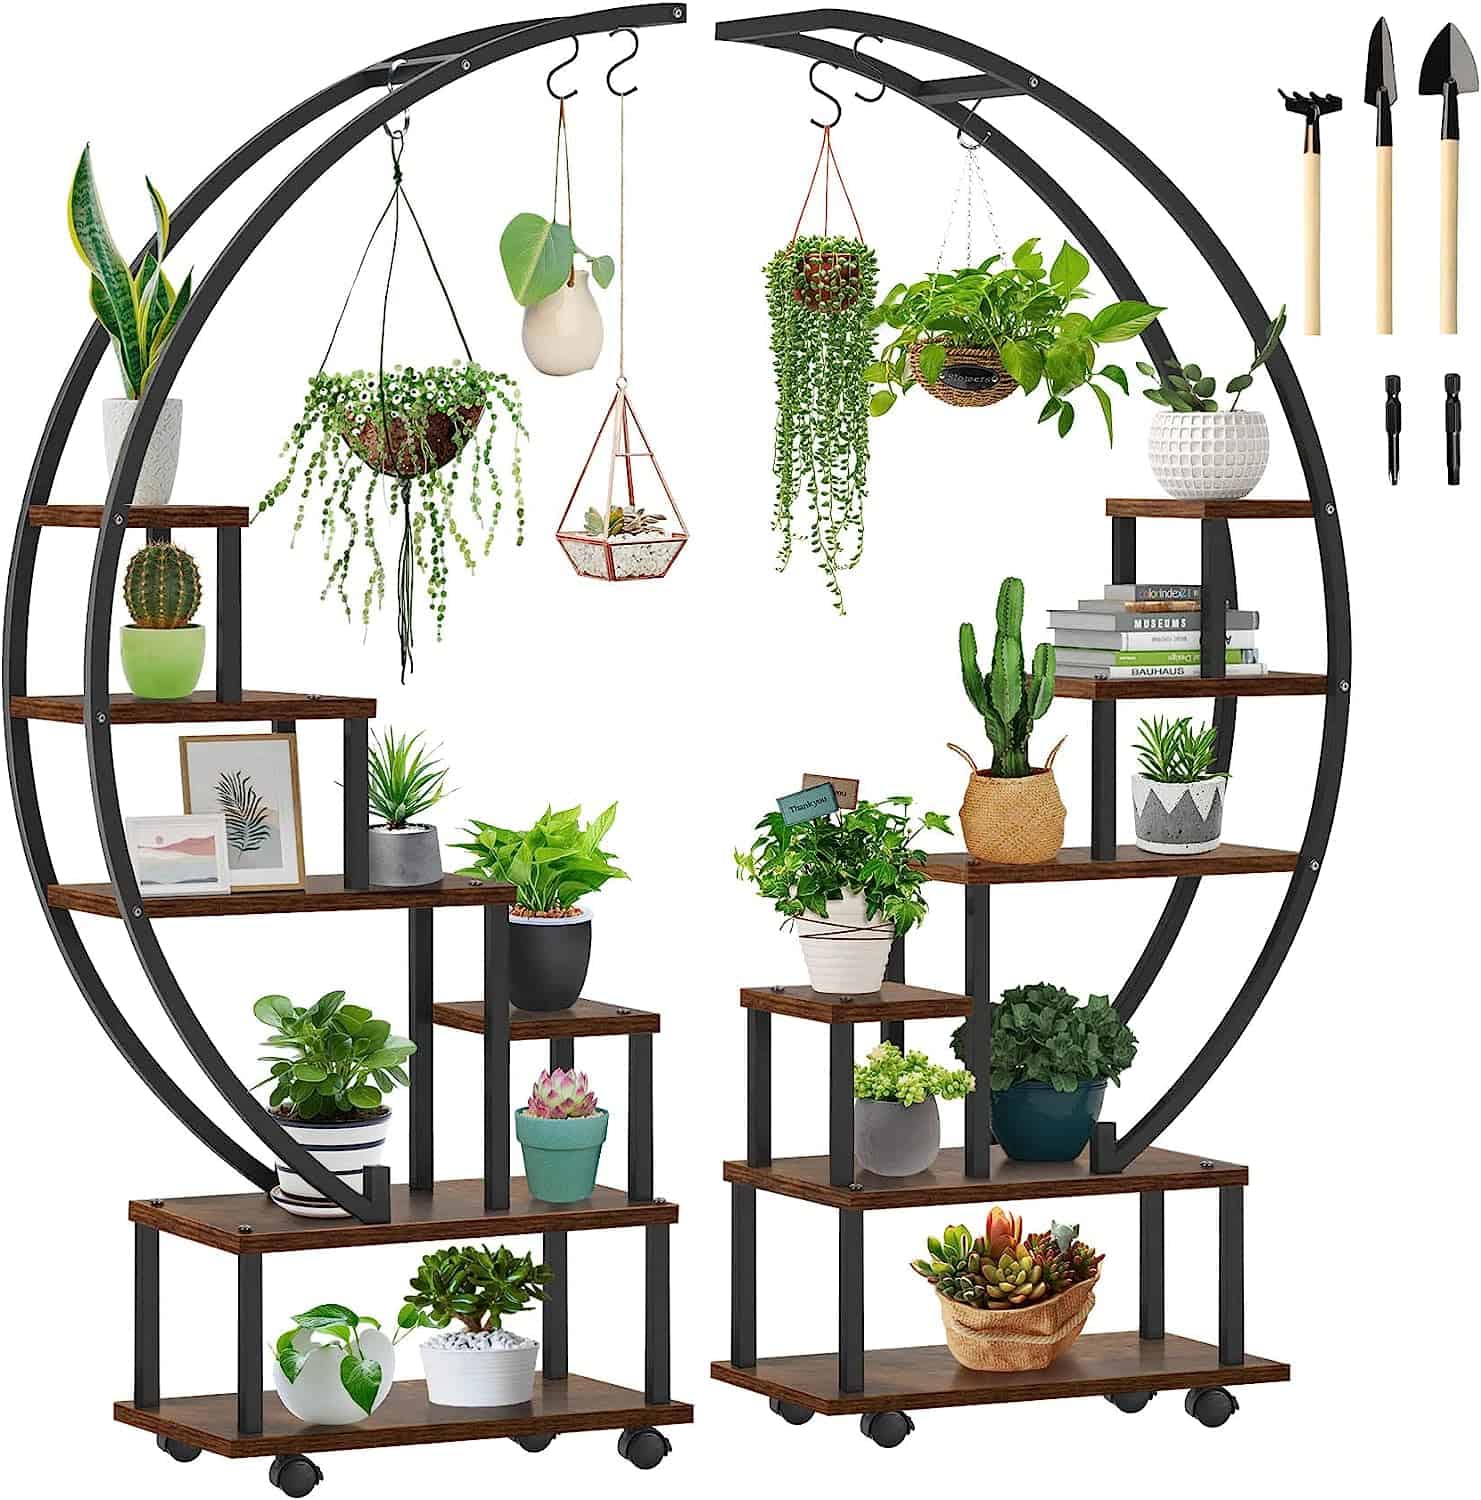
 【Multi-Tiered Plant Stand】:Our UPGRADE tiered metal plant stand has 6-tier, capacity is about 20 pots and 6 hooks on the top of the stand allows for the placement of hanging plants,that are designed to allow for maximum sunlight for each plant and providing you with plenty of storage and display positions, making your space look tidier.


. These crispy baked chicken wings are covered in our homemade buffalo sauce for the perfect hot and spicy flavor. Baked Buffalo Chicken Wings are a real crowd pleaser and perfect for game day parties. You're going to love these crispy oven baked buffalo wings!")
. These crispy baked chicken wings are covered in our homemade buffalo sauce for the perfect hot and spicy flavor. Baked Buffalo Chicken Wings are a real crowd pleaser and perfect for game day parties. You're going to love these crispy oven baked buffalo wings!")
. These crispy baked chicken wings are covered in our homemade buffalo sauce for the perfect hot and spicy flavor. Baked Buffalo Chicken Wings are a real crowd pleaser and perfect for game day parties. You're going to love these crispy oven baked buffalo wings!")
. These crispy baked chicken wings are covered in our homemade buffalo sauce for the perfect hot and spicy flavor. Baked Buffalo Chicken Wings are a real crowd pleaser and perfect for game day parties. You're going to love these crispy oven baked buffalo wings!")

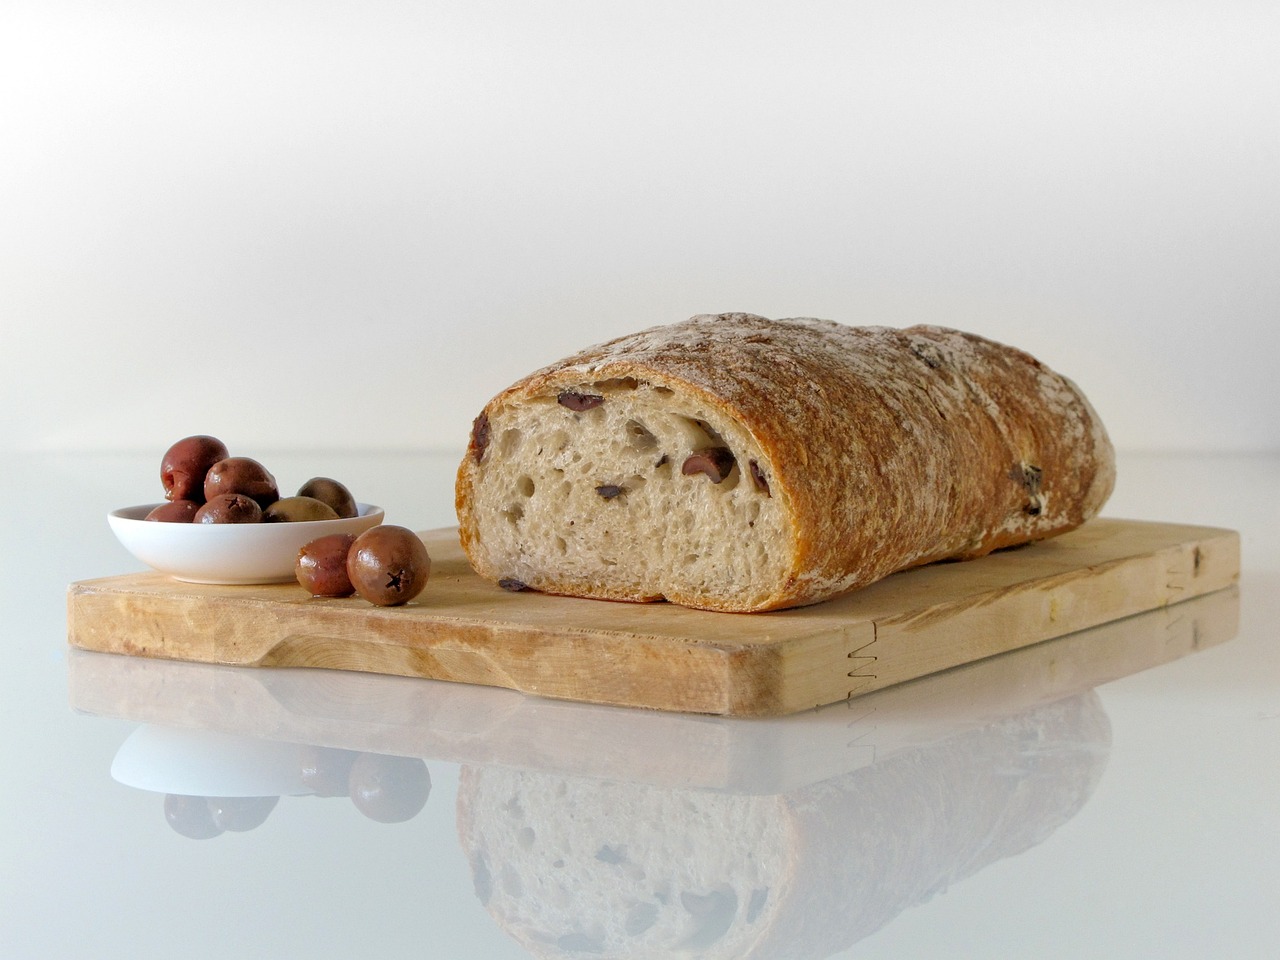


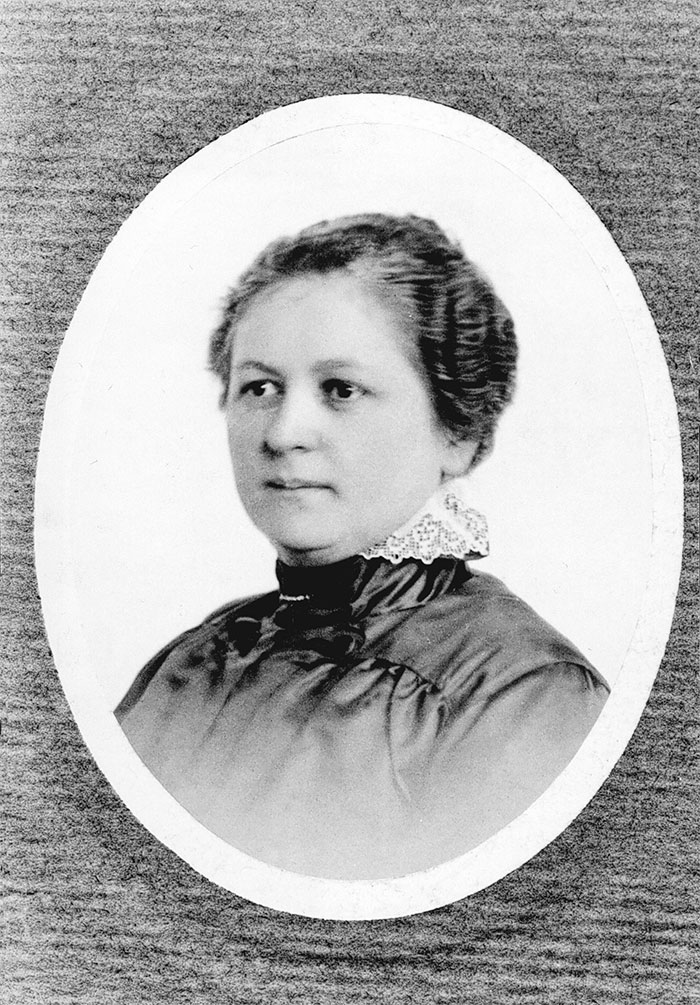


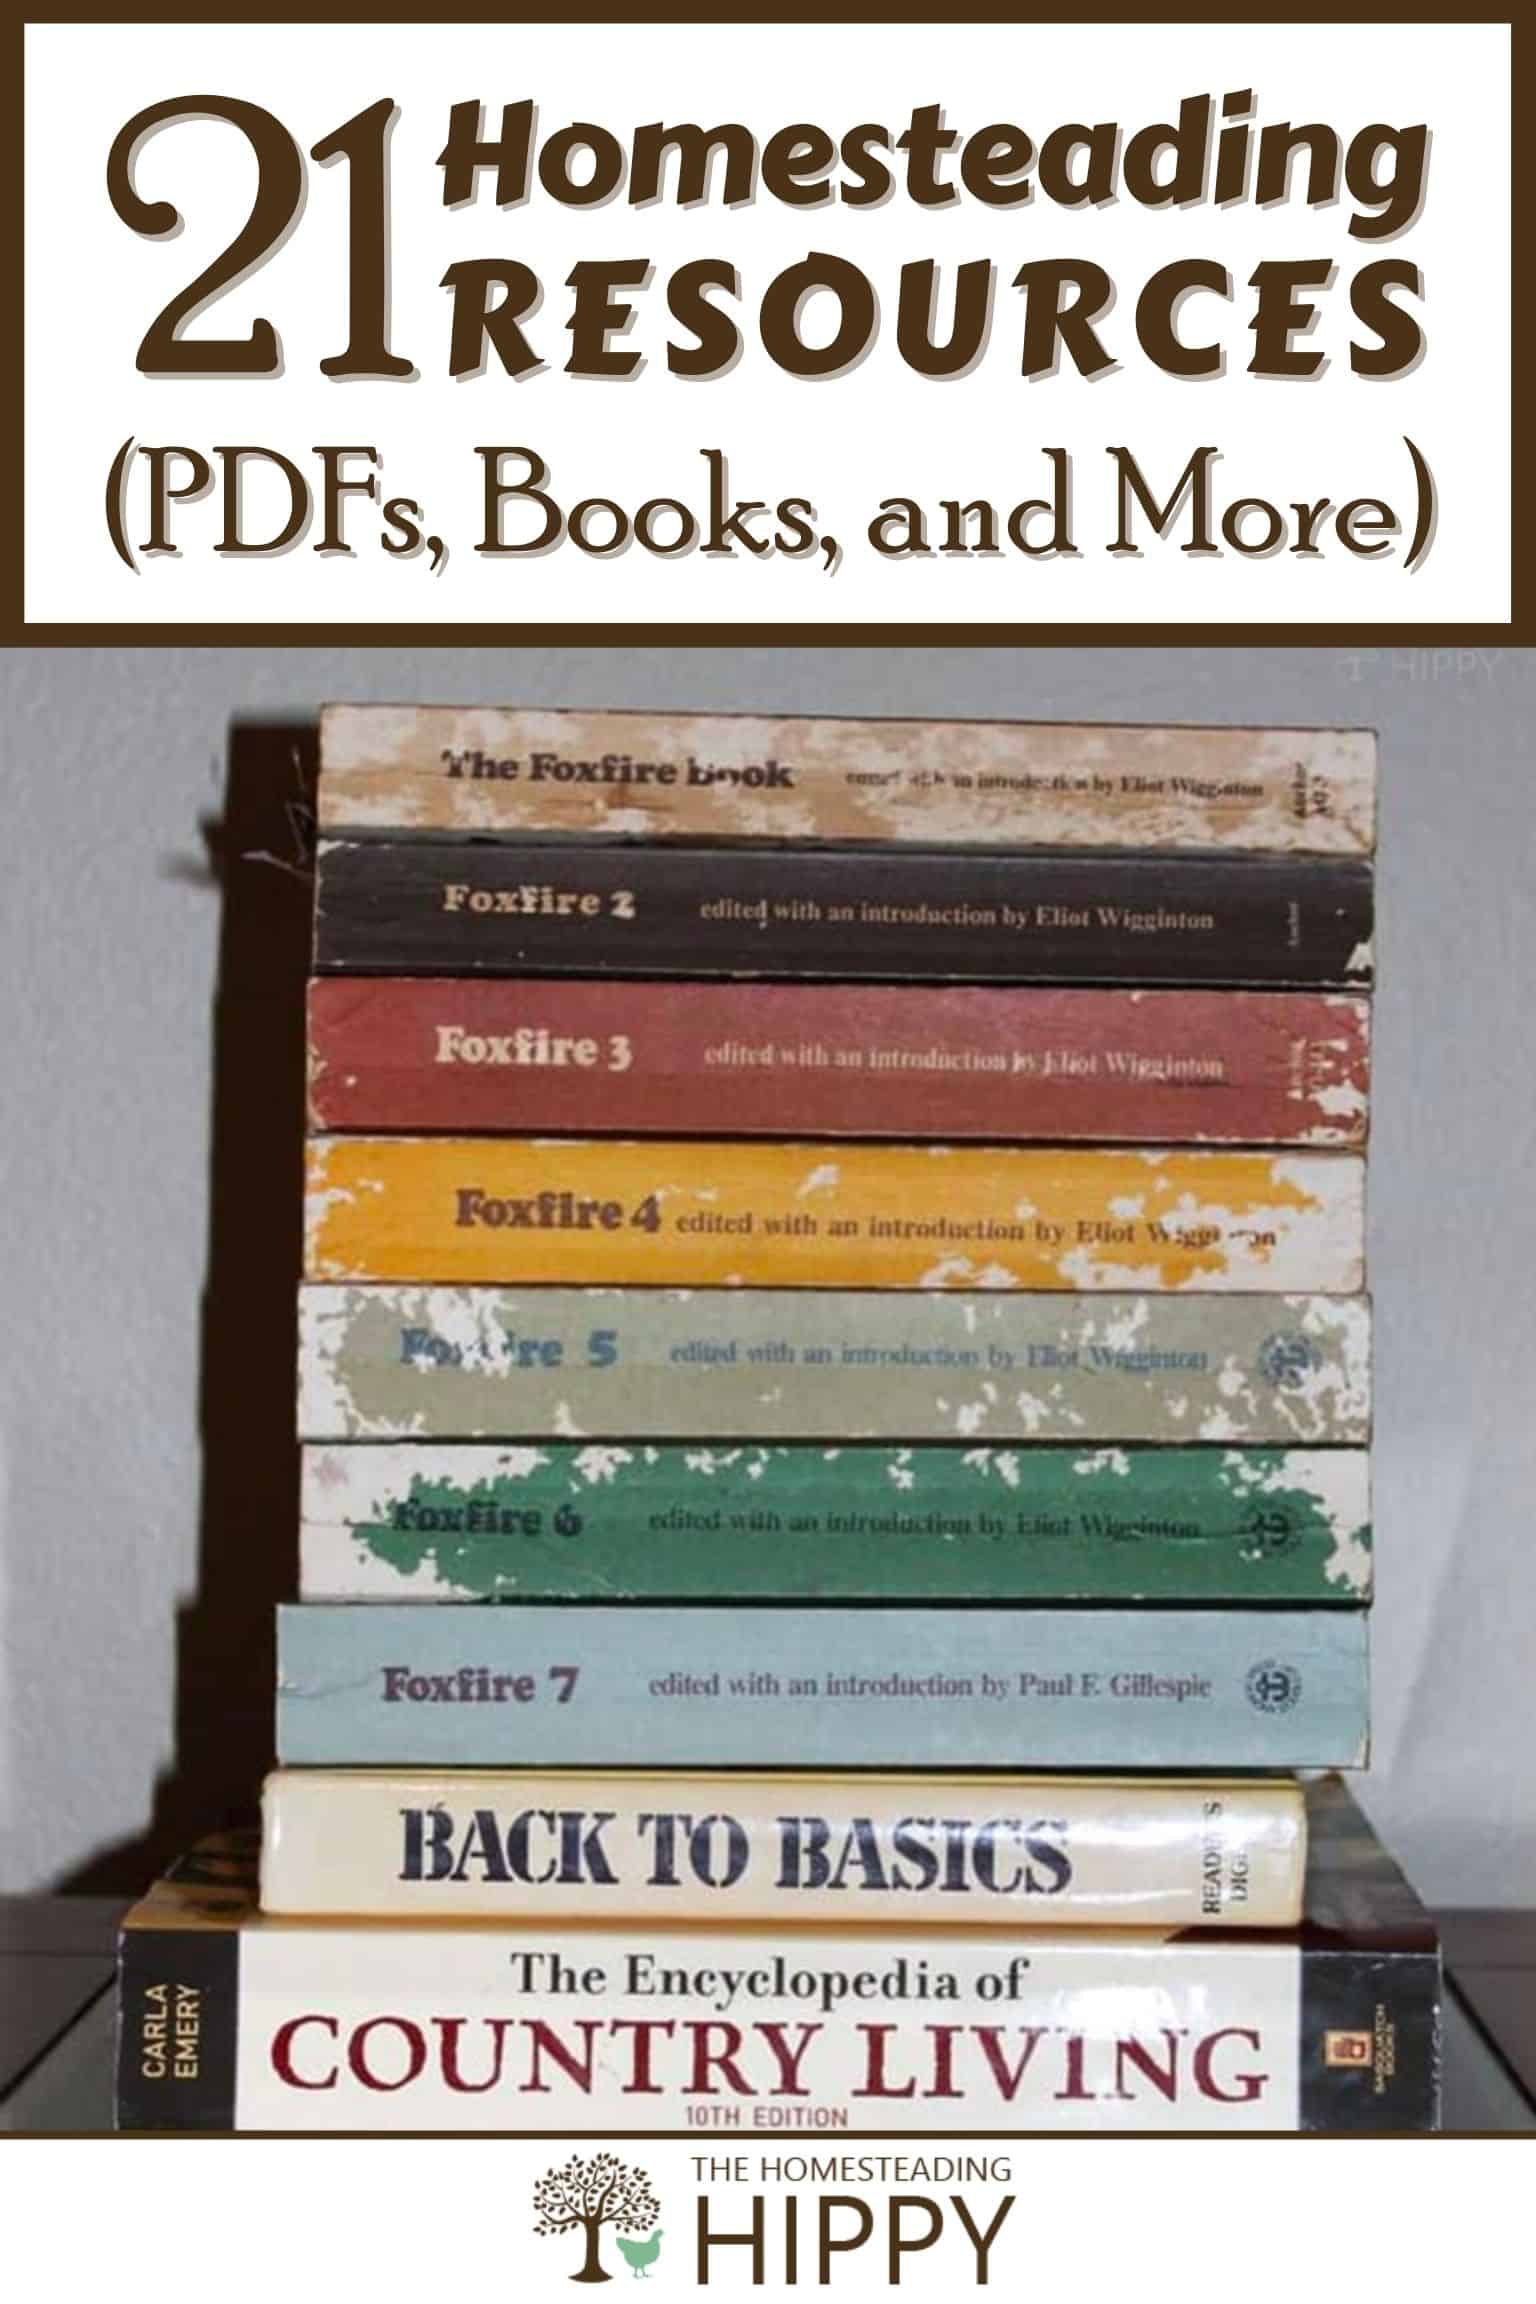


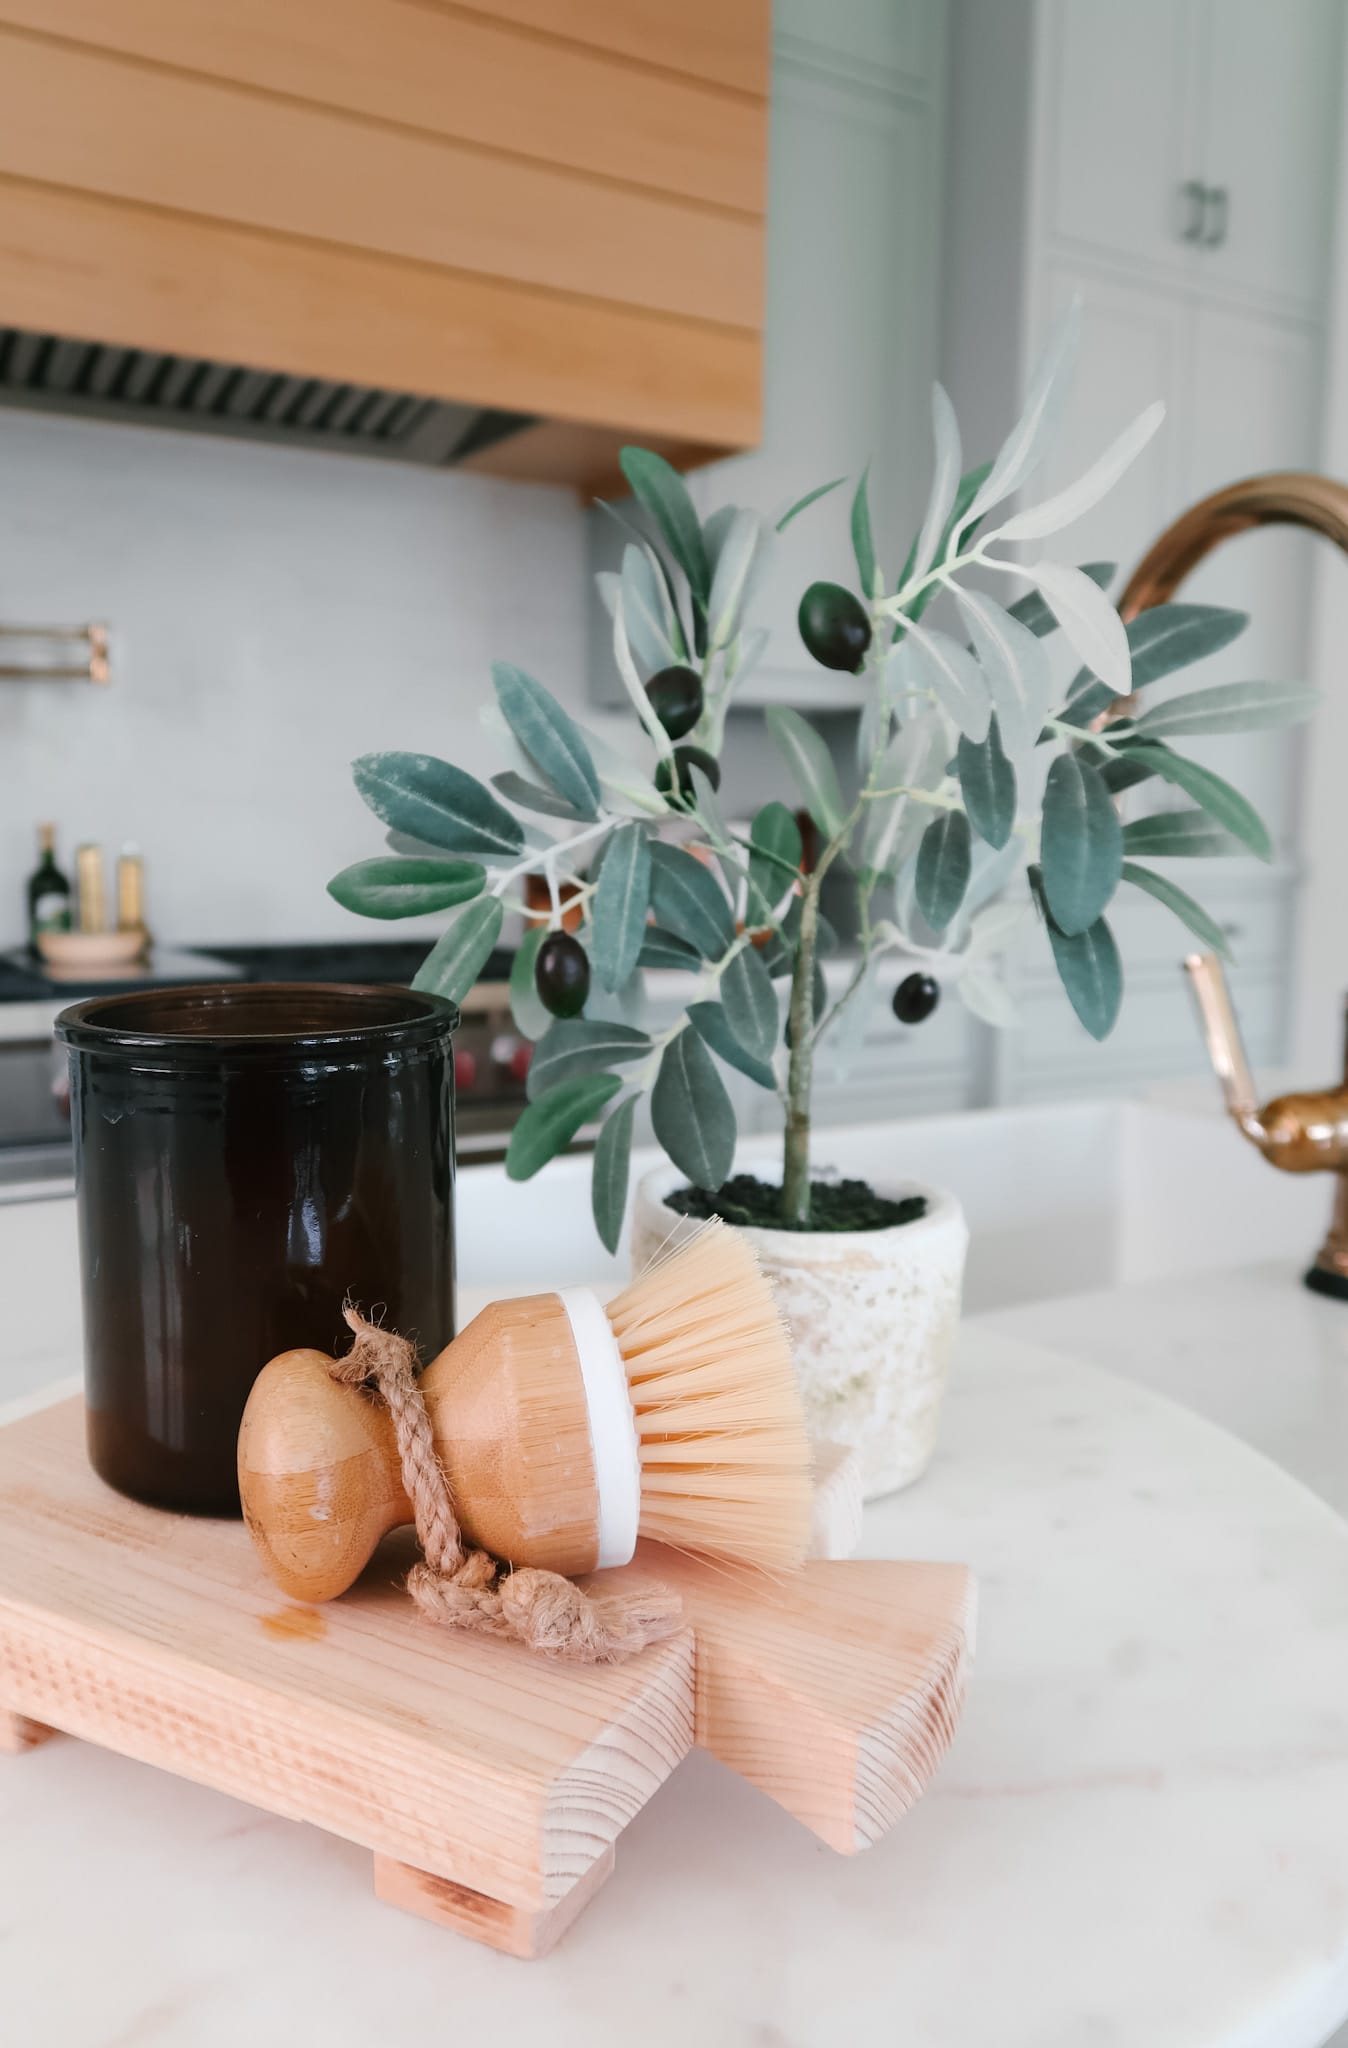


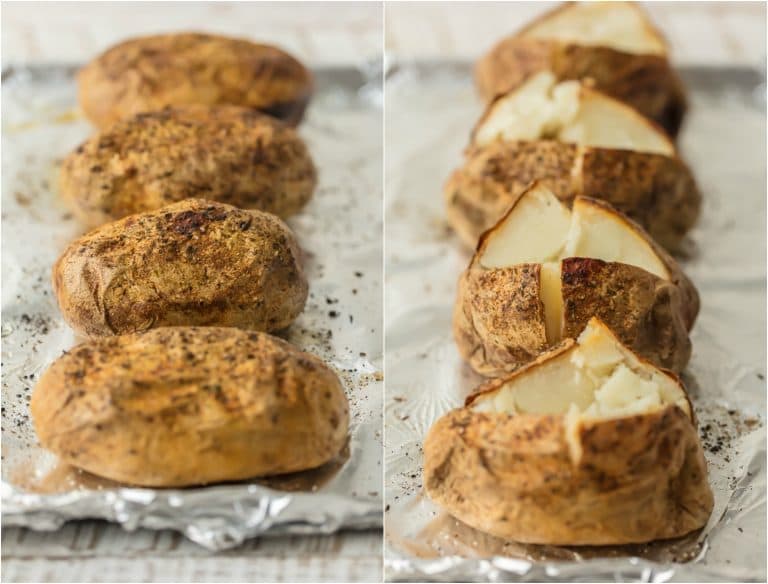


")


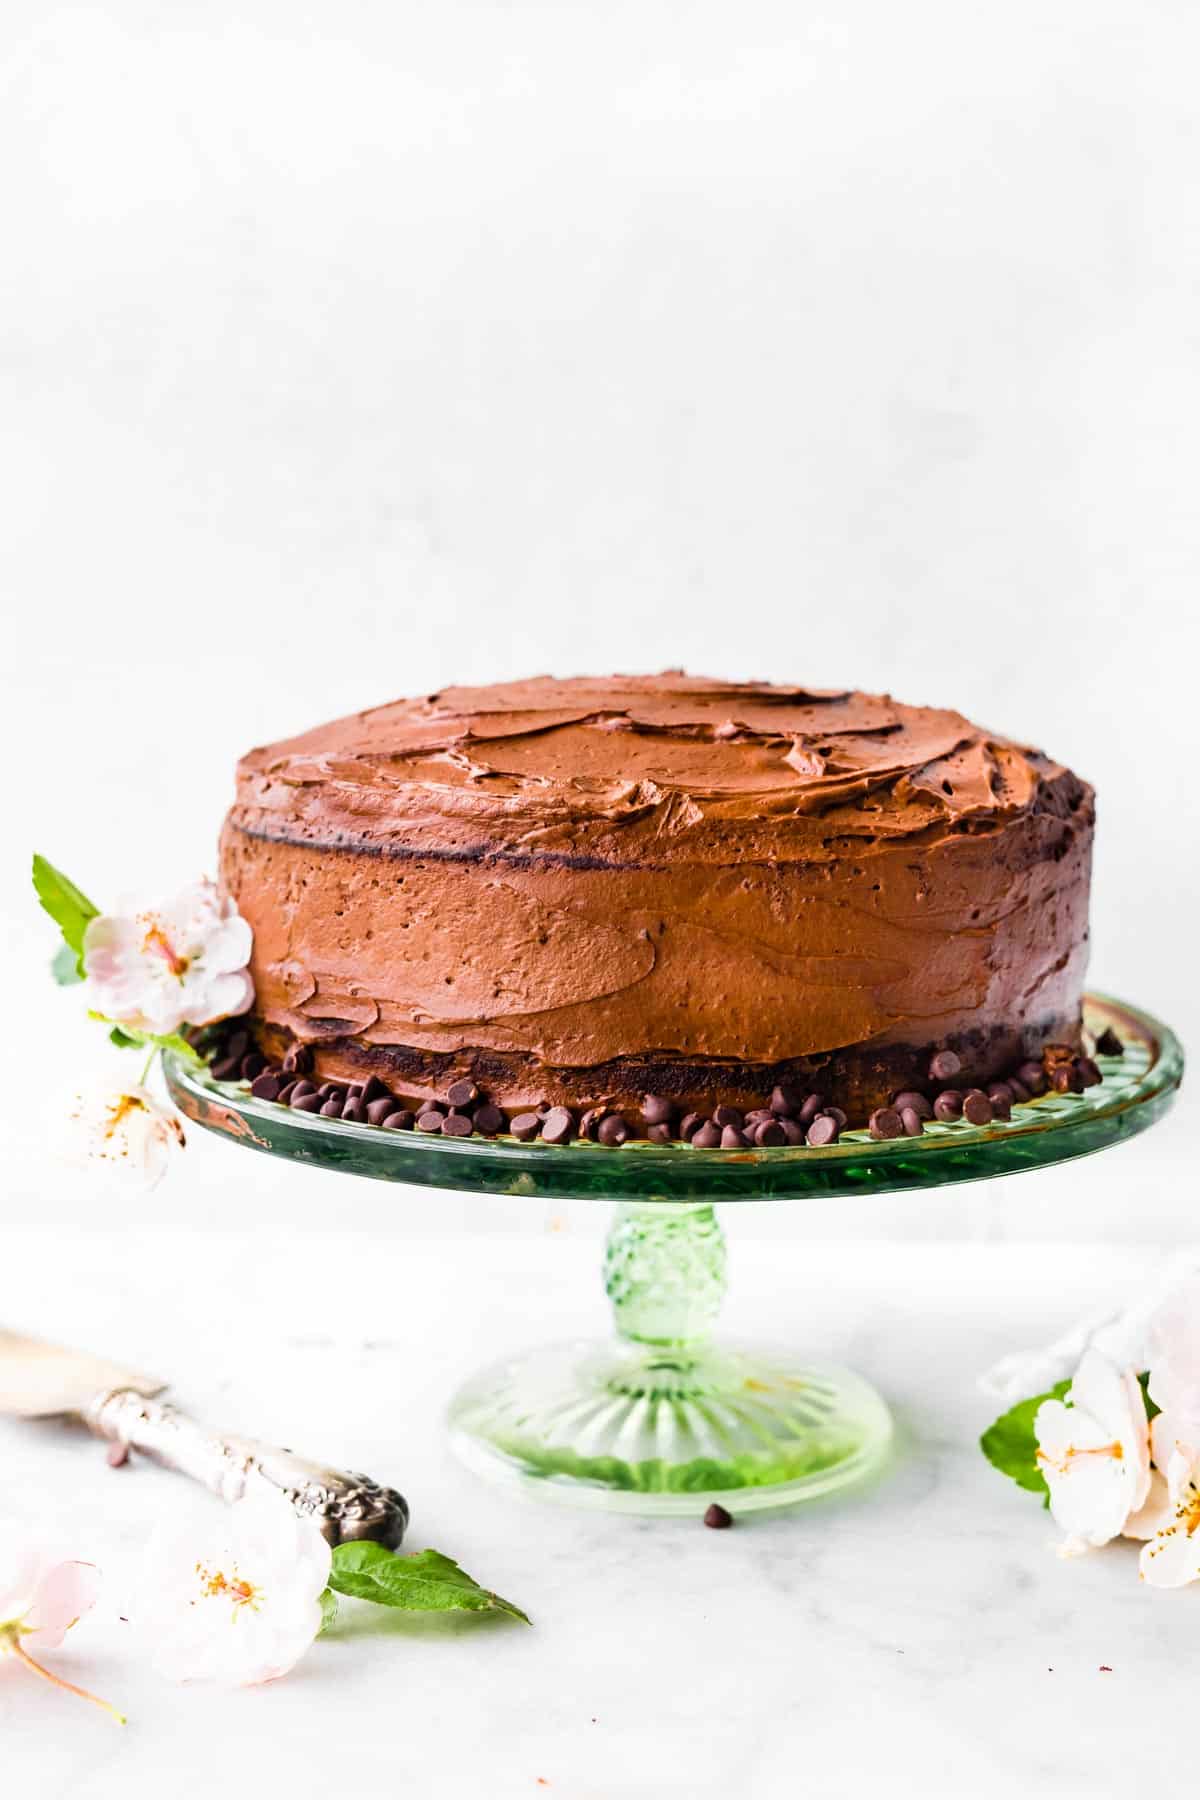

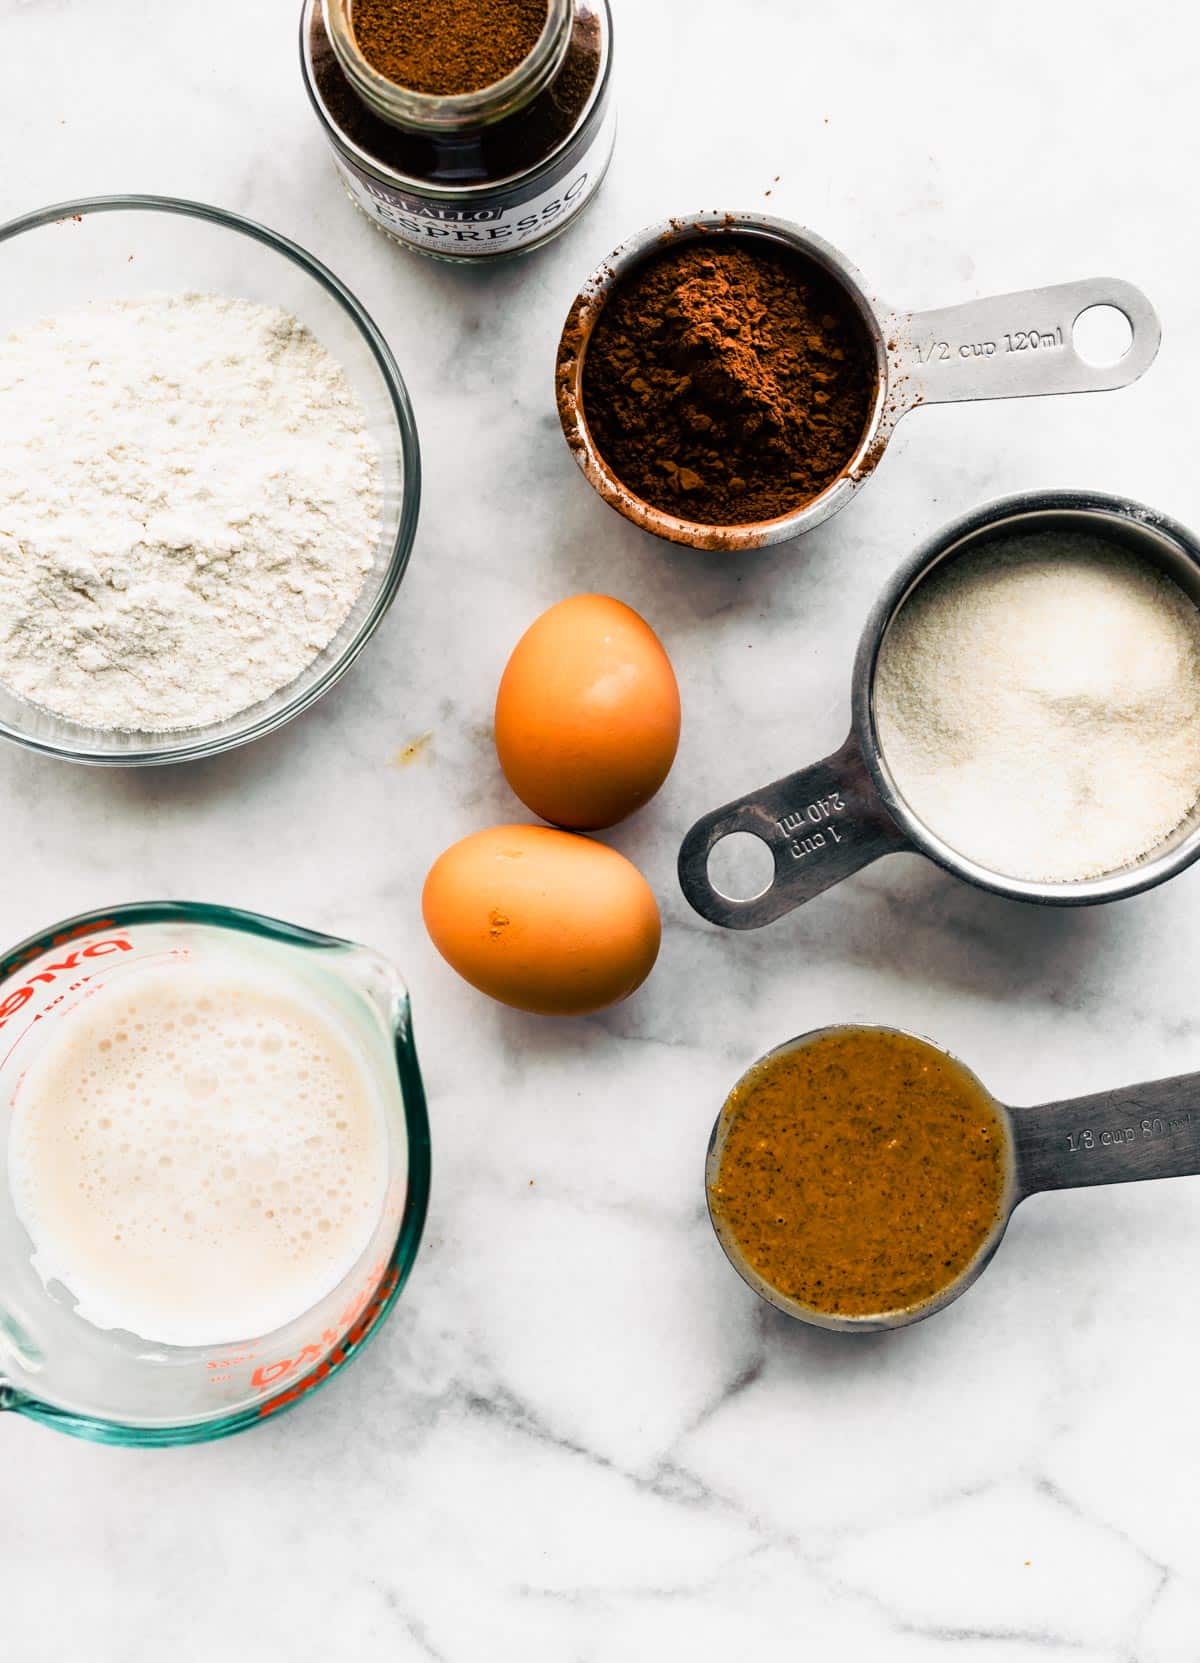

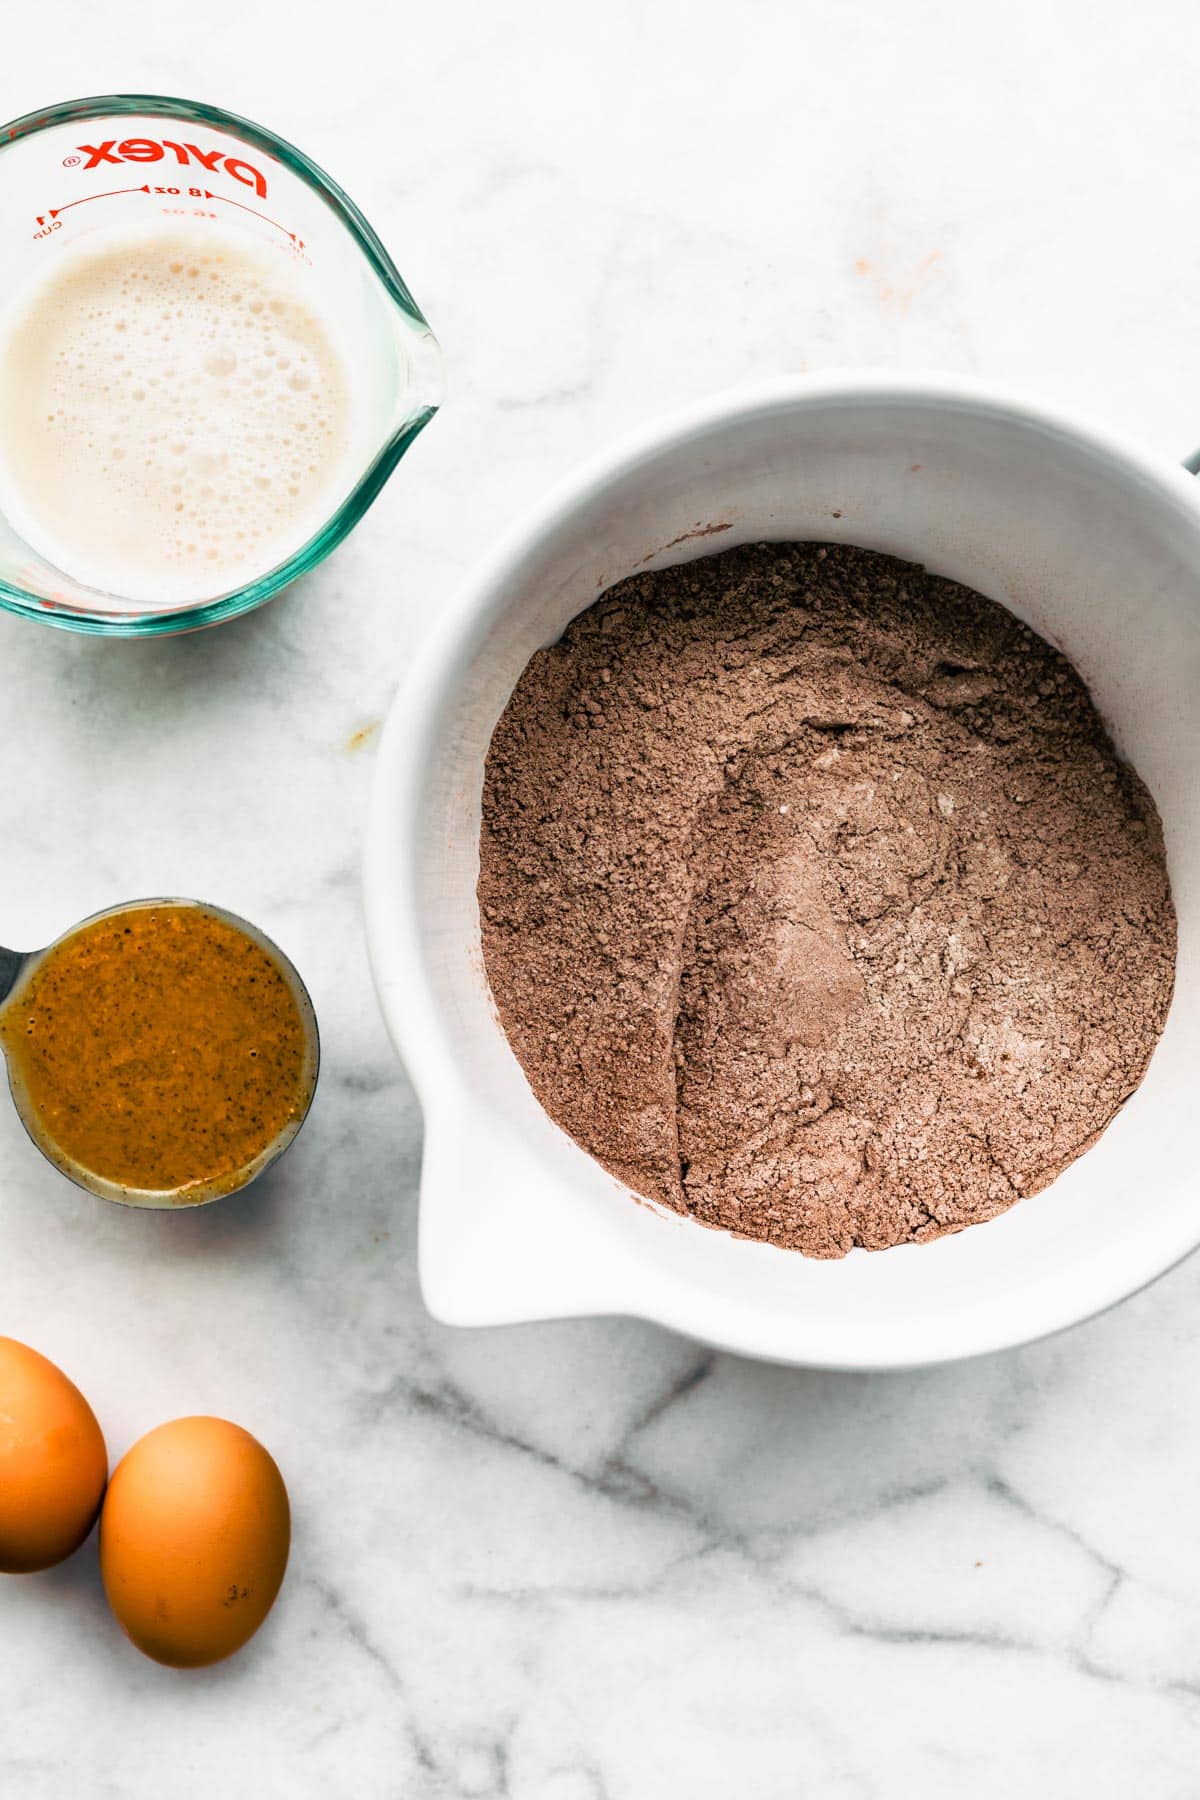
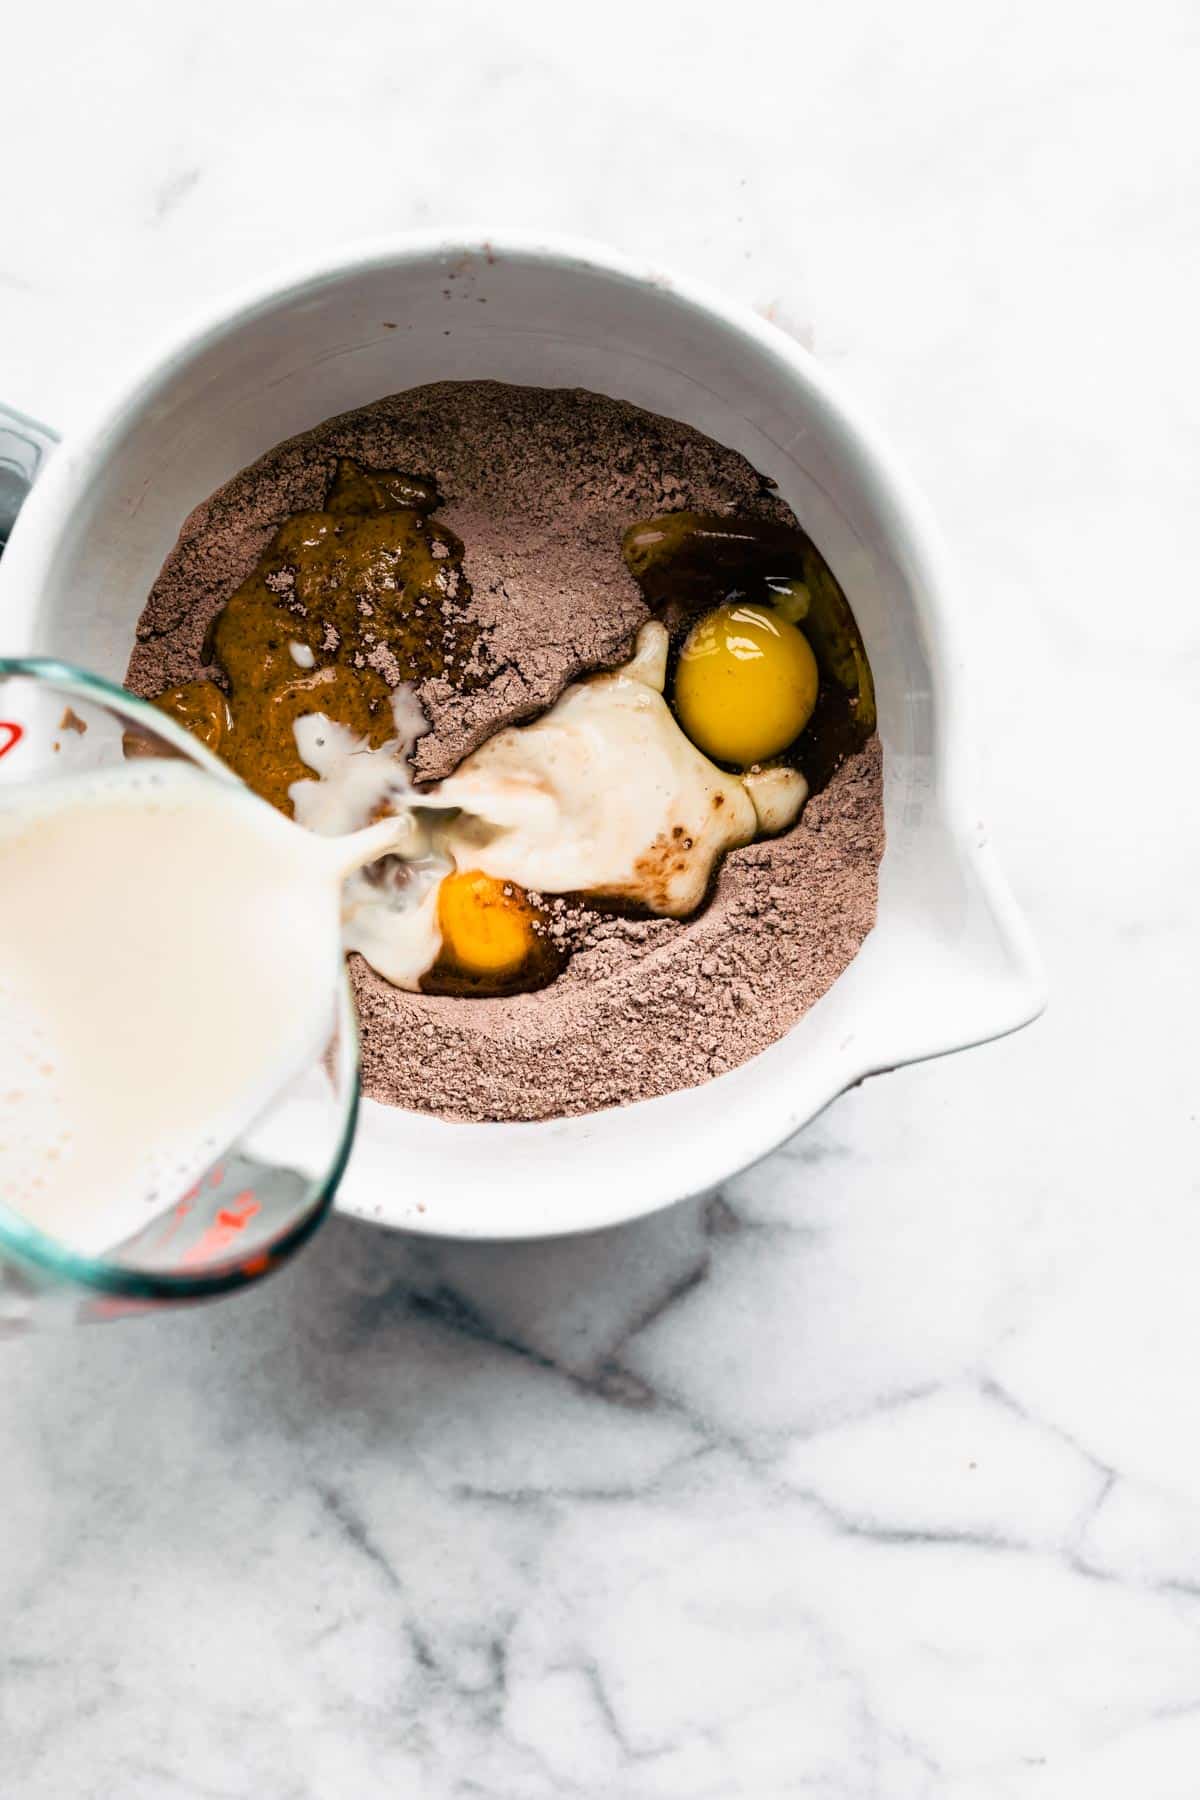


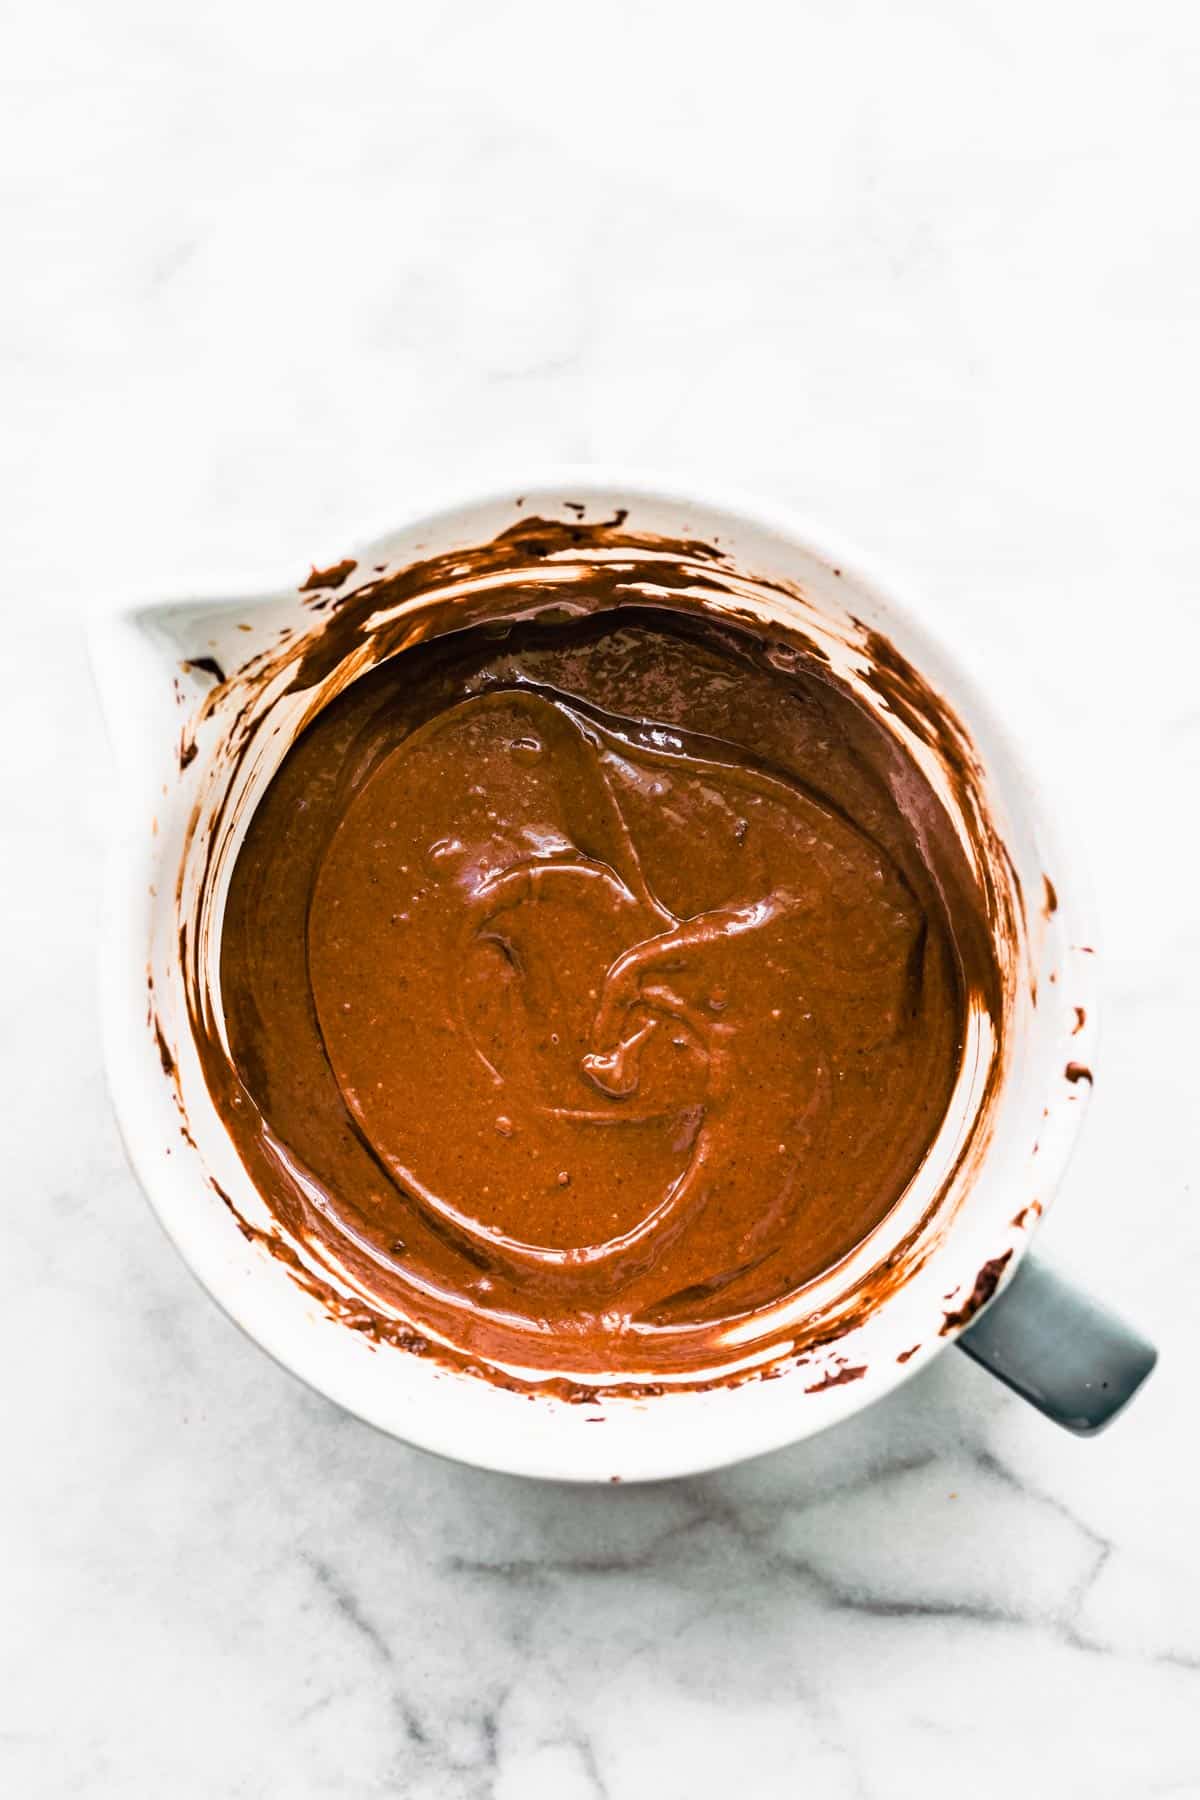
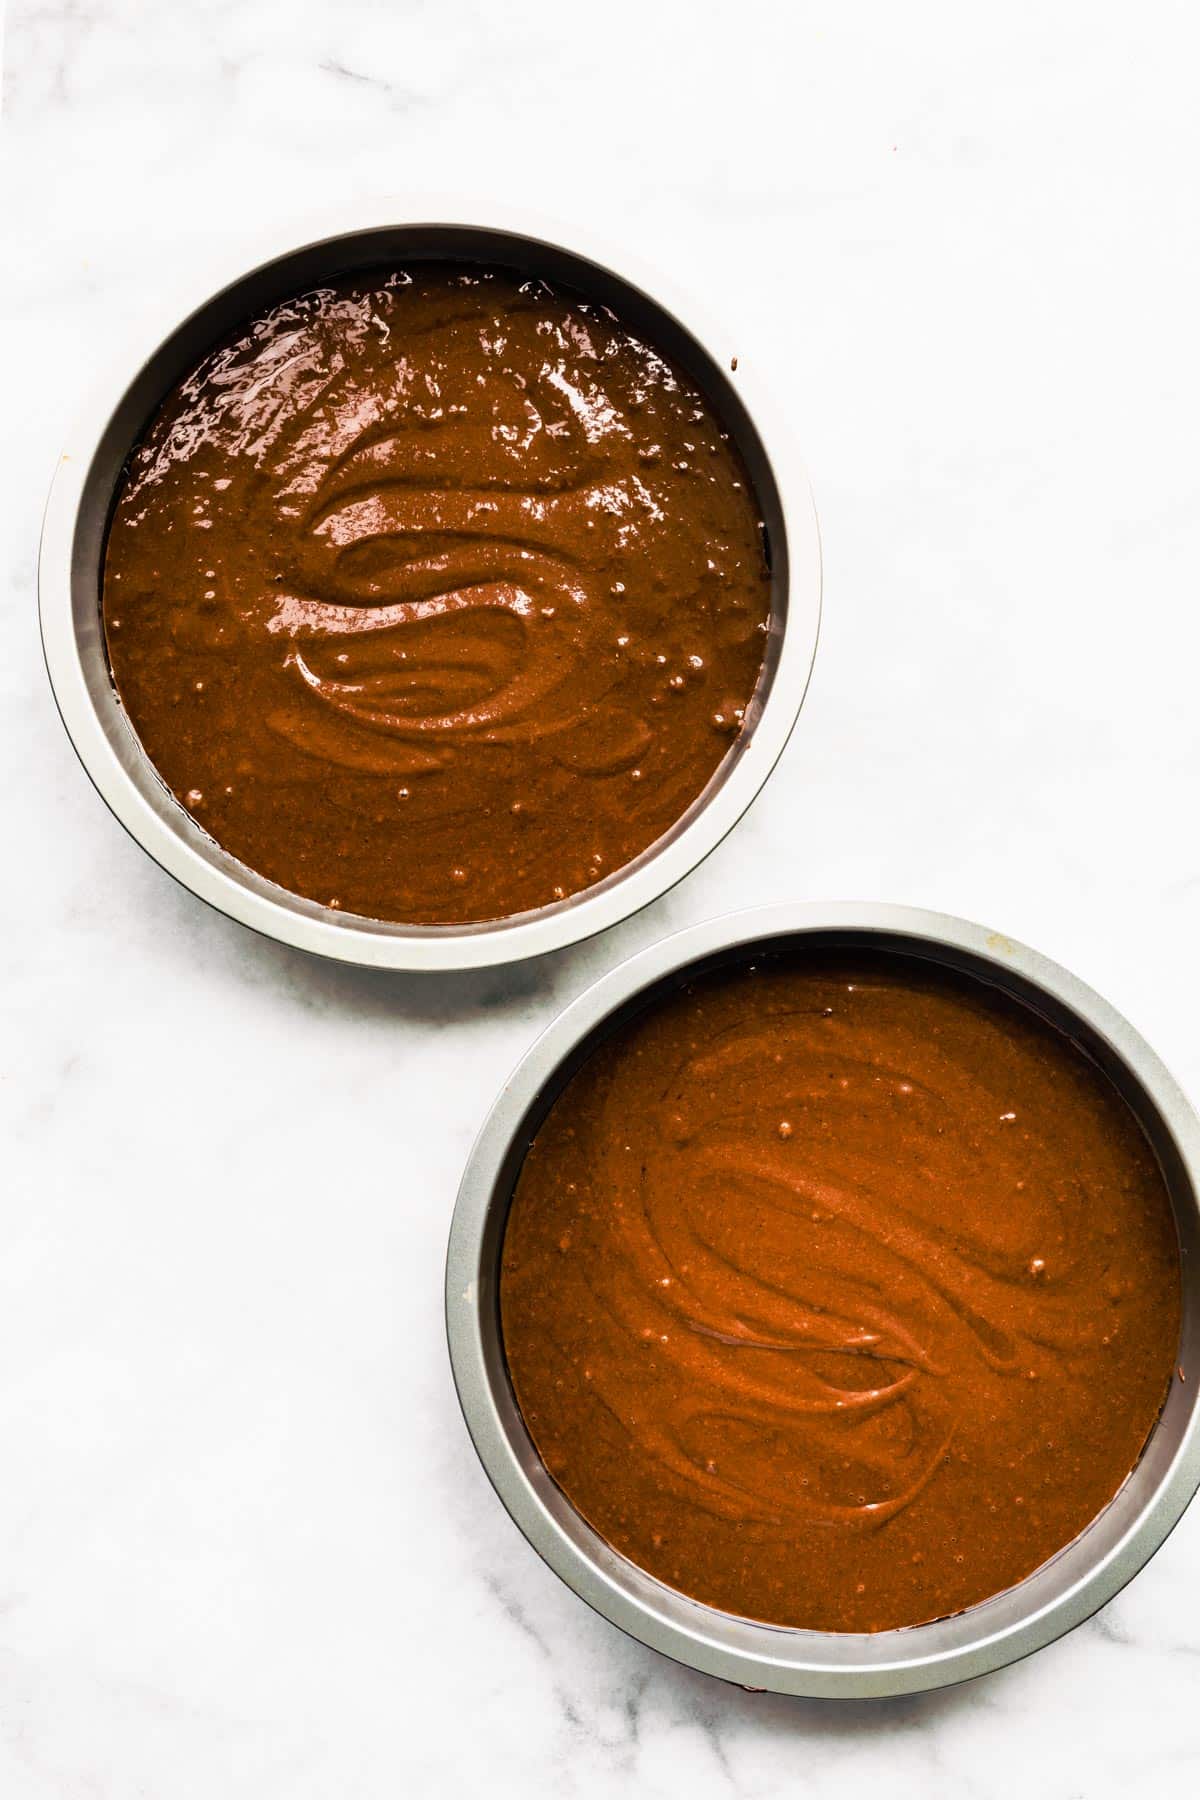


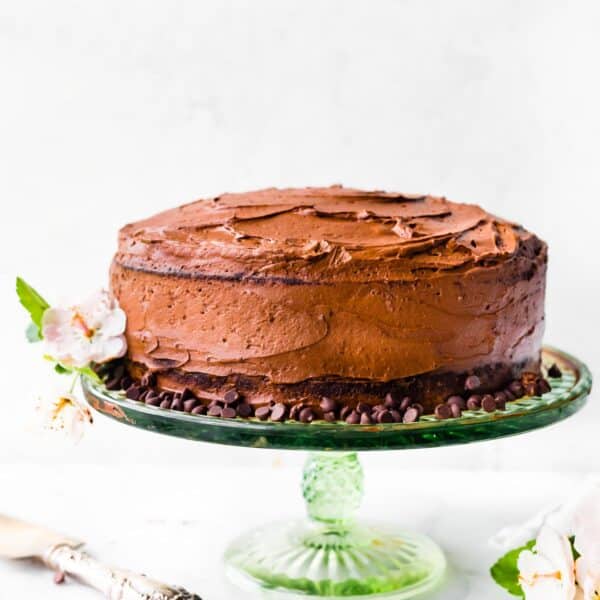


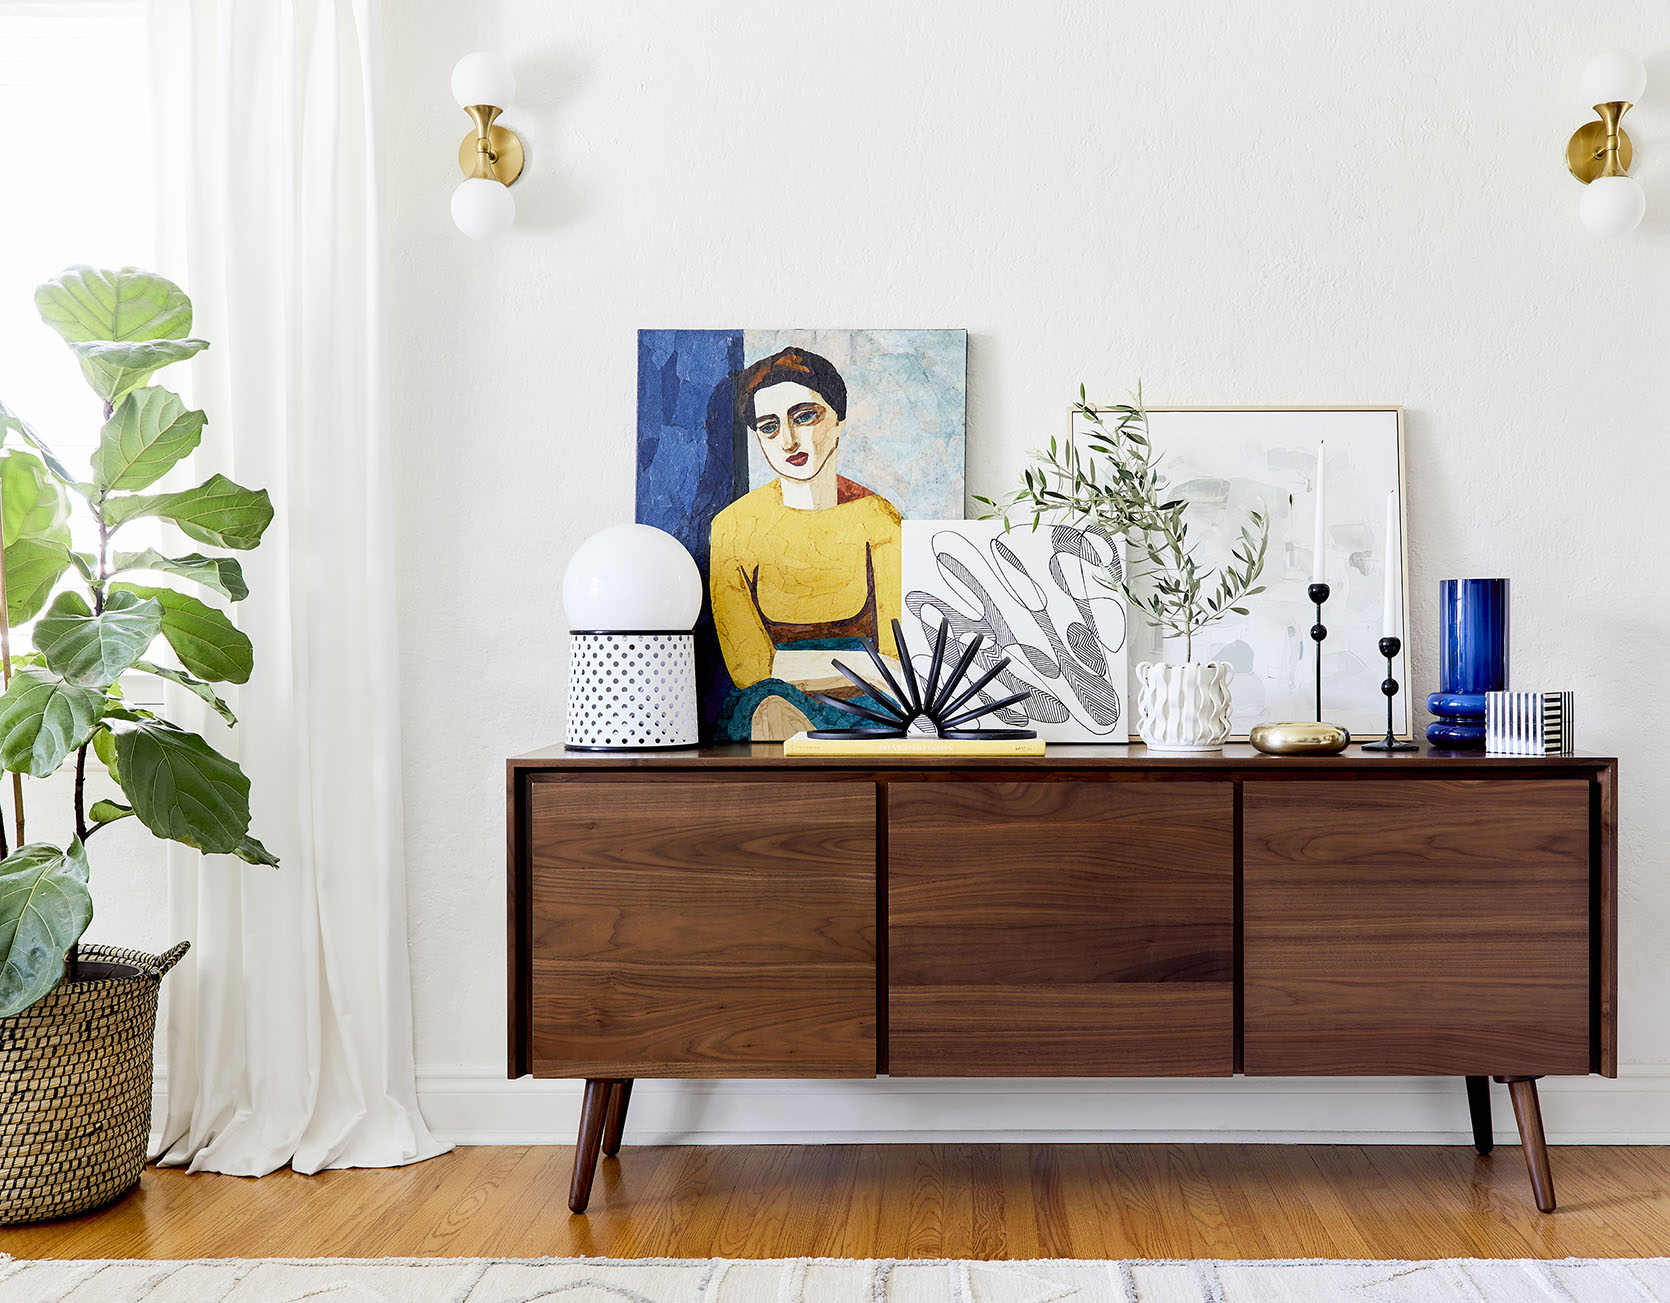


 Above: “Beforehand, the kitchen was chaotic, dark, and a small and unusable space,” says Al. “The layout felt disorganized and wasn’t aesthetically pleasing. The existing kitchen needed to be ripped out, and the walls needed plastering.”
 Above: A custom plate rack and an arched backsplash, Temi’s idea, add to the luxe look. (For more, see Trend Alert: Sculptural Marble Backsplashes—though, in keeping with her budget, Temi’s worktops and backsplash are actually Ventatino quartz.)
 Above: A well-worn breakfast table adds to the freestanding look.
 Above: The range cooker—tucked into a nook—was kept in place, as was the parquet flooring.
 Above: The team designed a custom freestanding larder to fill the corner beside the range.
 Above: Inside, there are specially designed spaces for spices and dry goods as well as bulky countertop appliances.
 Above: The kitchen is also equipped with an induction cooktop. A sliding glass door leads into the WC.
 Above: And a glimpse in the WC, with farmhouse sink and brass taps.