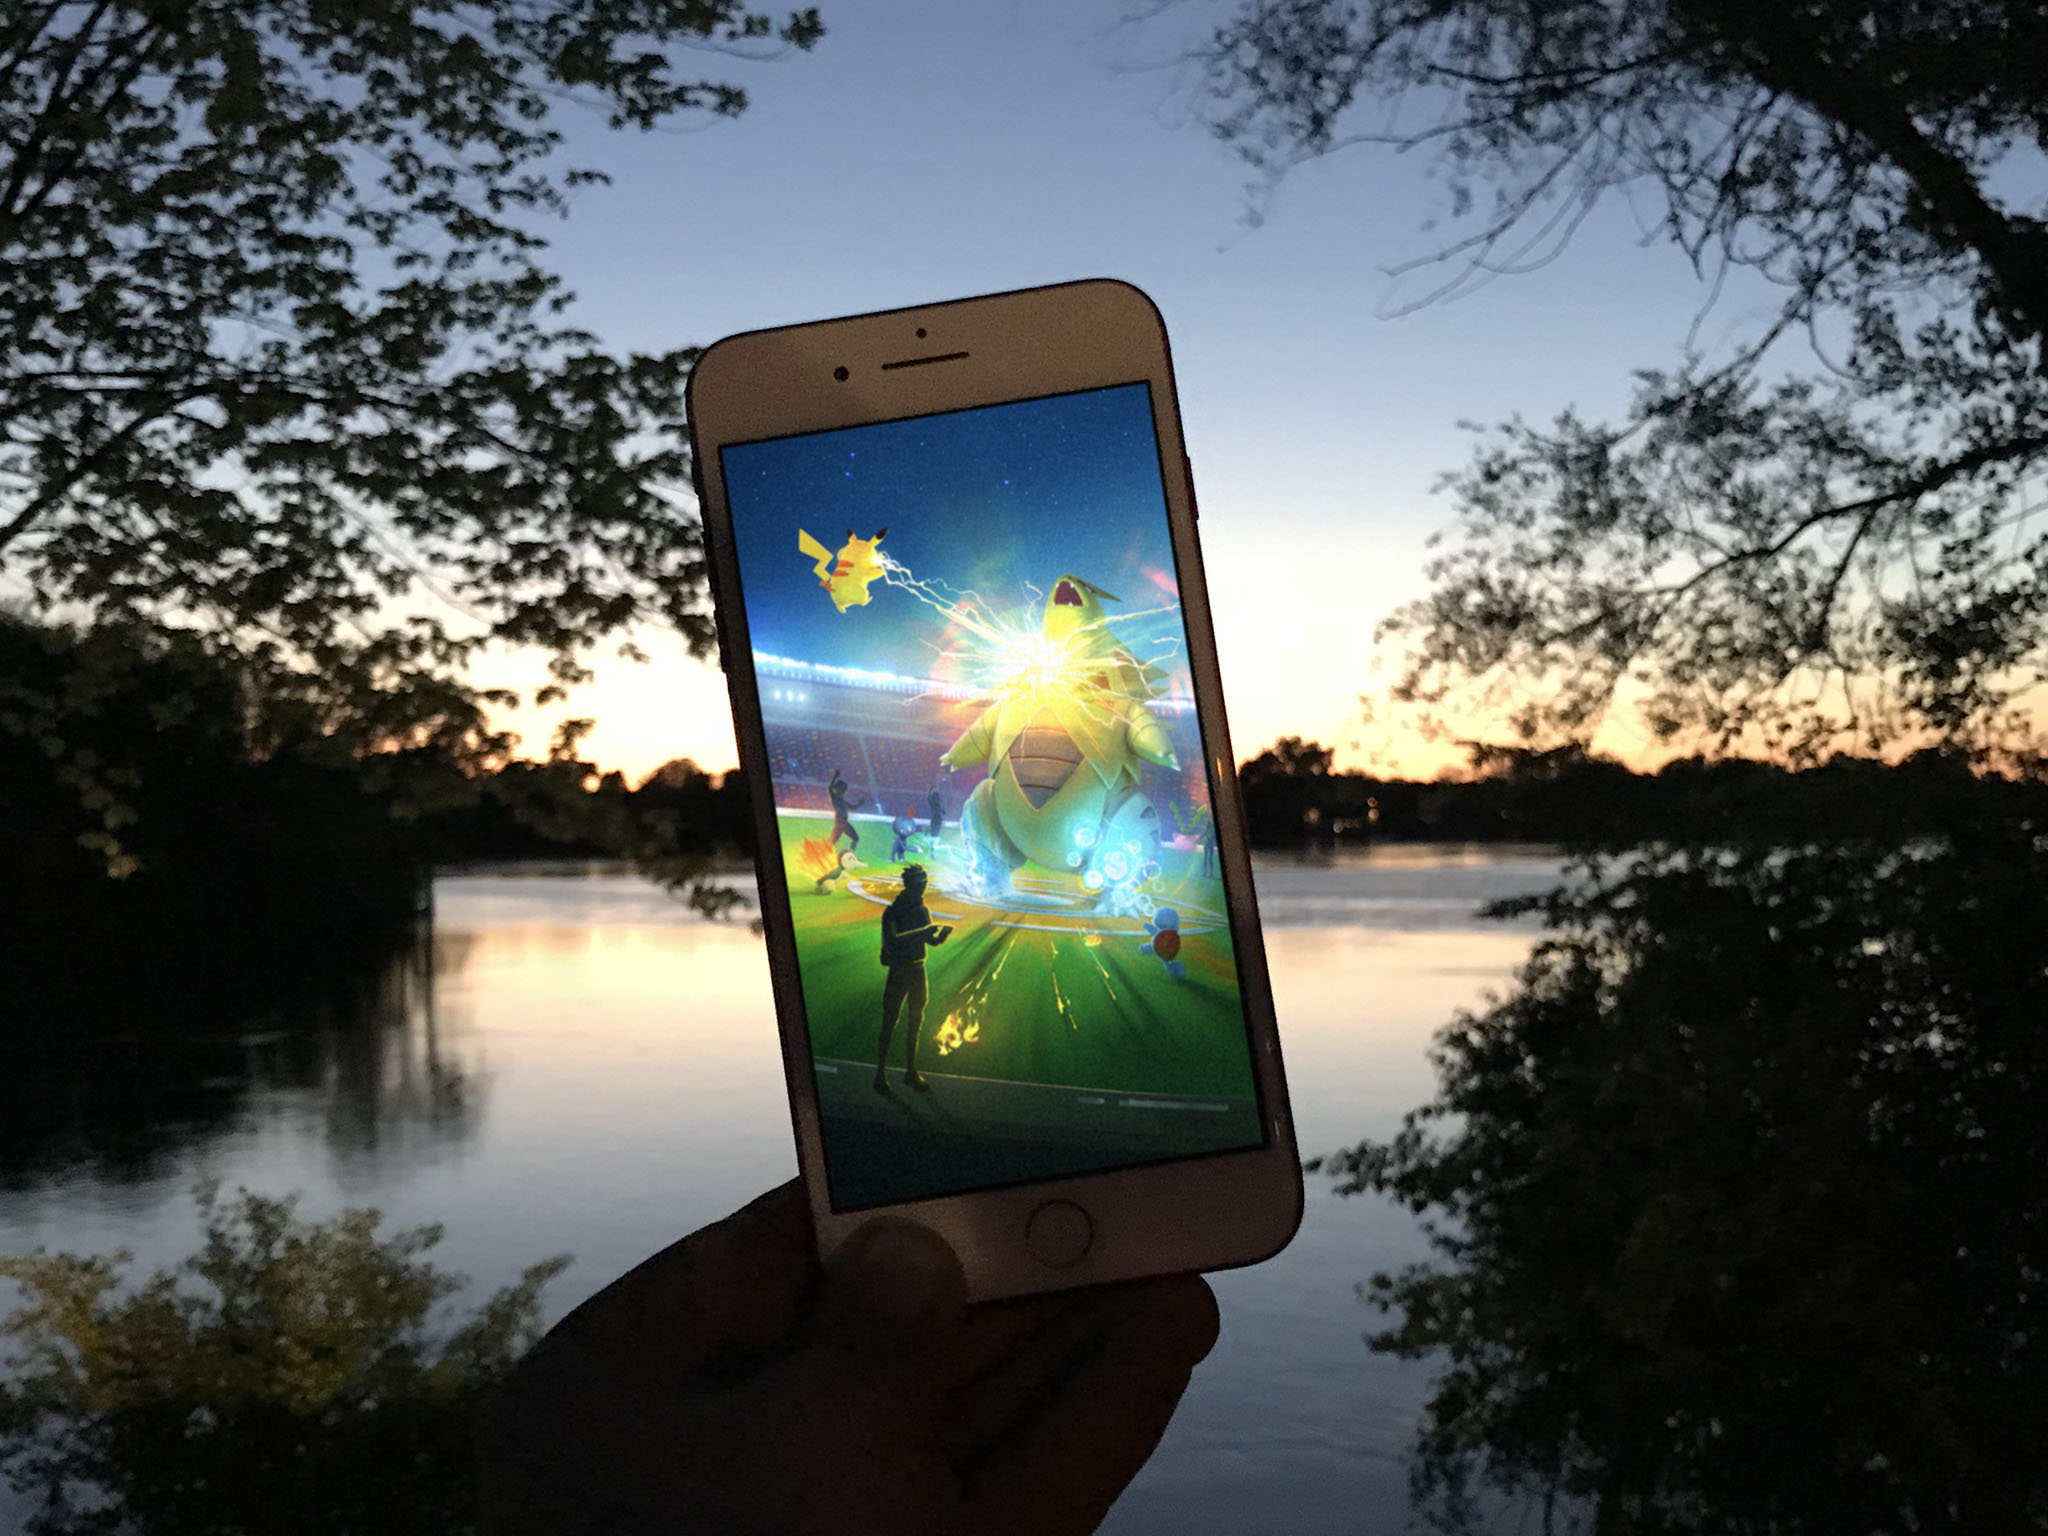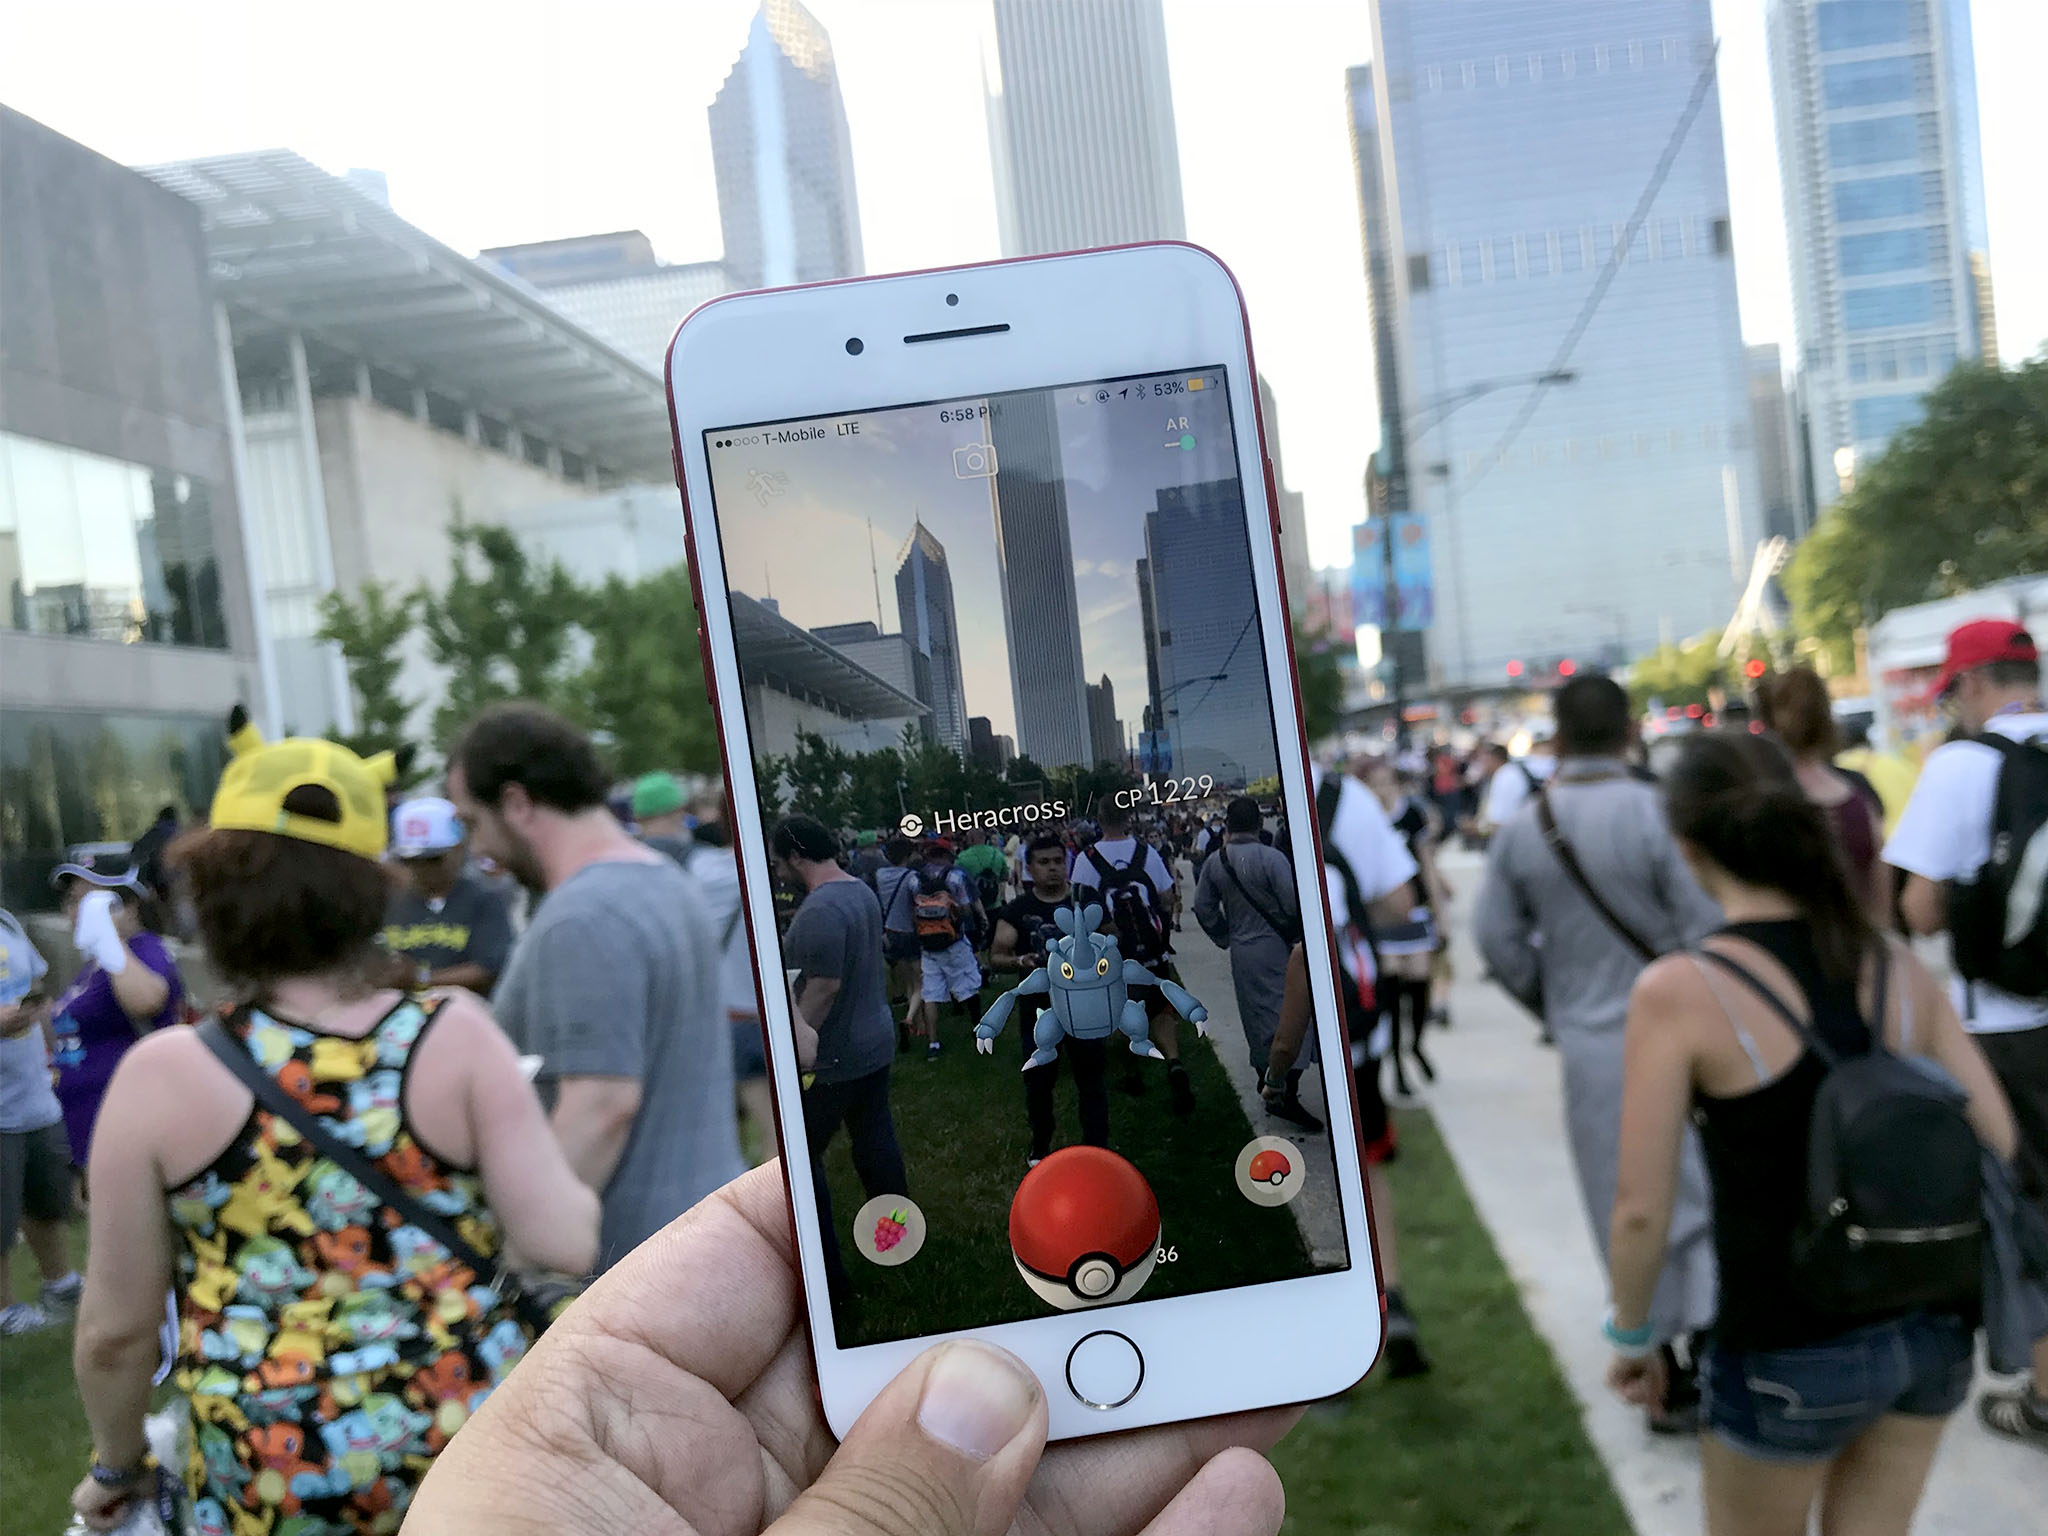
What are the best Pokmon Go tips and tricks? Here are all the latest!
I've been playing Pokmon Go since it launched. I've almost got enough experience points to have reached level 40 twice. I've completed my regional Pokdex for Kanto, Johto, and Hoenn, and have beaten over 1000 Raids. Over the last couple of years, levels, events, and encounters, I've picked up a few tips and tricks that have helped me immensely. It's the stuff I know now that I wish I knew back when I started. Heck, I wish I knew some of it back when I hit level 30!
We have lots of individual guides you can check out for quick answers, but here you can find the most important tips and tricks for the entire game.
Our Complete Pokdex Leveling up fast Getting Maximum Stardust Gyms Best Move Sets Eggs Nests Maps and Trackers Making friends Cheats and Hacks Team Go Rocket Pokmon Go Battle League
Finding: Check your Nearby and Sightings
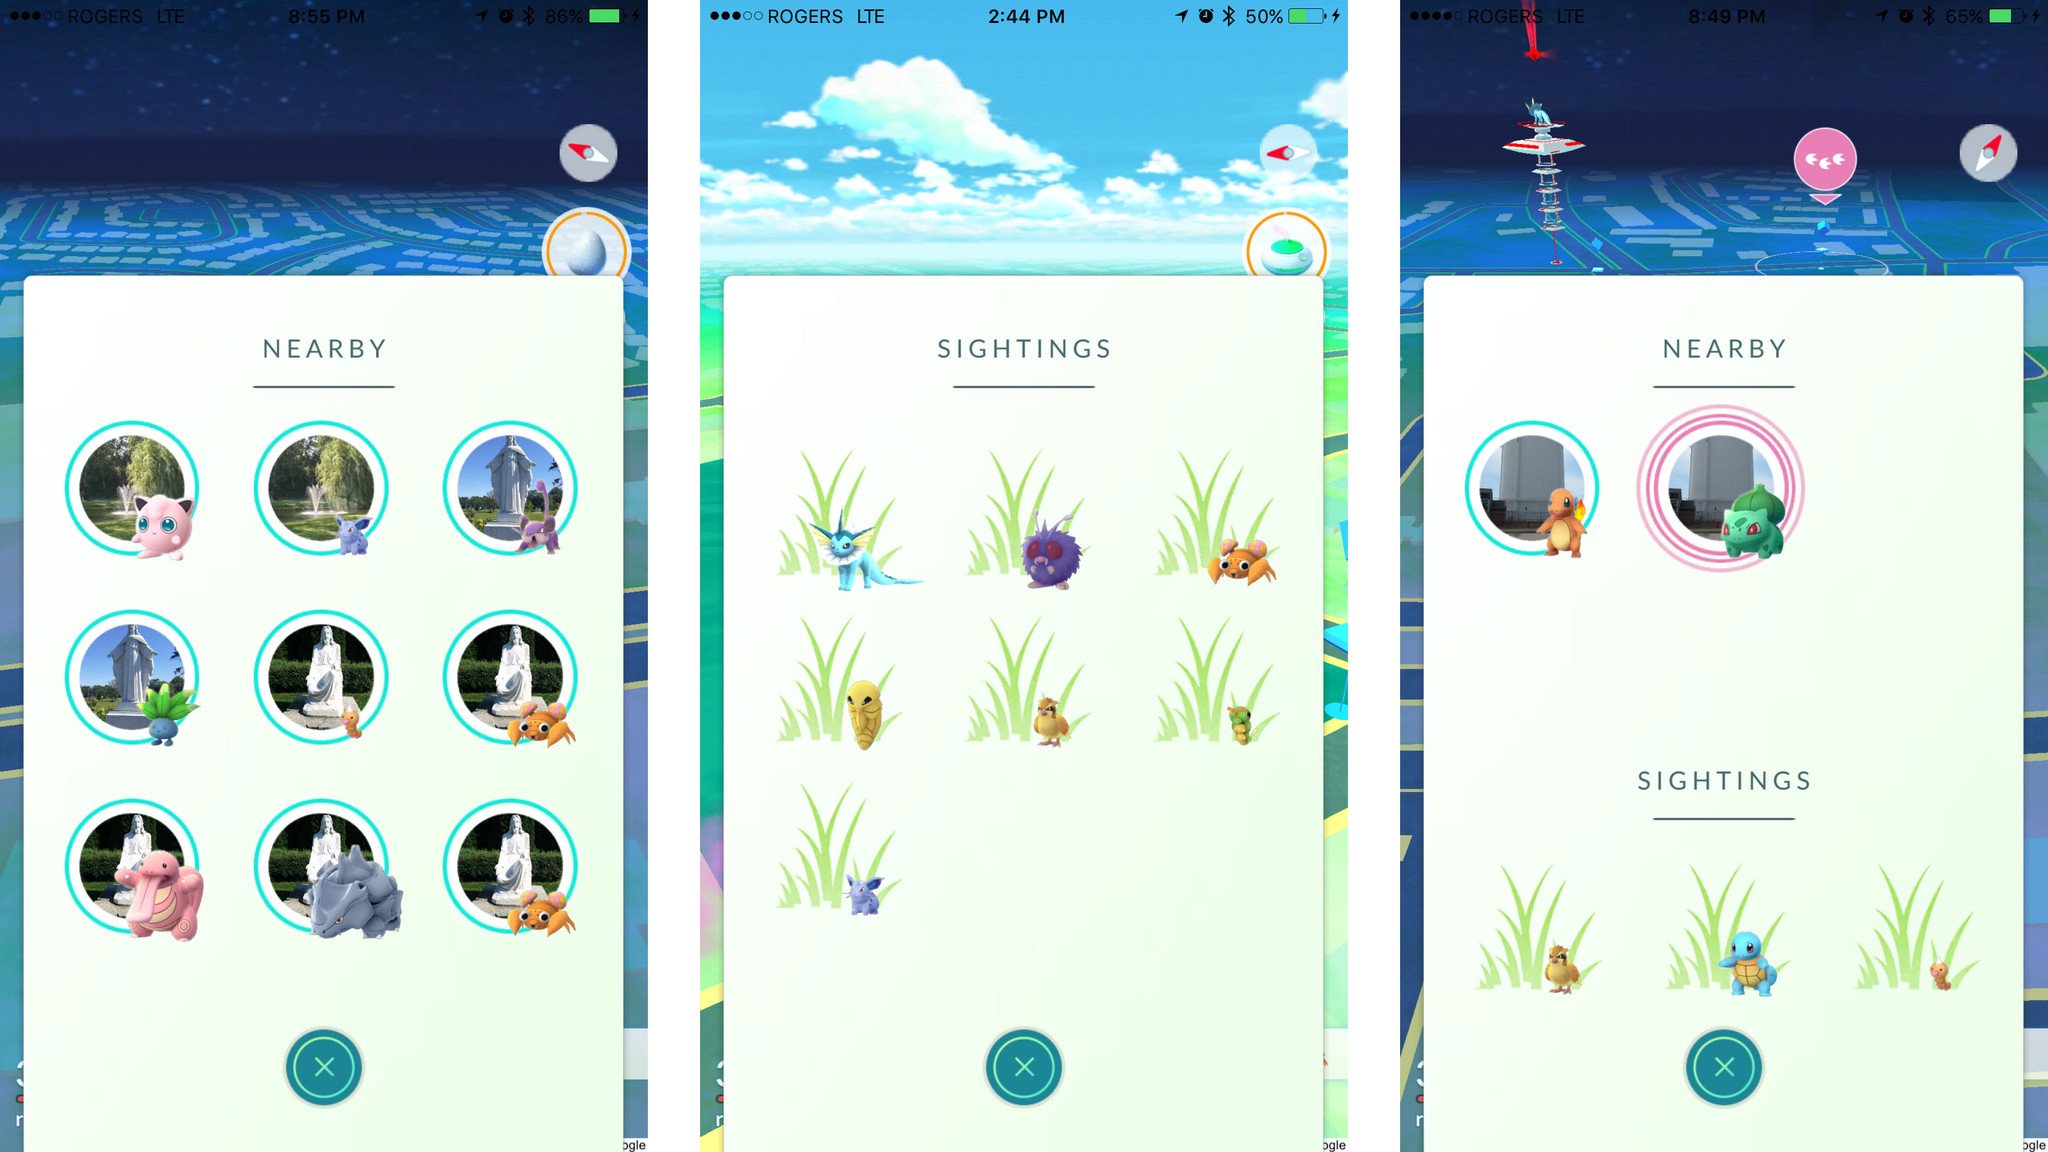
Pokmon Go includes two distinct forms of detecting the Pokmon in your immediate vicinity. The first is Nearby, which shows you Pokmon hanging around the PokStops in your area. The second is Sightings, which shows you the Pokmon hiding anywhere close by, ready to spawn.
The Pokmon tab at the bottom right of your travel screen shows you up to three Pokmon. Tap on it, and you'll see up to nine. Depending on what's in your area, they'll be all Nearby, all Sightings, or a mix of both.
Neither Nearby nor Sightings show you every Pokmon around you. If there are a lot of PokStops in your area and a lot of Pokmon loitering at those Stops, Nearby will only show you a random sampling.
In a perfect world, if a Snorlax spawned close by, it would override everything else and pop straight to the top. But we live in a very, very imperfect world. So, Nearby, if that Snorlax wasn't at a PokStop, you'd have to walk within 40m or so or risk missing it.
Catch some of the Pokmon at the PokStops, though, and you thin things out, letting Sightings back in. Then you might see that Snorlax sooner.
You can't watch Nearby and Sightings 24/7, and a person can't live by FOMO (Fear Of Missing Out) alone. If you do have a few moments here or there, though, tap open Pokmon Go and take a peek.
I was once out filming a video review, took a spare second to check, and found a Snorlax had spawned right on top of me. When I arrived at a friend's house for dinner, I popped it open and saw a Lapras right on the street corner. It's only happened a handful of times, and I've no doubt missed more than I've caught, but catching any super-rare Pokmon that just happen to be around is better than none.
See how to find rare Pokmon in Pokmon Go
Finding: Know your nests
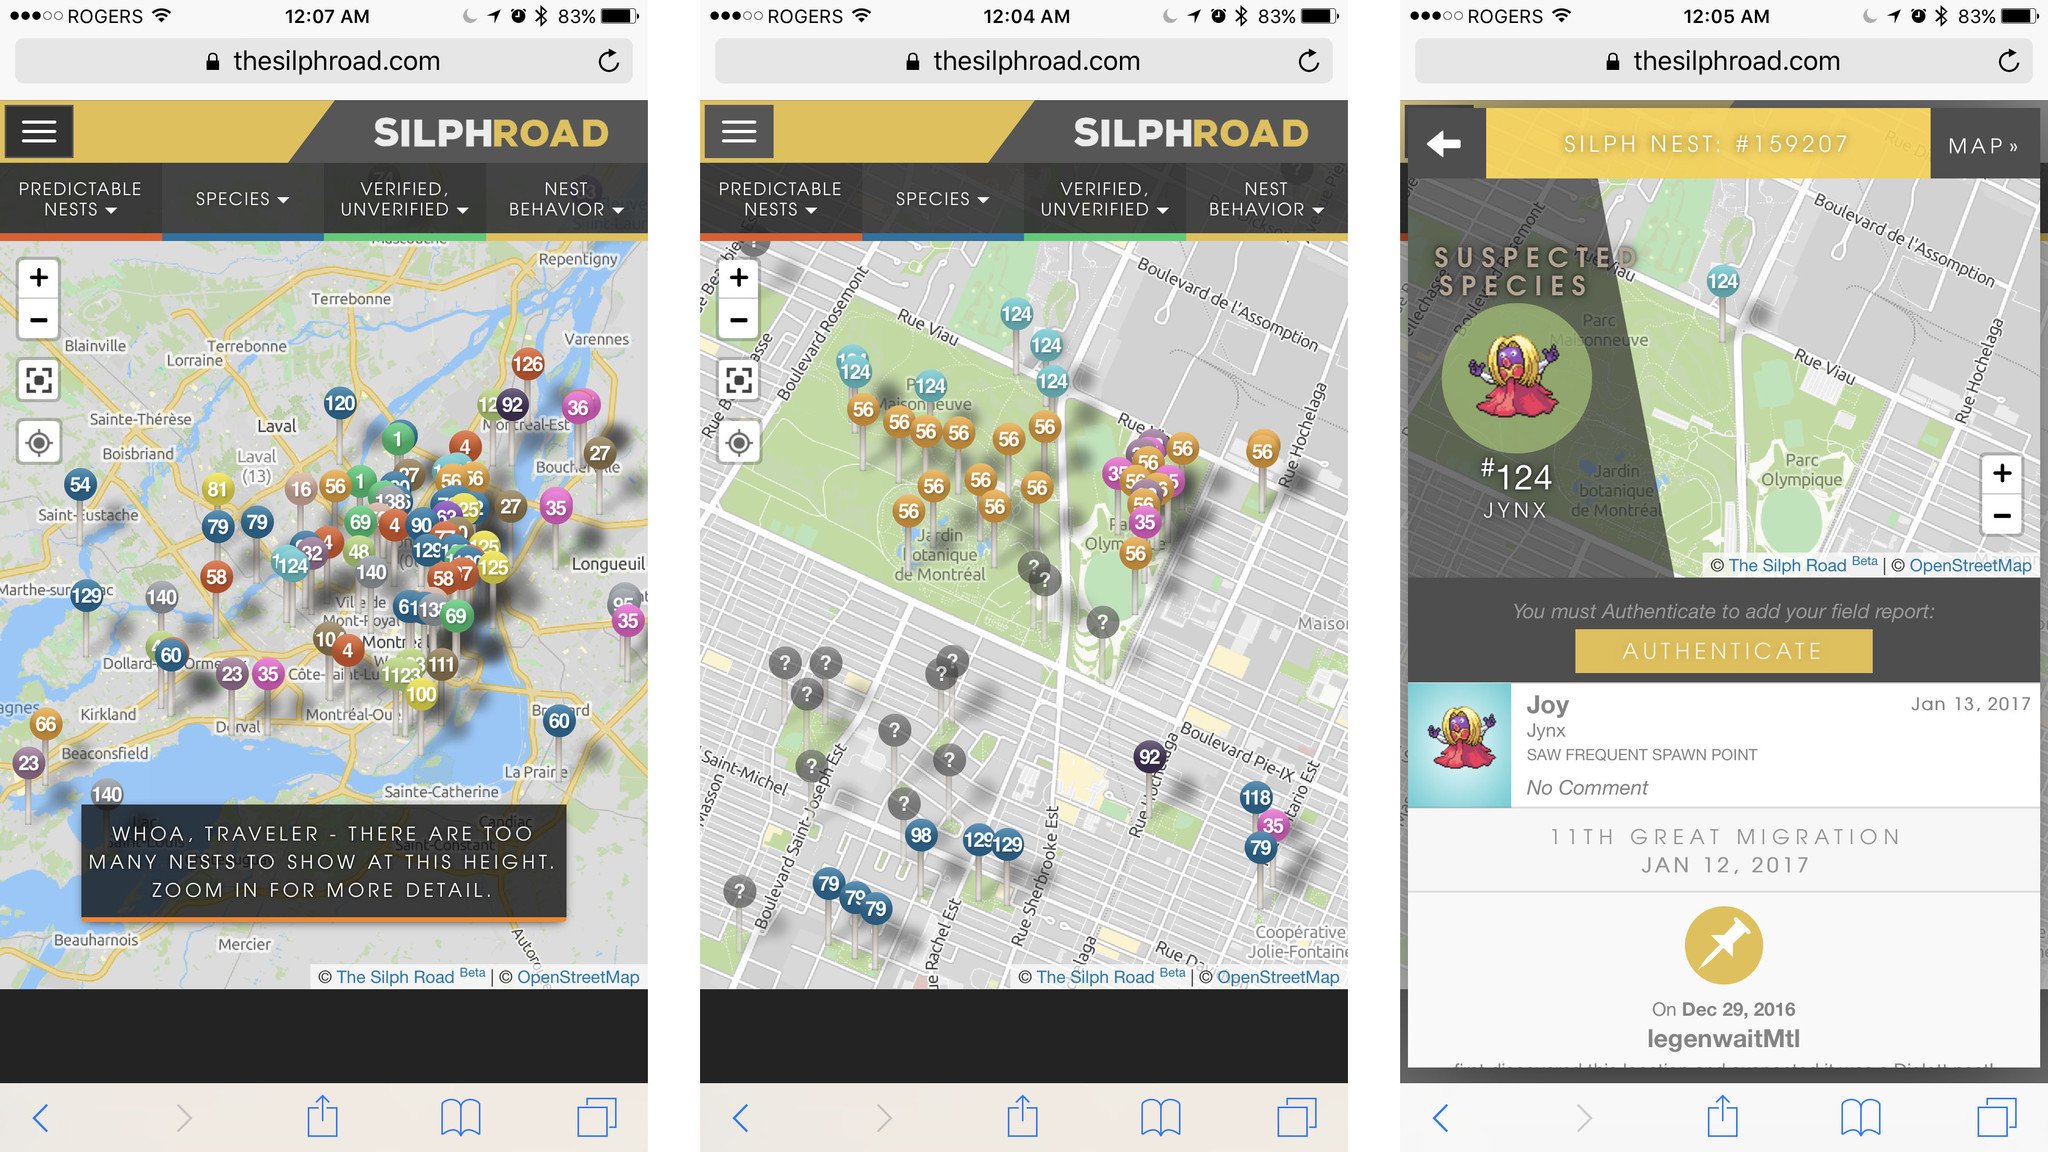
Most Pokmon have "nests," or consistent places where one to four of the same Pokmon will regularly spawn, sometimes even hourly. Sadly, very rare Pokmon like Tyranitar, Dragonite, and Hydreigon don't have any known nests, but others like Electabuzz, Rhyhorn, and all of the Starter Pokmon do.
Nests currently "migrate" every two weeks. These migrations occur at 12 a.m. UTS. (4 p.m. PST / 7 p.m. EST or 5 p.m PDT / 8 p.m. PST) every second Thursday. That's good, because it gives you a couple of weeks to stock up on any good Pokmon at your local nests, but also changes things up fairly quickly if you get stuck with a bad nest. So, over a few months, your Charmander nest might become Slowpoke, Charmander again, Marill, Drowzee, Yanma, Growlithe, and so on. Nest migrations are seemingly random, though, so you never really know what you'll get.
Water spawns aren't nests because they don't migrate and have multiple water-type Pokmon that spawn together. For example, Staryu, Slowpoke, Poliwag, Psyduck, Chinchou, Remoraid, Magikarp, and Wailmer often all spawn at the same water-side points. And if Magikarp and Wailmer are spawning hourly... Dratini and Feebas may just be spawning daily.
The same goes for a few others, like electric spawns. Find a big electric center at a university or other large structure, and don't be surprised if you find Magnemite and Voltorb aplenty along with it.
Learn about Pokmon Go nests and how to find them
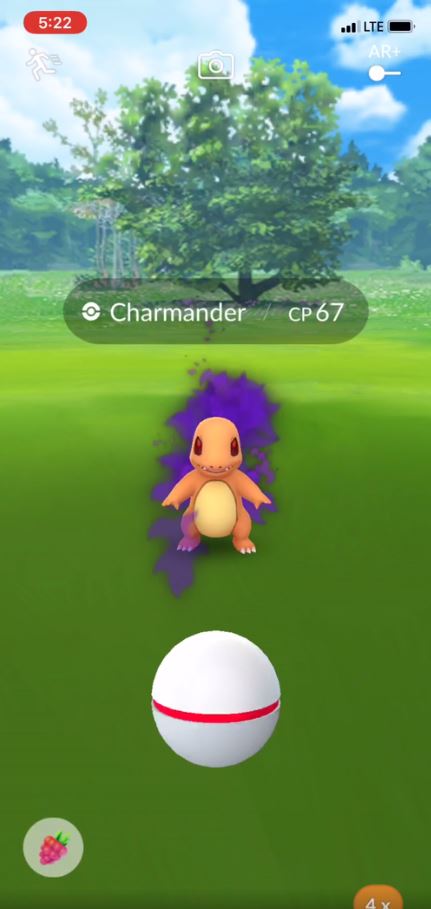
Catching: Always be Curving (ABC)
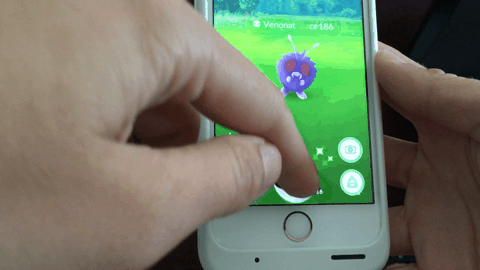
Throwing a Curve Ball in Pokmon Go gives you a 1.7x bonus to catching a Pokmon. (Catching means they don't break free from your Pok Ball or, worse, flee.)
The 1.7x bonus for a Curve Ball is higher than the 1.5x bonus you get for using a Razz Berry or switching to a Great Ball, and it consumes no resources. It's also cumulative, so if you do use a Razz Berry or Great or Ultra Ball, you get a 1.7x bonus for curving on top of the bonus for the Berry or better Ball. It's basically free bonus. All you have to do is get good at throwing it.
Learn how to throw the perfect curve ball every time
Each Pokmon has one or two types, and each type has a medal. Typically, if you catch 10 of the same type, you get a bronze medal. Catch 50, and you get a silver medal. Catch 200, and you get a gold medal. Why bother? Bronze medal earns you an extra 1.1x bonus for catching Pokmon. Silver gets you a 1.2x bonus, and gold gets you 1.3x. It's not as high as a Curve Ball bonus, but it's also effortless once you have it. And any bonus you get to catching that Dragonite might matter!
How to get every medal in Pokmon Go
Bonuses stack together, so if you use a Razz Berry, then throw a Curve Ultra Ball at a Pokmon you have Gold Medal for, and hit the Excellent Bonus, you catch rate multiplies through the roof.
- Pok Ball: x1.
- Curve Pok Ball: x1.7.
- Curve Ultra Ball: x3.4.
- Curve Ultra Ball + Razz Berry: x5.1.
- Curve Ultra Ball + Razz Berry + Excellent: x10.2.
- Curve Ultra Ball + Razz Berry + Excellent + Gold Medal: x13.26.
Golden Razz Berry raises the catch rate even higher, and after a few Raids, you'll have plenty. Don't be shy to use them on the Pokmon that mean the most to you.
How to stack bonuses and catch any Pokmon in Pokmon Go
When you see a Pokmon on your catch screen, you also see the CP (Combat Power) of that Pokmon. If the CP is low, we tend to think the level is low, making it easier to catch. But CP doesn't just depend on level; it also depends on stats (IV).
So, a Pokmon with low CP could be a low-level Pokmon with good stats... or it could also be a high-level Pokmon with lousy stats that's super hard to catch.
In other words, if a low CP Pokmon has a red or orange ring around it and keeps escaping your Pok Ball, odds are it's a lousy Pokmon that just happens to be high level and may not be worth your continued time and resources to catch.
Catching: Set your circle size
Once you get the hang of hitting Great or even Excellent throws, you can up your odds by setting the circle size, so it's ready when you want to throw.
- Touch and hold the Pok Ball until the target circle shrinks down to Excellent size.
- Wait until the Pokmon starts to attack.
- Spin the Pok Ball so you can curve it.
- As the Pokmon gets to about 3/4 through its attack, throw the curve ball as close to dead center as you can.
The target circle will remain the same size you set, so if you hit it correctly, you'll score the Excellent throw and associated bonus.
Maxing: Catch 'em all, seriously

You may be tempted to ignore more common Pokmon, or Pokmon you already have, for rare Pokmon and the ones you still need to complete your Pokdex. Don't. If you have enough Pok Balls, there's more than enough reason to keep catching the more common or already registered Pokmon.
Pidgey, Caterpie, and Weedle only require 12 candies to evolve. So, you want to catch as many as possible to get as much candy as possible. Then drop a Lucky Egg and evolve them all at once to get as much XP as possible. It's called grinding, and it's a huge accelerator when it comes to leveling up.
None of the Gen 2 Pokmon are at the same 12 candy level, so while you can catch Sentret, Hoothoot, and the rest, they're more like Rattata a slower grind. Still, grab 'em if you need 'em. However, Wurmple and Whismur from Gen III are only 12 Candies to evolve, and Pidove from Gen V is as well.
If you're swimming in Lucky Eggs, and you have a Pokemon Go Plus, you can even drop an egg and then go to a place with a ton of spawns, like a big mall parking lot. Each catch will net you 300 XP, each miss 50 XP, and it'll add up fast. Almost as fast as mass-evolving.
How to get max XP and level up faster in Pokmon Go
Gyms no longer give the 500 Stardust per Gym per day for your Defenders Bonus. So, if that's what you were used to, you'll need to make up the difference somehow. Feeding Berries is both slow (20 stardust per berry) and resource-draining (you lose the berries). Catching as many Pokmon as possible, on the other hand, is faster (100 stardust per catch) and means you have as much Stardust as possible to power up.
Drop a Star Piece before you start, and you'll get 1.5x as you go. And since you're catching for XP anyway, it's a great way to double-dip.
How to really rack up the Stardust in Pokmon Go
Once upon a time, you had to wish for rare hatches or chase down nests to get the candy you needed to evolve and power up your Pokmon. Now there's Rare Candy. Sure, you can still hatch and catch your way to a lot of candy but, Rare Candy can be used as any candy.
Hatch all the eggs you can, catch all the Pokmon you can, and Raid when you can, and you'll have all the candy you need.
How to get all the candy you need in Pokmon Go
Having friends makes most games more enjoyable, and Pokmon Go is no different. Between the XP and Stardust, being able to trade and battle, and the massive bonuses when taking on Raids and Gym battles together, having friends can only improve your Pokmon Go experience. Even if you don't know many other players in real life, there are communities and groups across many social platforms, such as Facebook and Discord, where you can connect with local players and players from around the world to up your game. For more on how to make friends, check out our guide.
Friendship: How to increase your level fast
Friendship is an interesting mechanic in Pokmon Go that rewards you for raising your Friendship level, but you can only raise your level with each friend once a day. So, it's consistency that counts.
- Make sure you Raid, battle at a Gym, or exchange a Gift with as many of your Friends as possible every day. It takes 30 days to reach Ultra Friend and 90 days to reach Best Friend status. The fewer days you miss, the faster you'll level up.
- For long-distance Friends or Friends you didn't meet up with during the day, open or send a Gift. (Alternate Gifts because only one gift opening counts, so coordinate only one a day to save on resources and avoid duplication.)
- For friends you do see during the day, get in a Gym or a Raid. There's a limit of 20 gifts you can send or receive, but no limit to Gyms or Raids you can coordinate.
Trading: How to boost your Lucky odds
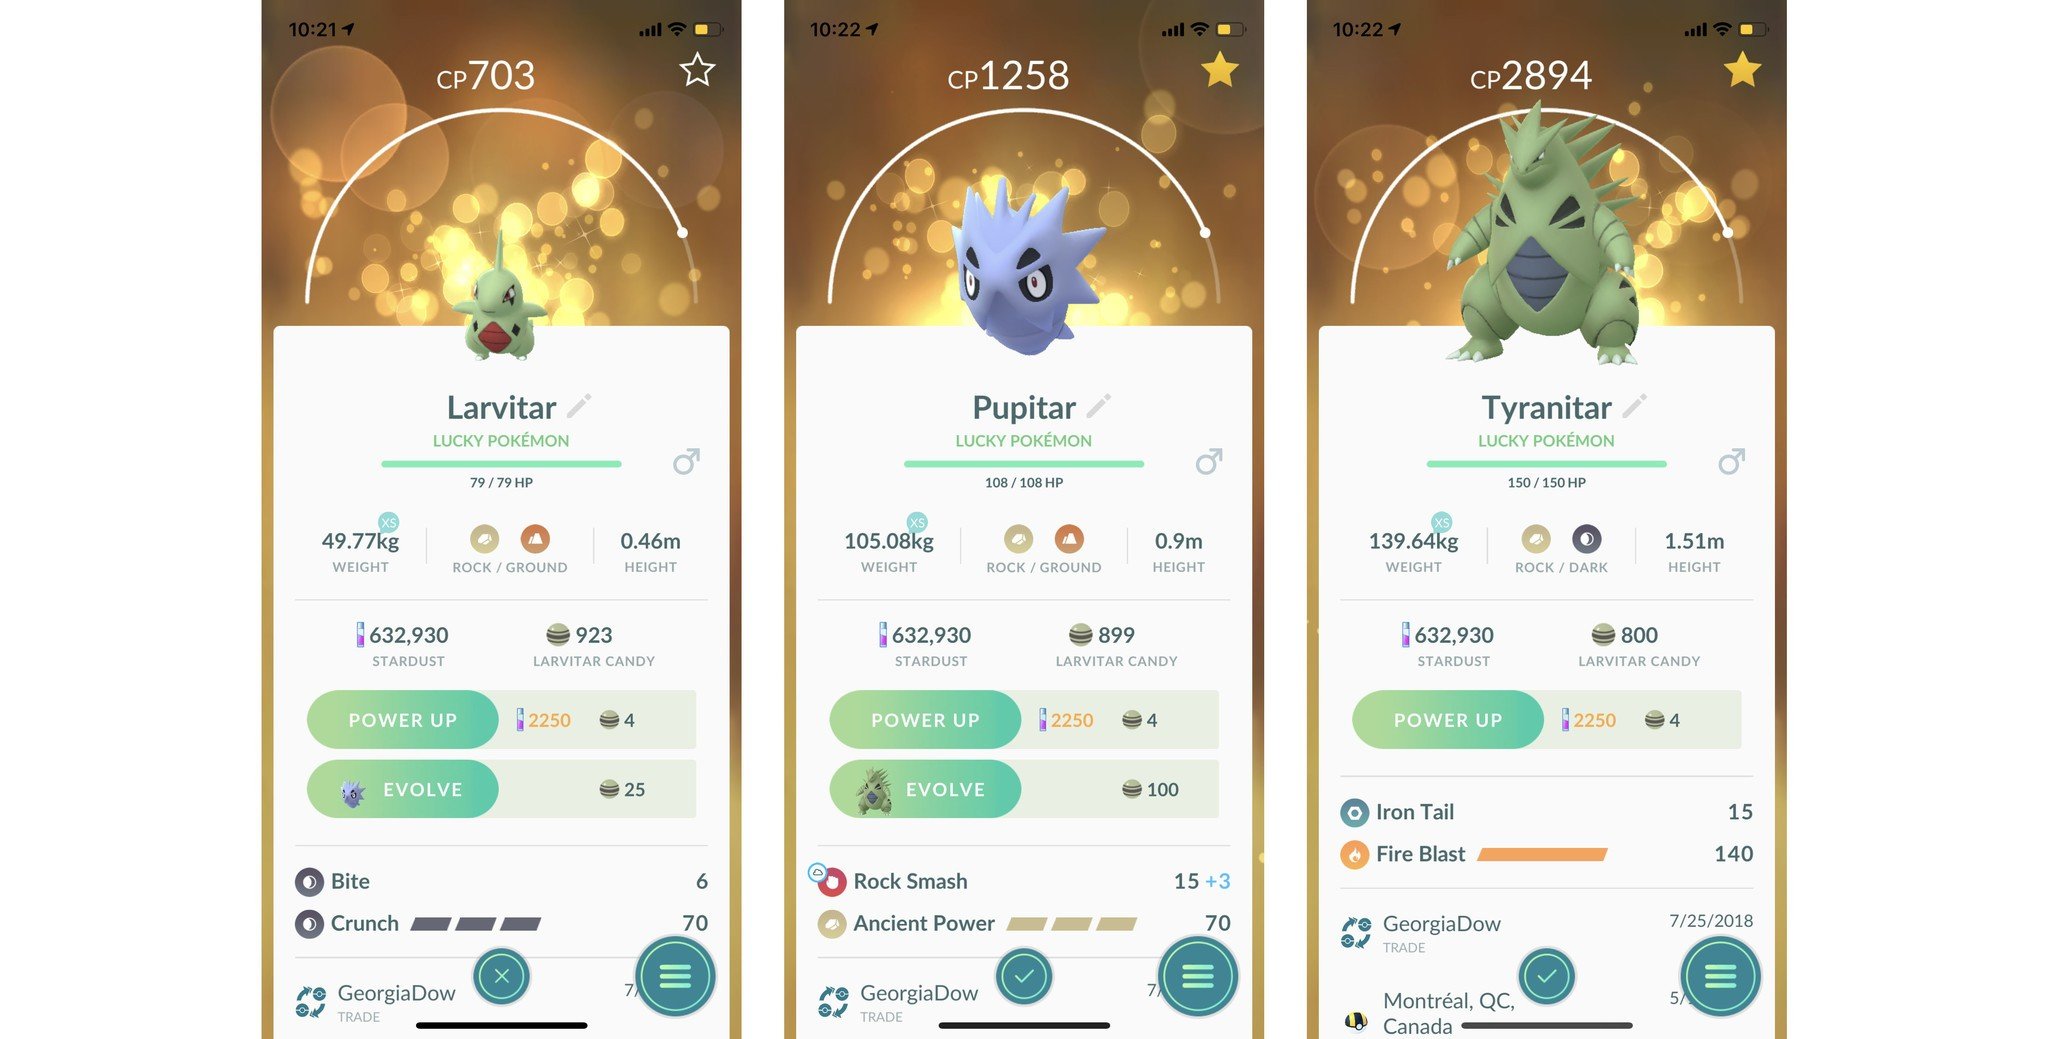
When you Trade Pokmon with a Friend, there's a chance both of you will end up with a Lucky Pokmon. Unlike Shiny Pokmon, Lucky Pokmon aren't a different color though they do sparkle on your screen but they do have a benefit: They cost only 1/2 the Stardust to power up.
The longer a Pokmon has been in your collection, the higher the chance you'll get a Lucky if you trade it.
So, if you want to trade high level but low IV Larvitar to try and get a Lucky Tyranitar, here's how to increase your odds:
- Trade your Larvitar for the oldest Pokmon they're willing to trade.
- Trade the oldest Pokmon you're willing to trade for their Larvitar.
Also, another mechanic was introduced in April 2019 called Lucky Friends that assures you a Lucky Pokmon. If you interact with someone with whom you've reached Best Friend status, you have a chance to become Lucky Friends (you'll get a notification). Anyone who is your Lucky Friend guarantees your next trade with that person will be a Lucky Pokmon.
Gyms: How to take them down quicker
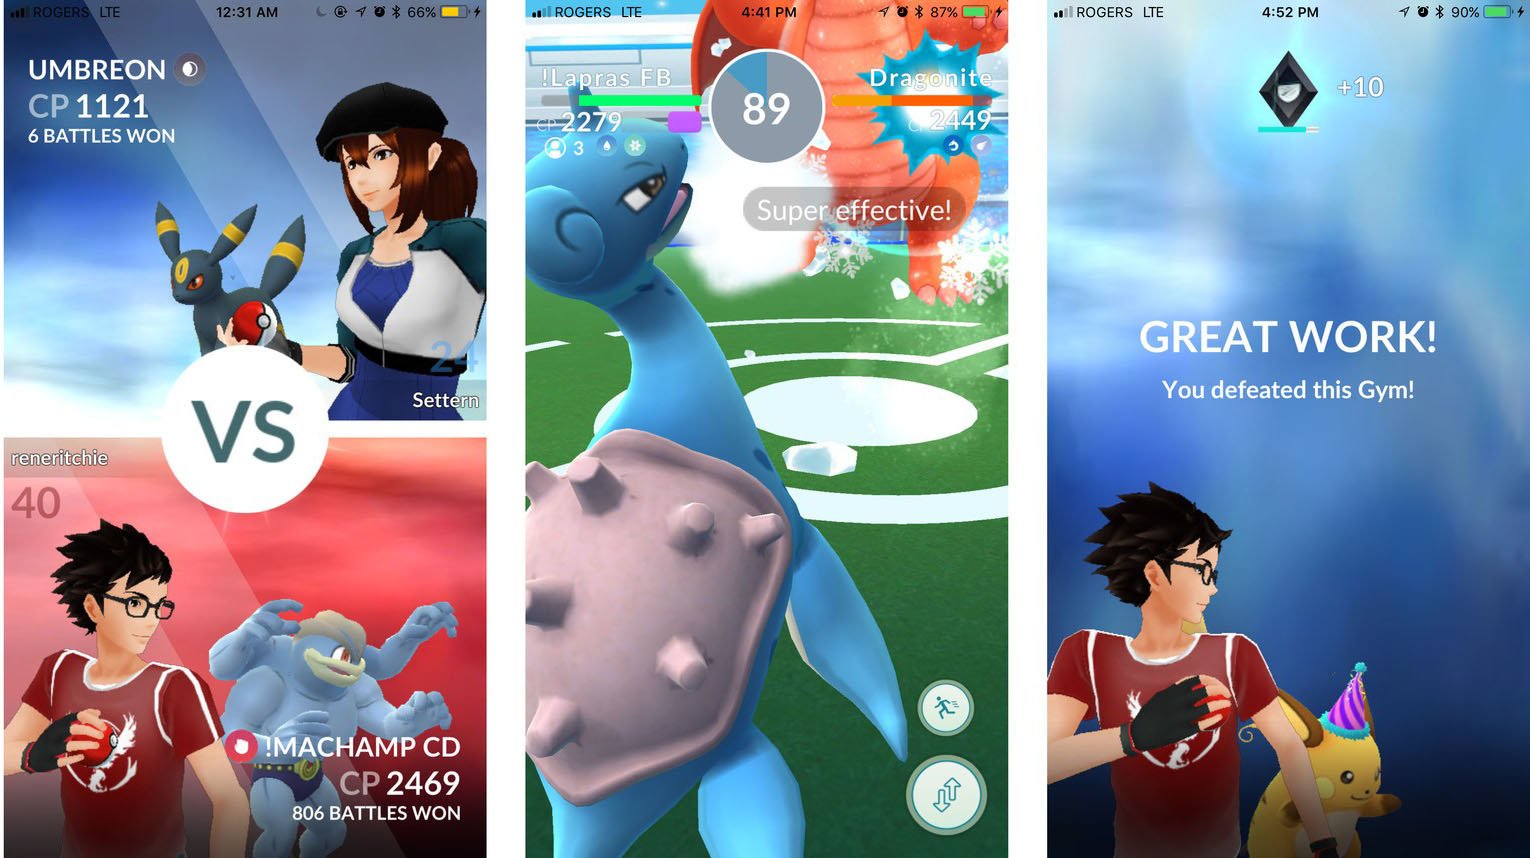
The current Gym system is very different from what Pokmon Go originally had. Thanks to CP decay, almost anyone can destroy almost any Gym in a short amount of time. Still, you can destroy them even faster if you want to, even if defenders are feeding berries.
It typically takes three rounds to take down a fully motivated Gym in Pokmon Go. If there's only one defender, that's three battles total. If it's a full six defenders, that's 18 battles. If you attack in groups, usually you all go together, and it still takes three rounds or up to 18 battles for everyone.
If you attack in waves, though, you can get that down to one round each.
- Attacker one enters the Gym and battles defender one.
- When attacker one defeats defender one, attacker two enters and starts battling defender one.
- When attacker one defeats defender two, and attacker two defeats defender one, attacker three enters and starts battling defender one.
- When attacker one defeats defender six, they can either stop or jump in and help attacker three with defender four. Either way, by the time attacker three is done, the Gym should be done too.
If you have more than three people, you can team up for the waves. Two people can do the first wave, for example. You only ever need three waves, though, because that's usually how many battles you need to take down the Gym.
You can also focus on taking out one Pokmon at a time, making it less likely other defenders will get notifications and start feeding berries as well.
- Attack the first defender.
- Drop out.
- Attack the first defender a second time.
- Drop out.
- Attack the first defender a third time.
- Drop out.
- Make sure the first defender is gone. If not (if someone is remotely feeding it), attack it again. If so, move on to the second defender.
- Repeat until all defenders are defeated, and the Gym is empty.
Combine the two methods, and you can wipe out any Gym quickly and effectively.
Gyms: How to defend them longer
Sure, under the new Gym system, anyone can take down any Gym they want. So, the trick becomes making them not want to take down your Gym.
Ideally, you want to work as a team and stack a Gym with the best mix of ultra-tanks and counter-counters as possible. You want to anchor your Gyms with the Pokmon that are the toughest to take down:
- Blissey
- Snorlax
- Chansey
- Slaking
If you want to optimize for intimidation, especially if you don't mind feeding Golden Razz Berry remotely, then you can go for higher CP and not worry about it. Especially with Slaking. That'll keep the Gym big and tall, further encouraging would-be attackers to keep stepping.
If you want to optimize for longevity, especially if you're low on Golden Razz Berry, you can stick to between 1200 and 1800 CP and hope for the best.
You can also anticipate counters. Most of the best defenders have one thing in common and one weakness in common. They're Normal-type and so are all vulnerable to Fighting-types.
To help compensate for that, you want to make sure your Pokmon have Psychic-type moves to at least damage the Fighting-types that'll be thrown against them.
- Blissey: Dazzling Gleam
- Snorlax: Zen Headbutt
- Chansey: Dazzling Gleam
- Slaking: Play Rough
Then you want to interleave them with Pokmon that do even more damage to the counters or the generalists that less tactical players will throw at them. That'll either beat down the attackers or force compromises in the attack teams and/or switching between rounds.
If you're working with a team and go to the trouble of stacking a Gym for maximum effect, keep in touch with that team while you're defending. Whether you're using Facebook Messenger, Discord, iMessage, Whatsapp, or something else, coordinate slot filling and berry feeding to really maximize your defense.
Raids: How to run them right
Raiding has brought new challenges, new rewards, and a new sense of community to Pokmon Go. But if you're not careful, you can consume a lot of resources at best, and fail in your raid attempts at worst.
There's the simple stuff everyone already knows: Use the best counters and give them the best moves. You can get good counters by working your way up through raids. For example, get Machamp to get Tyranitar. Then use your TMs to give them the best moves. Heavy Slam Machamp or Fire Blast Tyranitar are near useless. Dynamic Punch Machamp or Stone Edge Tyranitar are forces of nature.
It's also best to put your effort into the most efficient counters rather than niche counters. Tyranitar and Golem, for example, typically counter a bunch of Raid Bosses, so they're better investments than a Pokmon that only counters one.
If you do want to use a Gengar or some other high DPS, low toughness Pokmon put them first in your Battle Team. That way, hopefully, they can get off a charge or two moves before the Raid Boss squishes them.
If you're lucky enough to have a lot of good counters, pay attention to what Pokmon Go auto selects for you. If they're decent and you think you will have to jump back into the raid, pick other Pokmon to start. That way, when you faint, the auto-select will be good enough, and you won't have to waste time healing or choosing all over again.
Also, if you notice odd auto selections, it might be an indicator of movesets you should worry about. For example, if you don't get Tyranitar for Lugia, it means Lugia has Hydro Pump, which hurts Tyranitar. Same for Gyarados for Groudon. It means Groudon has Solar Beam.
Select alternates accordingly.
Field Research: How to finish faster

Field research lets you complete common tasks in Pokmon Go and earn rewards in the form of items, XP, and even encounters. There are a couple of things you can do, though, to complete them faster.
- Delete tasks that are hard to complete. If you get a Raid task after Raids have ended for the day, or a catch-task for a type of Pokmon that's unlikely to spawn due to location, time, or weather, you can delete it and get another, easier to complete a task.
- Stack tasks that are similar. If you have identical or near-identical tasks or even complementary, try to complete them at the same time. For example, if you have to catch 10 Pokmon and you have to hit 3 Great Throws, go for the Great Throws on those 10 Pokmon.
- Failure is an option. For Raid and Gym tasks, unless they specifically say you have to win, all you really have to do is try. So, you can do a Raid, lose, and often get credit anyway. You can even lose repeatedly to knock a bunch of Raids off your list.
Special Research: How to finish Raid tasks fast
Some of the Special Research Tasks, including two for the Let's Go, Meltan task, require you to complete several Raids to proceed. That can take time, especially if you have to find the raids, and need to find help to complete them.
The good news is: You don't have to complete them. All the task wants is your Raid pass. Give it that, and you can jump out of the lobby and go on to the next Raid. Yes, it's a total waste of a Raid pass, and money if you bought a Premium Raid pass, but if you don't have the numbers to win, and your time is worth more than the Raid pass, it's a great way to get through the task quickly.
Hatching: Eek the most out of Eggs

There are two kinds of eggs in Pokmon Go: Pokmon Eggs that hatch Pokmon and Lucky Eggs that double the XP you get for catching and hatching Pokmon and performing other in-game actions. Pokmon Eggs are free, and you can only get them from spinning PokStops. You can buy Lucky Eggs, but you also get them as rewards for hitting some levels.
Regardless of the kind of egg you have, you want to get the most out of it.
Incubators are one of the very few things I'll pay for if I need to. Sure, you'll get a lot of common Pokmon, but you'll also get some rare Pokmon that would take you a long time to catch in the wild, and it's currently the only way to get the Gen 2 and Gen 3 Pokmon babies.
How to hatch Pokmon Go eggs faster
If you have a Lucky Egg, a bunch of Pidgey, Caterpie, Weedle, and Rattata, you want to mass-evolve for leveling, and a slew of Pokmon Eggs available to hatch, start your 10 KM eggs incubating. When you get to 5 KM on them, start your 5 KM eggs incubating. When you get to 8 KM / 3 KM, start your 2 KM eggs incubating.
When they're about to hatch, drop your Lucky Egg and start your mass evolution. You can do one evolution every 20 seconds, so if you have enough Pokmon and enough candy, you can really make an XP dent. (Some people like force-quitting each evolution to speed up the process your mileage may vary.)
If you can time your daily PokStop spin bonus (see below) or better, your weekly spin bonus all the better. And if you happen to hatch something new, your Pokdex bonus will get doubled as well!
If you go to a new part of town or a new town, you can also hit a ton of new PokStops in a row. Each one of those will net you 250 XP 500 XP with a Lucky Egg. City centers can have dozens of PokStops down a single street, which can mean massive XP hauls.
When everything comes together, you can not only get some new Pokmon, candy, and Stardust to evolve more great Pokmon and a considerable amount of XP towards your next level.
How to get XP and level up faster in Pokmon Go
Evolving: Measure twice, tap once

I know the feeling. You finally have the 25 candies you need to evolve Larvitar to Pupitar or Dratini to Dragonair. But then those 25 candies are gone, and you need to hatch, catch, or Buddy walk another 100 candy to evolve Tyranitar or Dragonite.
And during that long, long period, you might just hatch or catch a better Larvitar or Dragonair. Or get one from a Raid Battle!
If all you care about is finishing your Pokdex, it may not matter to you. But if you care about getting the best Pokmon possible, ones with the highest stats (IV) and HP (Hit Points) to attack in Raids or defend Gyms or just show off! then you'll need the best base levels to evolve from.
Hard as it may be, wait until you have the full 125 candies to evolve completely before doing any evolutions at all. Then, if you get a higher IV base Pokmon, you can evolve that one instead. Or, if you get a third evolution by capturing a Raid Boss, and it's perfect or near-perfect, you can save yourself evolving and spend those 125 Candies powering up.
Here are the best Pokmon to evolve and power up for Raid Battles!
Special cases for evolution
Not all Pokmon evolve in such a straightforward manner. For some Pokmon, there are multiple possible evolutions. For some, theit evolution is gender specific or requires an evolution item.
Eevee is one of the most versatile examples of special cases for evolution. With seven possible results (and one more on the way,) getting the Eevee you want can be tricky.
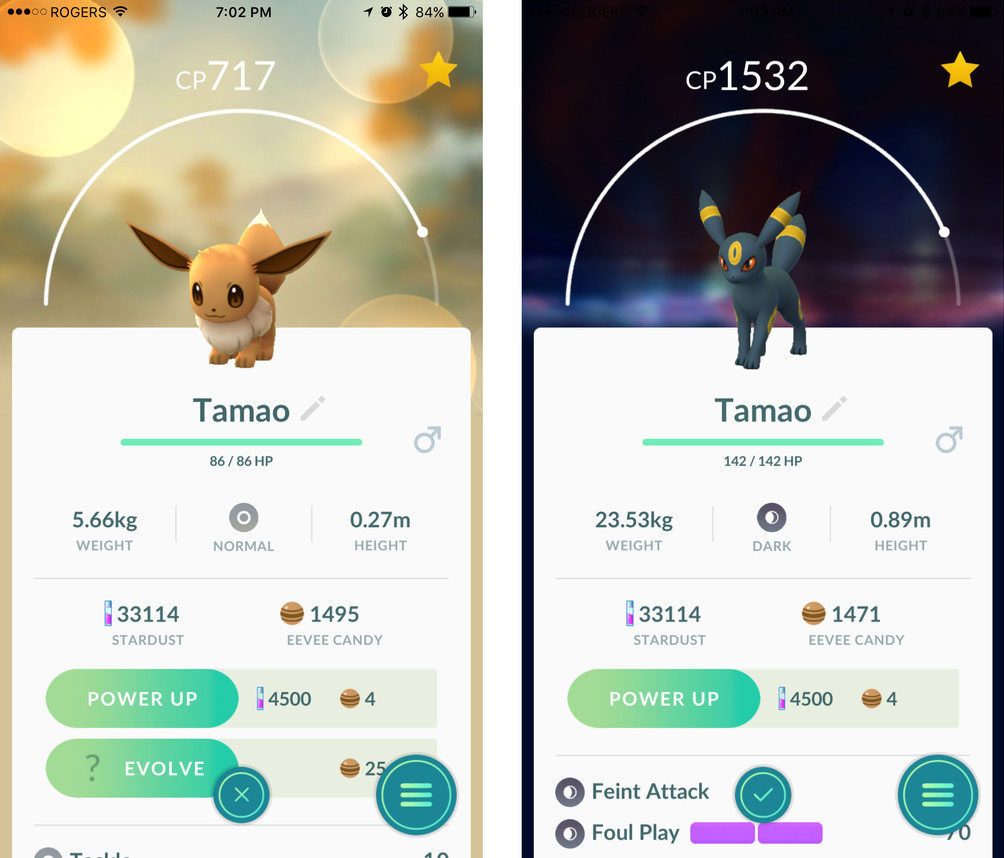
While it only works once, you can get each eevolution by renaming your Eevee before evolving. The following names work one time each:
- Pyro for Flareon
- Sparky for Jolteon
- Rainer for Vaporeon
- Sakura for Espeon
- Tamao for Umbreon
- Linnea for Leafeon
- Rea for Glaceon
If you want more Espeon or Umbreon, you have to make an Eevee your Buddy, walk 10 KM with it, then evolve during the day (Espeon) or at night (Umbreon) while it's still your Buddy.
And if you want more Leafeon or Glaceon, you'll need a Mossy Lure or a Glacial Lure (respectively). Use whichever one you want on a Pokstop, and you'll be prompted to evolve your Eevee. You still need 25 Eevee candy, or the prompt won't appear.
Pokmon Go: How to get Leafeon, Glaceon, and all the Eevee Evolutions!
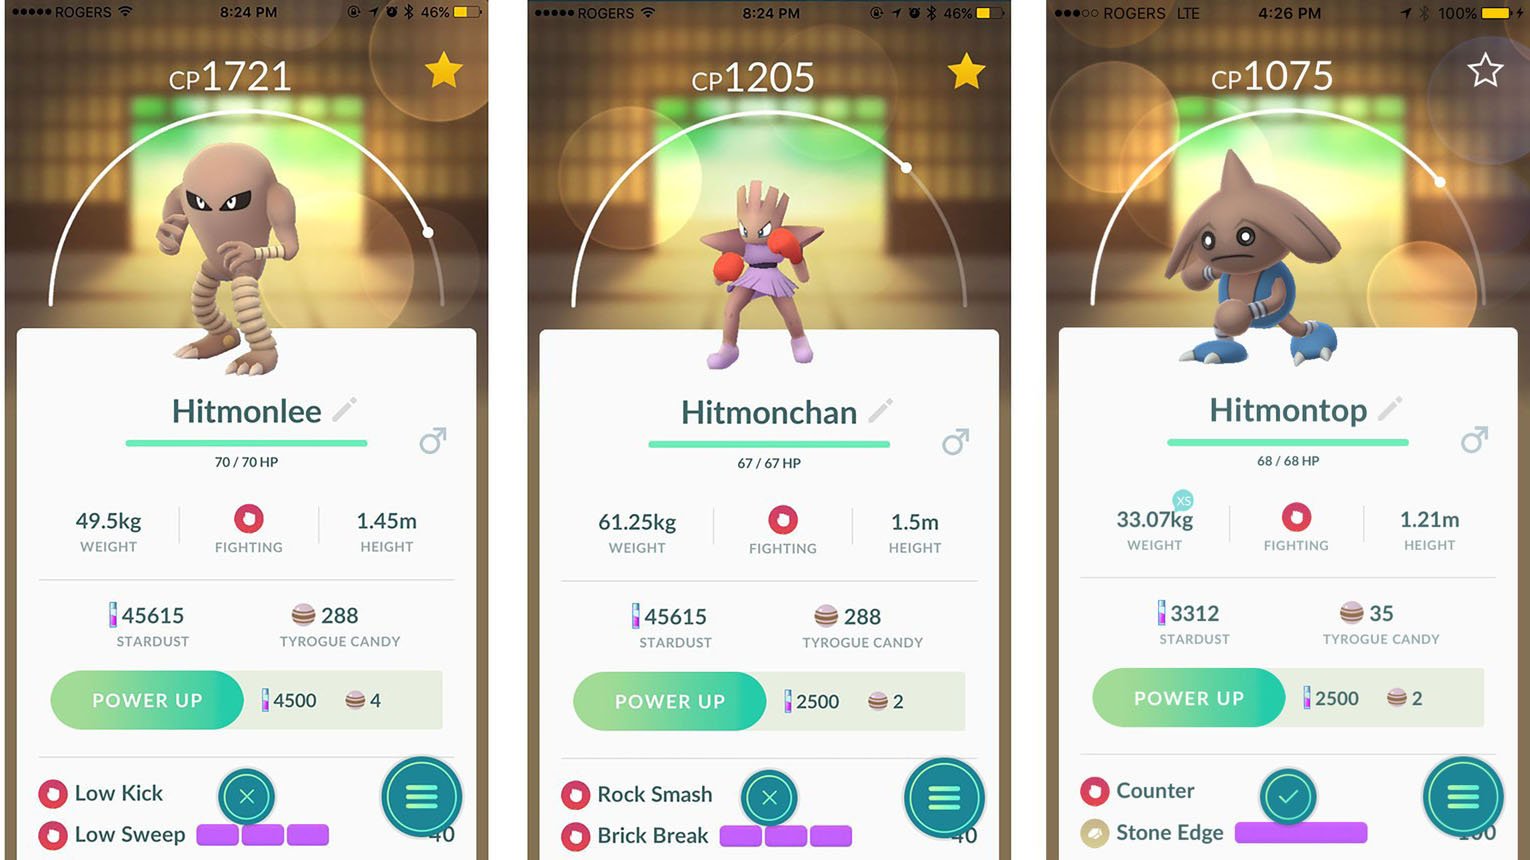
Another special case for evolution is that of Tyrogue. Tyrogue is one of the baby Pokmon introduced in Gen II and can evolve into three different Pokmon, the Gen I Hitmonlee and Hitmonchan or the Gen II Hitmontop. The type of Hitmon you get from evolving Tyrogue depends on your Tyrogue's stats:
- Hitmonlee when Attack is the highest stat.
- Hitmonchan when Defense is the highest stat.
- Hitmontop when HP is the highest stat.
How to evolve Tyrogue into Hitmontop in Pokmon Go

Evolution Items are items that trigger new or newly split evolutions. You collect them from PokStops, like you do Pokmon Eggs, and use them to unlock the new Gen 2 evolutions and splits.
- Sun Stone: Evolve Gloom to Bellossum (and Gen 2 Sunkern into Sunflora).
- Kings Rock: Evolve Poliwhirl to Politoed, Slowpoke to Slowking
- Metal Coat: Evolve Onix to Steelix, Scyther to Scizor
- Dragon Scale: Evolve Seadra to Kingdra
- Up Grade: Evolve Porygon to Porygon 2
- Sinnoh Stone Evolves a number of Gen IV Pokmon
- Unova Stone Evolves a number of Gen V Pokmon
They're less common than Pokmon Eggs, so you'll have to hit a lot of PokStops to get them. They're also single-use only, which means you'll need to get one for each evolution you want to perform. Yeah.
Right now, you get one and very rarely more than one during your 7-day streak spin. You can get them randomly from other spins at any time, but the odds seem to be around 1/300. So spin. A lot.
How to get evolution items in Pokmon Go
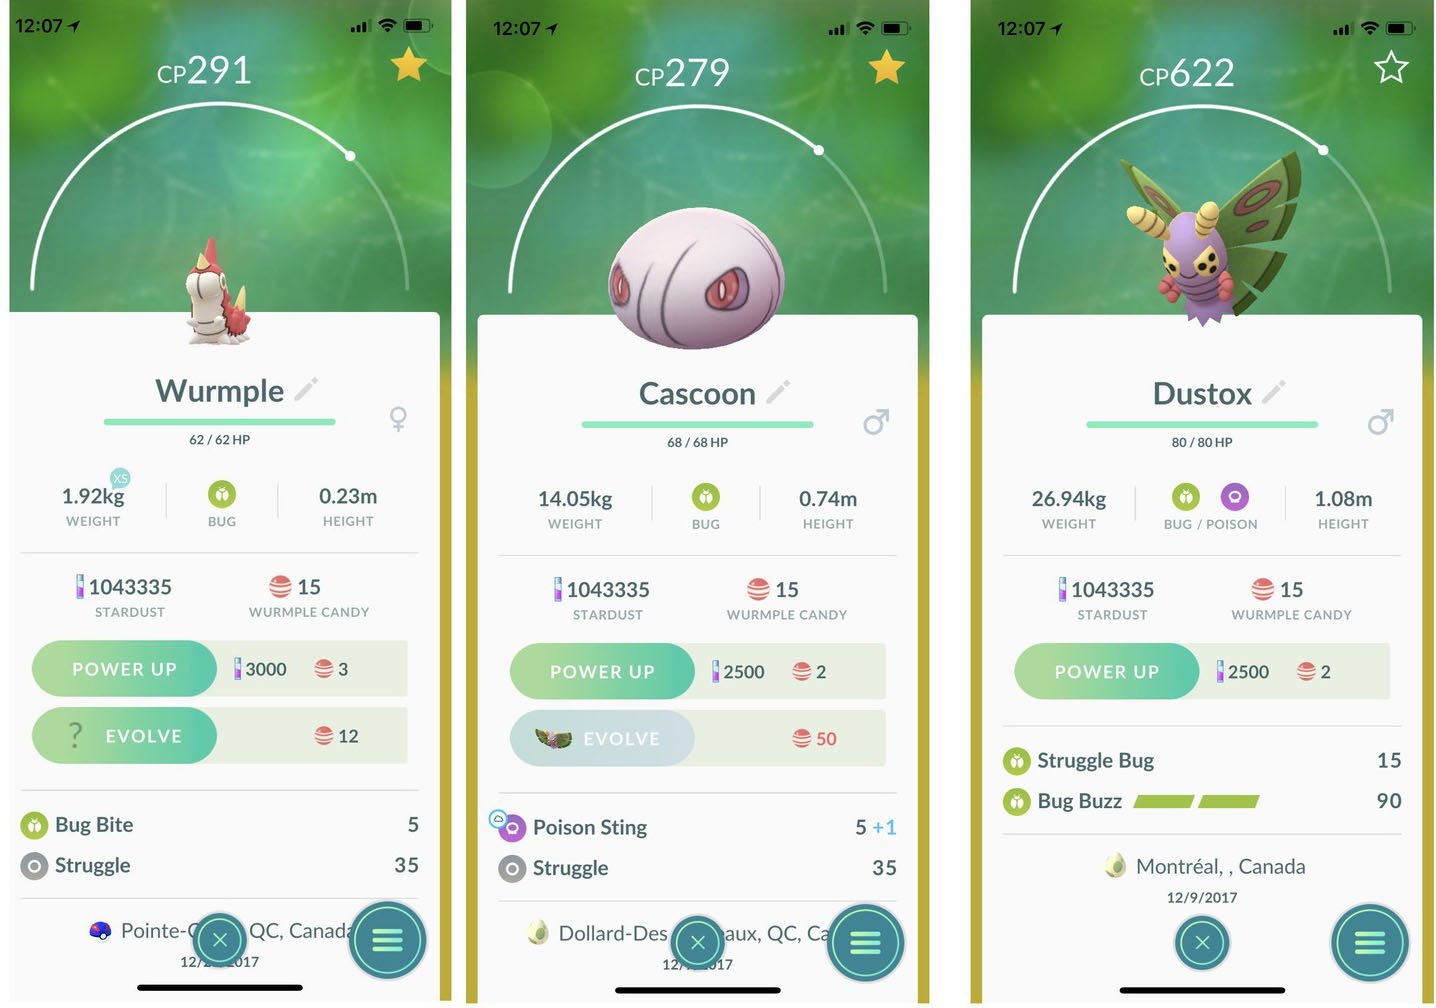
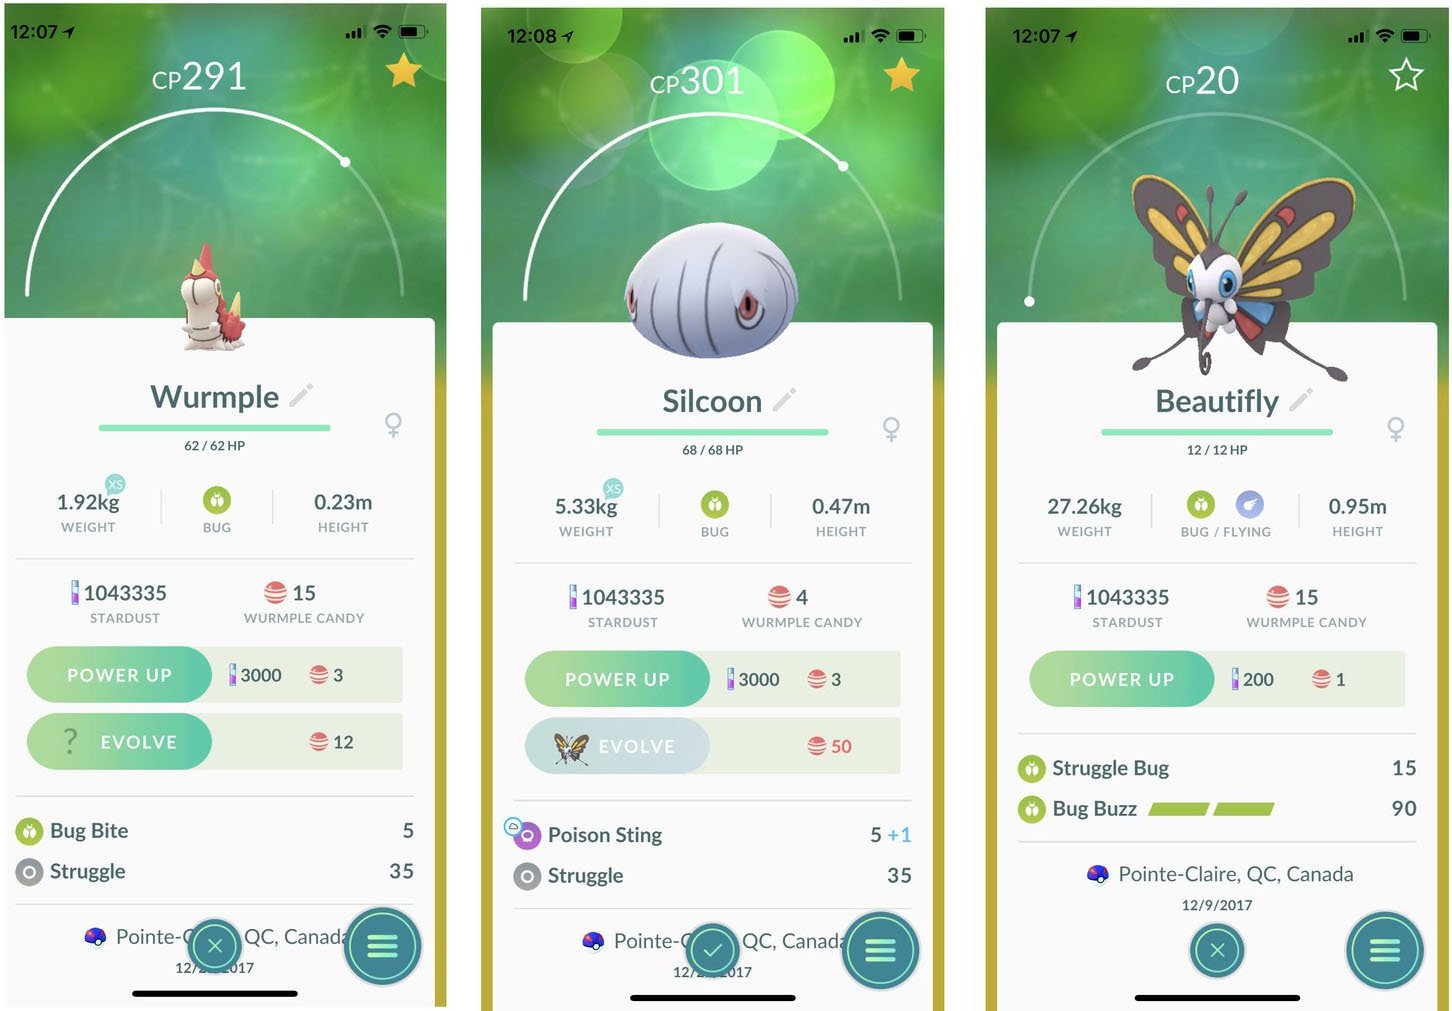
Another special case, evolving Wurple into Silcoon or Cascoon is completely up to chance. No trick or easter egg has yet been found to force the evolution one way or another.
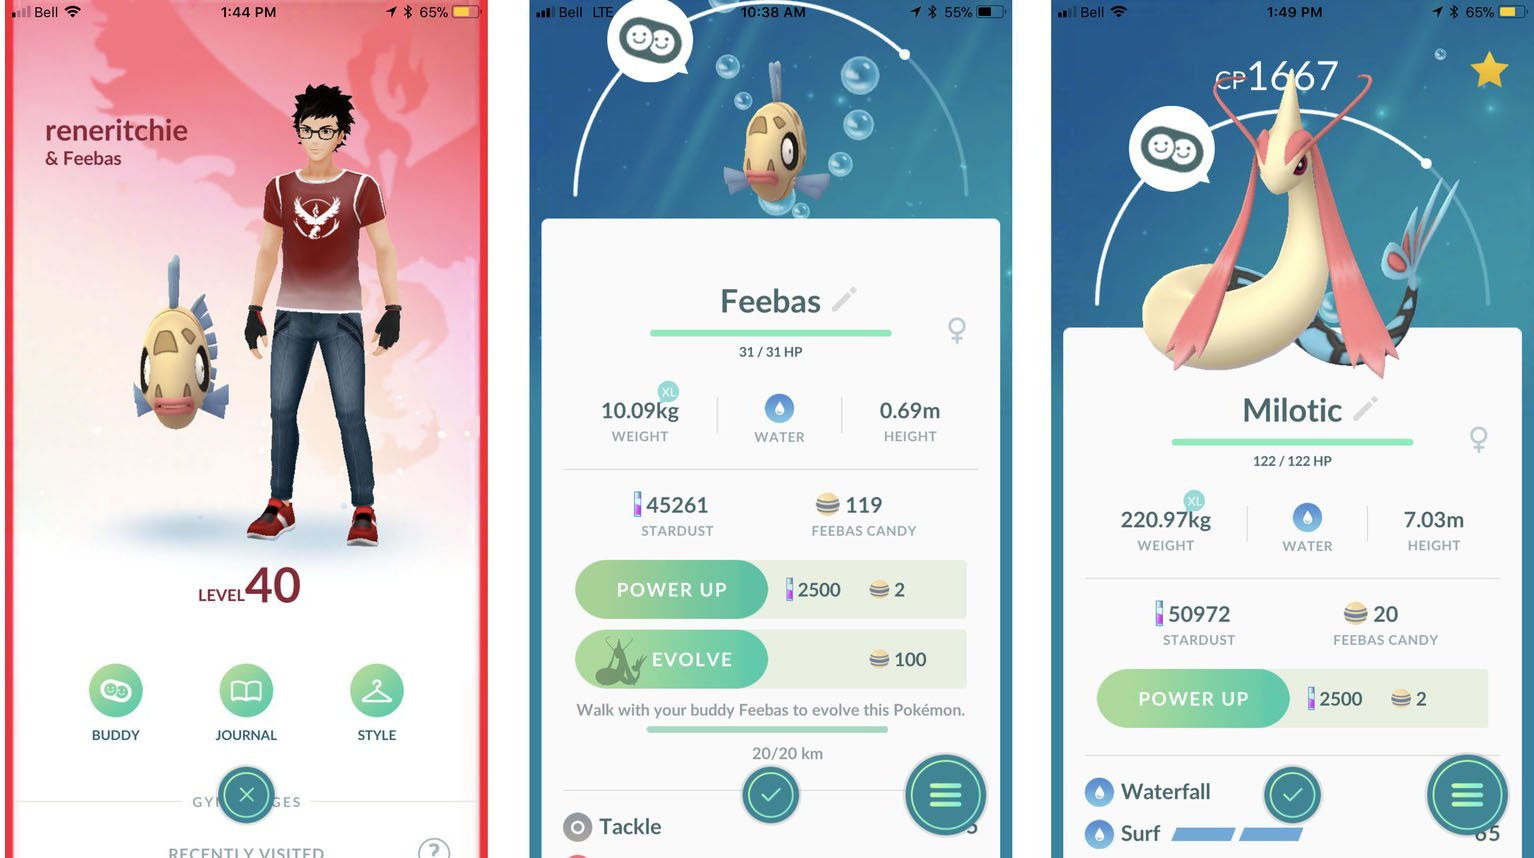
Similar to Espeon and Umbreon, to evolve a Feebas into a Milotic, you need to make it your Buddy Pokmon and walk it for 20 KM. Oh, and you need 100 Feebas candy as well.
How to evolve Milotic, Dustox, Beautifly
Trade Evolution
Yet another unique evolution mechanic, Trade Evolution was recently introduced to Pokmon Go. Now, Pokmon who originally evolved by trading in the core games can be traded to evolve for free! That's right - zero Candies! the following Pokmon benefit from Trade Evolution:
How Trade Evolution works in Pokmon Go
Looping: PokStops and Bonus Streaks
Pokmon Go encourages you to play regularly by giving you daily and weekly bonuses not just for catching Pokmon but for spinning PokStops. They're called "streaks." Your first spin of the day will get you extra items and XP. Spin every day, and you get an even bigger weekly bonus on the seventh day including an evolution item.
Also, if you spin ten PokStops in a row, with no more than ten minutes between each one, you can also get extra items. So...
Spin as often as you can. Once you get comfortable with the PokStops near where you live, work, learn, and play, and along your regular travel routes, spin them whenever possible. It costs you nothing but can significantly boost your stock of Pokmon Eggs (so you can hatch more Pokmon), Pok Balls, Great Balls, Ultra Balls, Razz Berries, Potions, Super Potions, Hyper Potions, Max Potions, Revives, and Max Revives.
To really stock up on items, get a Pokmon Go Plus, put it in PokStop only mode, and then go somewhere with high-density stops, like downtown. You'll be overflowing in no time.
With the big Gym update, Pokmon Go has added Photo Discs to Gyms. So, now, you can spin those as well. If your team controls the Gym, you get a bonus time. You can also earn Gym badges, from basic to bronze, silver, and gold. The higher you go, the more bonus items you get.
If your team controls a Gym, you have a gold badge, and you spin it for a streak, the number of items you get can really add up. Like 30+ for a 7-day streak.
With the new items, your backpack can run out of space. Rather than trashing items to make space for additional Pokmon and spins, you can use it. More than that, you can let your items lead you and help you to decide what to do while you're out playing.
Have an excess of Balls? Go hunting for Pokmon to catch. (And walk off those extra Pokmon Eggs at the same time!). Too many Potions and Revives weighing you down? Go battle at some Gyms.
Not only is it a great strategy for getting as much free stuff as possible, but it also helps keep storage open, so you never lose out on a Pokmon Egg or anything else you desperately need just because your bag is full of stuff you don't.
Play smarter not harder
Pokmon Go has helped me get out and go. Going for hikes of 5KM or more is a lot more fun when I'm catching and hatching Pokmon along the way. That said, sometimes my schedule or the weather makes it hard to get all those KM in. So, I play smart.
You can leave Pokmon Go on while you're doing housework, shopping, walking the dog, even riding in slow-moving transports like ski lifts, trams, ferries, buses in traffic, and more. Around 10KM/hr is the sweet spot for hatching eggs and walking Buddies, but stop and go can still add up.
Are you stuck at home or in the office? GPS drift where your trainer runs around because Pokmon Go can't get an exact fix can add up to extra KM for hatching eggs or walking your Buddy as well. Even if there's no PokStop where you are, there might be a spawn point that'll still bring you ample Pokmon to Catch. And you can always drop an Incense, which will bring you a bunch of common Pokmon every few minutes and maybe even one or two more exciting Pokmons.
Gyms are easier to take down now than they used to be. As a result, Gyms are getting taken down more often. So, if you're out and about, it's always worth checking a Gym to see if it has a free slot, or has lost motivation and make for an easy takedown.
Traveling fits right into this, as well. I've built up series KM walking through airports, being stuck in cabs and Ubers on the way to hotels, and having my trainer run around while I'm in the hotel. Many big-city hotels have multiple PokStops within range as well, perfect for Lures if you have them. (Likewise coffee shops warm, safe, and PokStopped!)
Pokmon Go Plus, Go-Tcha and Pok Ball Plus
While leaving Pokmon Go running means you'll always be getting that little bit of extra distance and know right away when a new Pokmon spawns, not everyone can do that. If nothing else, most phones just don't have the battery life to support it. Fortunately, there are a few accessories that can keep your game going without it running constantly.
While the Apple Watch is not longer supported, there are a few alternatives that work just as well and for far less. The Pokmon Go Plus was the first of these accessories. It's cheap and easy to come by, while also being relatively small and discrete. It can spin Pokstops and Gyms, and will attempt to catch Pokmon that spawn in range. The Go-Tcha works in similar ways produced by a third party. The Pok Ball Plus is the more expensive of the three but also works with other Pokmon games, like Pokmon Let's Go Pikachu and Eevee, and Pokmon Sword and Shield. It even comes with the Mythical Pokmon Mew for those games.
5 reasons you should buy a Pokmon Go Plus and a couple of reasons not to!
Adventure Sync
Even if you don't have an accessory and cannot leave your game running, Pokmon Go has a feature called Adventure Sync that will count the distance you're walking even when the app isn't running. Adventure Synce is a great way to hatch eggs and earn rewards. You can even get special eggs as weekly rewards if you reach certain goals. This relies on your phone's GPS but you probably have that running in the background anyway so be sure to turn this feature on so you get the most distance.
Gen 4: Exclusive evolutions
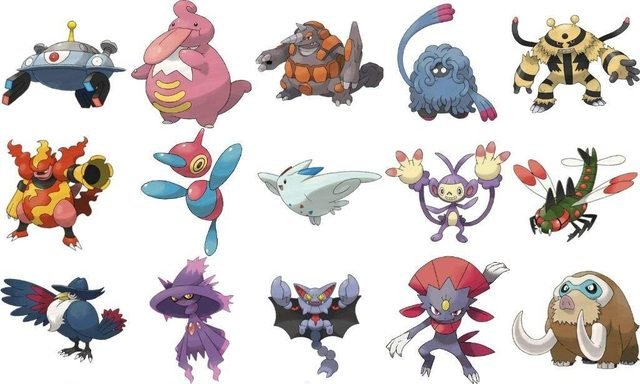
While the core Pokemon games featured many different ways of evolving pokemon, to simplify some of that, Pokemon Go introduced the Sinnoh Stone, an evolution item that is used exclusively to evole pokemon from previous generations that had new forms in Gen 4. By using a Sinnoh Stone and 100 candies, you can evolve:
- Aipom into Ambipom
- Lickitung into Lickilicky
- Tangela into Tangrowth
- Yanma into Yanmega
- Pilowsine into Mamoswine
- Male Kirlia into Gallade
- Female Snorunt into Froslass
- Rhydon into Rhyperior
- Electabuzz into Electivire
- Magmar into Magmortar
- Misdreavus into Mismagius
- Murkrow into Honchkrow
- Gligar into Gliscor
- Sneasel into Weavile
- Porygon2 into Porygon-Z
- Roselia into Roserade
- Dusclops into Dusknoir
And now, there are a few other Gen 4 Pokemon that evolve via different means:
- Eevee can now evolve into Leafeon or Glaceon by using a Mossy or Glacial Lure when you have 25 Eevee candies and an Eevee in your Pokemon Box
- Magneton and Nosepass can evolve into Magnezone and Probopass respectively when you use a Magnetic Lure and have the appropriate amount of Candies for either Pokemon
So, get those high-stat 'mon and all the candy you can!
Pokmon Go Gen 4: How you need to prepare right now
Gen 5: An ounce of preparation

Much like the Sinnoh Stone in Gen 4, now that Gen 5 has been added to the game, players can also obtain the Unova Stone. This evolution item only works for a handful of pokemon so far, but more are likely to be added down the line. Using the Unova Stone and 100 candies, you can evolve:
- Pansage into Simisage
- Pansear into Simisear
- Panpour into Simipour
- Lampent into Chandelure
- Munna into Musharna
- Mincinno into Cinccino
- Eelektrik into Eelektross
Team Go Rocket: Surrender now or prepare to fight!

Always trying to bring in new features, Pokemon Go now has Team Go Rocket Grunts causing all sorts of trouble and corrupting poor Pokemon into Shadow Pokemon! Fortunately for players, this gives the chance to fight Team Go Rocket in 3 on 3 battles. If you win, not only will you get more experience and items, but you also have the chance to catch a Shadow Pokemon that you can later purify, boosting its stats a lot!
Team Go Rocket Grunts take over individual Pokestops at random. These stops will look a little different from the usual stop and, when approached, will turn black, with a grunt showing up beside. Spin these stops to start an encounter with the grunt and pick your best three pokemon to battle. The Grunt will give you a clue as to what pokemon they're bringing into battle, but don't worry if you lose. You can always rechallenge them.
The hints for the grunt's team include:
- Coiled and ready to strike! (Zubat, Golbat, Venonat, Venomoth, Grimer, and Muk) Best Counters Tyranitar, Groudon, Raikou, and Rhyperior
- Normal doesn't mean weak (Ratatta, Raticate, Snorlax, and Zubat) Best Counters Machamp, Breloom, Hariyama, and Tyranitar
- ROAR!... how does that sound? (Dratini, Dragonair, Dragonite, Flygon, and Gyrados) Best Counters Mamoswine, Glaceon, Weavile, Magnezone, and Raikou
- These waters are treacherous (Magikarp, Gyarados, Psyduck, Poliwag, Poliwhirl, Poliwrath, and Politoed) Best Counters Alolan Exeggutor, Sceptile, Leafeon, Tangrowth, Raikou, and Magnezone
- Don't tangle with us (Bulbasaur, Ivysaur, Turtwig, Gloom, Vileplume, Cacnea, Cacturne, Seedot, and Shiftry) Best Counters Moltres, Charizard, and Entei
- My bird pokemon wants to battle you (Dragonite, Gyrados, Zubat, Golbat, Crobat, and Scyther) Best Counters Tyranitar, Mamoswine, Raikou, and Magnezone
- Do you know how hot Pokemon fire breath can get? (Charmander, Charmeleon, Houndour, Houndoom, Magmar, and Arcanine) Best Counters Tyranitar, Kyogre, and Vaporeon
- Go, my super bug Pokmon! (Weedle, Kakuna, Beedrill, Venonat, Venomoth, Scyther, and Scizor) Best Counters Charizard, Moltres, and Chandelure
- You'll be defeated into the ground! (Cubone, Marowak, Trapinch, Vibrava, Flygon, and Larvitar) Best Counters Gyarados and Exeggcutor
- Are you scared of psychics that use unseen power? (Drowzee, Hypno, Abra, Alakazam, Ralts, and Kirlia) Best Counters Tyranitar, Weaville, and Houndoom
- Let's rock and roll! (Larvitar, Pupitar, and Tyranitar) Best Counters Machamp, Hariyama, Breloom, Blaziken, Toxicroak, and Emboar
-
Ke ke ke ke ke ke (Sableye, Shuppet, Banette, Duskull, Dusclops, and Dusknoir)
Best Counters Darkraki, Weavile, Gengar, and Tyranitar -
This buff physique isn't just for show! (Hitmonchan)
Alakazam, Mewtwo, and Moltres -
Get ready to be shocked! (Electabuzz, Mareep, Flaaffy, and Ampharos)
Best Counters Groudon, Rhyperior, and Excadrill -
Don't bother, I've already won / Get ready to be defeated! / Winning is for winners (Charmander, Charmeleon, Charizard, Squirtle, Wartortle, Blastoise, Bulbasaur, Ivysaur, Venasaur) or (Lapras, Snorlax, Gyarados, Poliwrath, Dragonite, and Gardevoir)
Best Counters The hardest to counter, be prepared to potentially have to fight this one a second or even third time
In the rare case of a triple Snorlax: Tyranitar, Dialga, Metagross, Dragonite, Lucario, and Ursaring
What is "Purifying?" Pokmon?
Purifying your Pokmon changes them from their Shadow state and teaches them a new attack called Return. It also increases their IV scores and level quite a bit. While Purifying every Shadow Pokmon you rescue is not necessary (and if you're limited on Stardust and/or Candy, it can be an outright waste,) there are achievements and Research tasks that rely on Purifying Pokmon. If you purify enough, you will also get additional Premier Balls to capture more Shadow Pokmon.
Keep in mind, the costs for Purifying Shadow Pokmon varies based on the species. Some of the more common species, such as Rattata and Zubat, only cost 1,000 Stardust, while some of the rarer Pokmon can cost up to 5,000 Stardust. If you need to complete a Research task that requires several purifications, you might want to hold off until you have several of the cheap ones. On the other hand, if you're not trying to complete any achievements or Research, you may want to focus on purifying only the rarer Shadow Pokmon with good IVs.
The Leaders of Team Go Rocket
In addition to fighting Grunts, and rescuing and Purifying Shadow Pokmon, you can also track down Team Go Rocket Hideouts where you will be able to battle the Team Go Rocket Executives: Cliff, Sierra, and Arlo. These three are much tougher to beat than any of the Grunts, but the rewards for beating them are much greater too. Once a month, you can even complete Special Research to challenge the boss of Team Go Rocket himself: Giovanni. Just getting to Giovanni gives all sorts of XP and rewards but beating him also gives you the chance to catch a Legendary Shadow Pokmon. This chance resets once per calendar month so be sure not to miss out! For more on how to take on the leaders of Team Go Rocket, check out our guide here!
Your best Pokmon Go tips and tricks?
These are my Pokmon Go tips and tricks. Others have their tips, but these are mine. I'd love to learn yours, so if you have any or you have any questions! drop them in the comments below!